Have you ever tried to capture the elegance of a wine glass or the sparkle of a crystal vase, only to end up with a disappointing photo? I’ve been there, and let me tell you, photographing glass can be a real challenge. But fear not! I’m here to share my tried-and-true methods for getting that perfect shot of glass on a white background.
Glass photography is all about controlling light and reflections. It’s a delicate dance of illumination and shadow that, when done right, can transform a simple object into a work of art. In this guide, I’ll walk you through the steps to achieve professional-looking glass photos, even if you’re just starting out. So, grab your camera, and let’s get in!
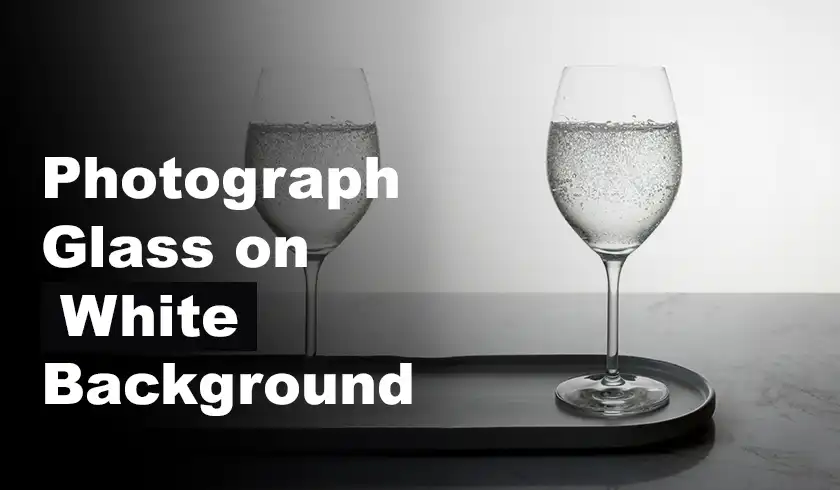
Steps to Follow to Photograph Glass on White Background
Before we jump into the nitty-gritty, let me say this: patience is key. You might not nail it on the first try, but with practice and these tips, you’ll be creating stunning glass images in no time.
Step 1 – Lighting
Lighting is the heart and soul of glass photography. Get this right, and you’re halfway to a perfect shot.
Backlighting is your best friend here. Think of it like this: you want the light to come from behind the glass, facing your camera. It’s like the glass is standing in front of a bright window, and you’re on the outside looking in. This setup makes the glass pop against the white background.
I usually go for a softbox because it gives a nice, even spread of light. It’s like wrapping your glass in a gentle, luminous hug. But hey, if you don’t have a softbox, no worries! You can use a flash with a diffuser or even natural light from a window. Just make sure to block out any other light sources that might cause unwanted reflections.
Now, let’s talk about light size. This is a game-changer. A smaller light source, like a bare flash, will give you a darker “black line” effect on the rim of the glass. It’s dramatic, but it might not be what you’re going for. On the flip side, a larger light source, like your softbox or a big window, will soften those edges. It’s like the difference between a sharp pencil line and a soft charcoal smudge.
Step 2 – Background
Alright, onto the backdrop. You want something smooth and seamless, like a big roll of white paper or a piece of fabric. Why? Because any wrinkles or shadows will show up in your photo, and trust me, you don’t want that distraction.
I like to create what’s called a “sweep.” Imagine a giant piece of paper that curves up from the table to the wall behind it. This curve eliminates any harsh lines where the table meets the wall. It’s a simple trick, but it makes your setup look super professional.
If you’re not in the mood for DIY, you can buy pre-made white backdrops. They come in different sizes and materials, so you can find one that fits your needs. Just make sure it’s wrinkle-free and clean before you start shooting.
Step 3 – Positioning the Glass
Now that your stage is set, it’s time to place your star: the glass. This part is fun because you get to play the director.
Most of the time, a straight-on shot works great. It’s classic, clean, and lets the glass speak for itself. But don’t be afraid to experiment! Try tilting the glass slightly. It can add depth and make your image more dynamic. It’s like the difference between a headshot and a candid photo – both are great, but they tell different stories.
Here’s a little secret: if you want to add some extra flair, place a clear piece of acrylic behind the glass. It creates a subtle reflection, like the glass is sitting on a glossy surface. It’s a small detail, but it can make your photo feel more high-end.
Additional Tips
Now that we’ve covered the big three – lighting, background, and positioning – let’s have some extra tips that’ll take your glass photos from good to great.
First up, camera settings. When you’re shooting glass, you want everything to be sharp. That means using a high f-number (like f/11 or f/16) for a deep depth of field. It’s like making sure every word in a book is in focus, not just the first line. This way, from the front edge to the back rim, your glass will be crisp and clear.
Next, let’s talk about reflections. They’re like the garnish on a cocktail – a little bit can be nice, but too much can overpower the main event. Use black fabric flags (or even just pieces of black cardboard) to control unwanted reflections. Place them out of the frame, and they’ll absorb light instead of bouncing it back into your glass. It’s like putting on sunglasses to cut glare – suddenly, everything looks clearer.
Lastly, don’t underestimate the power of post-processing. Even the best shots can use a little polish. I’m not talking about heavy editing, just minor tweaks. Adjust the white balance to make sure your background is truly white. Play with contrast to make the glass stand out. And a little boost in clarity can make those edges sparkle. It’s like putting the final touches on a painting – subtle, but it makes all the difference.
FAQ
Q1: Do I need expensive equipment to photograph glass well?
Not at all! While professional gear can help, you can get great results with basic equipment. A DSLR or mirrorless camera, a white backdrop (even a sheet will do), and controlled lighting (like a lamp with a diffuser) can work wonders. It’s more about technique than gear.
Q2: How do I avoid fingerprints and dust on the glass?
Great question! Clean your glass thoroughly with a lint-free cloth. Handle it with gloves or by the stem. And keep a rocket blower or a soft brush handy to remove any dust that settles during setup. Remember, what you can’t see with your eye might show up in your photo.
Q3: Can I use my smartphone for glass photography?
Absolutely! Modern smartphones have impressive cameras. Use portrait mode for a blurred background, and get creative with desk lamps or natural light for illumination. Just remember, control is key, so create a mini-studio setup even for phone shots.
Q4: How do I deal with colored glass?
Colored glass is fun but tricky. The color can cast onto your white background. To combat this, increase the distance between the glass and the background, or adjust your light intensity. In post-processing, you might need to desaturate any color casts on the white areas.
Q5: Is it better to use continuous light or flash for glass photography?
Both have their merits. Continuous light (like LED panels) lets you see the effect in real-time, which is great for learning. Flash can give you more power and a crisper image. If you’re just starting, I’d say go with continuous light. It’s more forgiving and helps you understand how light interacts with glass.