Grain, often referred to as digital noise, can diminish the overall quality of your images, making them look less sharp and polished. This issue typically arises in low-light conditions or when using high ISO settings. Removing grain in Photoshop is essential for improving image clarity and ensuring your photos retain important details. In this guide, we’ll dive into various methods for reducing grain using Photoshop’s built-in tools, filters, and some advanced techniques, including Camera Raw and Lightroom, for more precise editing.
What Causes Grain in Photos, and Why Is It Important to Remove It?
Grain is usually a byproduct of high ISO settings in low-light environments. When the camera sensor amplifies light to capture a well-exposed photo, it introduces random pixelation or grain. Grain impacts the overall clarity and professional appearance of your images, particularly in critical areas like the background or smooth surfaces. By reducing grain, you enhance the sharpness and detail in your photos, allowing them to look polished and suitable for professional or commercial purposes.
- Remove Grain Using Camera Raw
If you’re working with RAW files, Adobe Camera Raw (ACR) is one of the most effective ways to reduce grain before further editing in Photoshop.
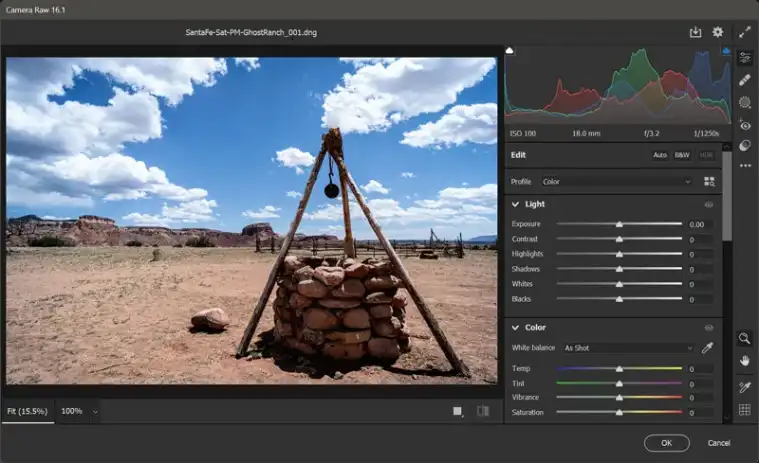
- Step 1: Open your RAW image in Photoshop, which will launch Camera Raw automatically.
- Step 2: In Camera Raw, go to the Detail tab.
- Step 3: Use the Luminance slider under the Noise Reduction section to reduce grain. Start with small adjustments and increase gradually.
The Luminance slider helps reduce noise without significantly affecting the image’s sharpness. To prevent the image from looking too soft, you can fine-tune the Detail and Contrast sliders to preserve edges and textures.
Key Takeaway: Camera Raw is ideal for non-destructive editing, especially with RAW files, and allows for a nuanced balance between grain reduction and detail preservation.
- Use Photoshop’s Built-In Noise Reduction Filter
For JPEG or non-RAW images, Photoshop offers a built-in filter to reduce grain:
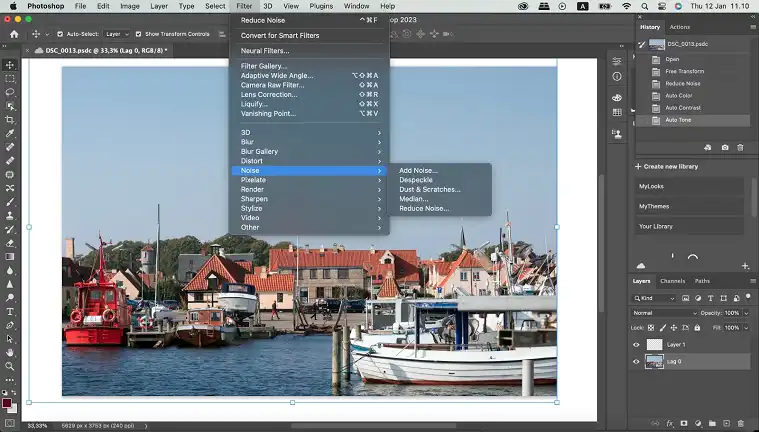
- Step 1: Open the image and go to Filter > Noise > Reduce Noise.
- Step 2: In the dialog box, you’ll see several sliders:
- Strength: Adjusts the intensity of the noise reduction. A setting of around 5 is usually a good starting point.
- Preserve Details: Balances noise reduction with maintaining sharpness. Keep this slider higher to avoid blurring important parts of the image.
- Reduce Color Noise: Focuses on removing color specks associated with noise.
- Sharpen Details: Sharpens the image after noise reduction.
Use the preview option to see how these adjustments affect the image in real-time. This method is quick and effective for most standard images but may require fine-tuning for more complex noise patterns.
Key Takeaway: The Reduce Noise filter is straightforward, making it an excellent tool for JPEGs and similar image formats.
- Use Surface Blur Be to Remove Grain Without Losing Sharpness
The Surface Blur tool is another excellent method for grain reduction, particularly on smooth surfaces like skin or backgrounds.
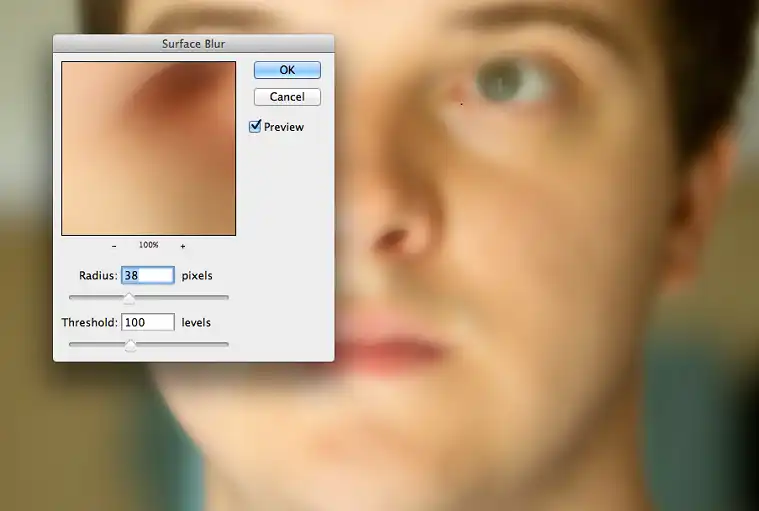
- Step 1: Go to Filter > Blur > Surface Blur.
- Step 2: Adjust the Radius (which controls how far the blur spreads) and the Threshold (which determines the edges that should be preserved).
Surface Blur is particularly useful for retaining sharp details around edges while smoothing out grainy textures on flat surfaces like skin or skies. This makes it ideal for portrait photography where fine details in the subject’s eyes or hair need to stay sharp, but the background or skin should appear smooth.
Key Takeaway: Surface Blur is a versatile tool that lets you reduce grain while preserving key details, making it a great choice for both portraits and landscapes.
- Use the Median Filter to Reduce Grain
The Median Filter smooths out grain by averaging neighboring pixels, effectively reducing noise in areas with consistent textures.
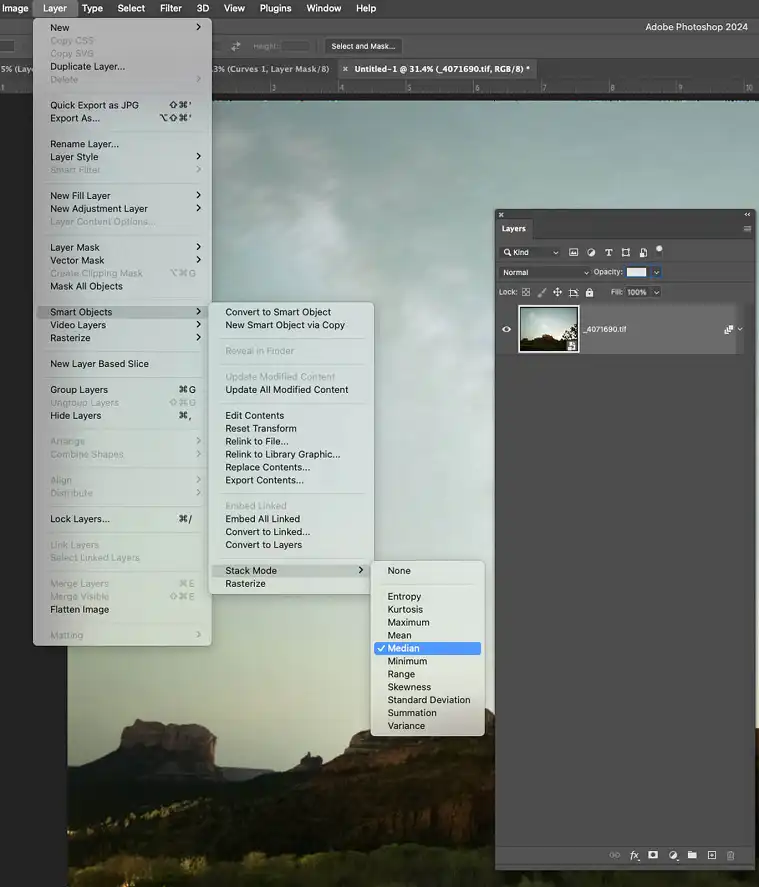
- Step 1: Go to Filter > Noise > Median.
- Step 2: Adjust the Radius slider to control the level of blurring.
This tool is particularly useful for reducing grain in areas like skies, where there are fewer complex details. It offers an effective solution for larger areas where noise is more pronounced but doesn’t affect intricate details.
Key Takeaway: The Median Filter works best on smooth, uniform surfaces and is a quick fix for reducing grain in large areas of an image.
How Do You Sharpen the Image After Grain Reduction?
Noise reduction often softens an image, so sharpening it afterward is essential. Here’s how you can do it:
- Step 1: Go to Filter > Sharpen > Smart Sharpen.
- Step 2: Adjust the Amount and Radius sliders to selectively sharpen the image while avoiding the reintroduction of grain.
Smart Sharpen offers more control than the standard sharpening tools, making it an excellent choice after noise reduction. It also includes options to reduce noise while sharpening edges, ensuring that your image retains a crisp appearance.
Key Takeaway: Always sharpen as the final step to enhance clarity after grain removal.
Can You Combine Lightroom with Photoshop for Advanced Grain Removal?
For a more advanced workflow, using Adobe Lightroom in combination with Photoshop can yield the best results.
- Step 1: Start by reducing noise in Lightroom, using its noise reduction sliders for Luminance and Color.
- Step 2: Export the image to Photoshop for additional fine-tuning, such as sharpening or detail preservation.
Lightroom excels in handling batch edits, so if you’re working with multiple images, it can save time while providing excellent control over grain reduction before you finalize the edit in Photoshop.
Key Takeaway: Combining Lightroom and Photoshop offers a comprehensive noise-reduction workflow for both single images and batch edits.
Should You Consider Third-Party Plugins for Grain Removal?
While Photoshop’s built-in tools are highly effective, third-party plugins such as Luminar Neo’s Noiseless AI or Topaz Denoise AI offer AI-powered noise reduction that can sometimes outperform traditional methods, especially with heavy grain or high ISO images.
Key Takeaway: AI-based third-party tools can offer superior results in some cases, making them a valuable addition to your editing workflow.
Wrapping Up
Grain reduction is a crucial step in refining your photos, whether you’re working with RAW or JPEG files. Photoshop offers several methods to reduce grain while retaining critical details, from Camera Raw and the built-in Reduce Noise filter to more advanced tools like Surface Blur and Smart Sharpen. By mastering these techniques, you can produce cleaner, sharper images that meet professional standards.
FAQs
Can you completely remove grain from all photos?
No, while Photoshop offers robust tools, it’s challenging to completely eliminate grain without compromising image quality. The goal should be to reduce it while maintaining as much detail as possible.
Which is better: Camera Raw or the Reduce Noise filter?
Camera Raw is better for RAW files as it provides more control over noise reduction, while the Reduce Noise filter works well for JPEGs and other formats.
Does sharpening after noise reduction reintroduce grain?
Excessive sharpening can reintroduce grain, so it’s crucial to apply sharpening selectively, focusing on areas that need it the most.
Can third-party plugins remove grain better than Photoshop?
Yes, AI-powered plugins like Topaz Denoise AI often provide better results for severe grain or high-ISO images.

