Boosting product image aesthetics is crucial for higher eCommerce conversion rates. However, most sellers focus solely on shooting high-quality product photos ignoring how background and effects like custom shadows can dramatically improve visual appeal.
This article will explore why custom shadows matter for eCommerce sites and how to add different types of shadows to product images. I have also recommended some popular shadow editing services tailor-made for eCommerce.
Do Shadows Matter for Product Images of eCommerce Site?
Yes, shadows hugely impact how appealing your product photos look to online shoppers. Subtle shadow effects make images appear more natural. Customers also perceive well-shadowed product photos as higher quality.
Shadows lend products a realistic look making them stand out. Images without shadows often look flat and amateurishly photoshopped. Bad shadows can also make products look strangely distorted.
Well-done shadows can make products literally pop on category and product pages. Consistent shadow effects across your eCommerce site also promote cohesiveness between product images of different types.
In short, Shadows:
- Make product photos appear more natural
- Enhance visual quality
- Add depth for increased realism
- Help products stand out on page
- Promote visual consistency for a professional look
With custom eCommerce shadows, you can highlight products uniquely while maintaining site-wide style uniformity. Keep reading to master this crucial yet often overlooked aspect of product imaging.
Types of Shadows for Product Images
Different types of shadows for product photos produce distinct effects. Choose wisely to align with your brand image and product photography style.
Natural Shadows
These mimic shadows occurring in real life, like when products sit near windows or under ambient light conditions. Natural shadows include soft-edged exterior shadows and sharper case shadows within the packaging. They promote life-like product images.
Drop Shadows
One of the most popular artificial shadow effects. Drop shadows are placed behind objects adding a lifting appearance. Usually fuzzy-edged without hard lines, drop shadows visually detach subjects from backgrounds. They powerfully highlight products in images.
Double Drop Shadows
As the name suggests, double drop shadows involve layering two drop shadow layers for a heightened 3D illusion. The bottom layer typically uses a lighter more diffused shade while the top consists of a darker color.
Background Shadows
Subtle shadows like a light source behind products add depth without distraction. Background shadows quietly enhance realism allowing main focus on foreground subjects.
Reflection Shadows
Shadows reflecting off surfaces like glass or metal surfaces add interest while retaining a natural vibe. Reflection shadows work for shining products like jewelry or consumer tech.
Cast Shadows
These shadows are created by the object itself blocking light and projecting a shadow onto another object or the background. They add a sense of realism and context, helping to show how the product would interact with its surroundings.
How to Add Different Types of Shadows for eCommerce Site Product Images
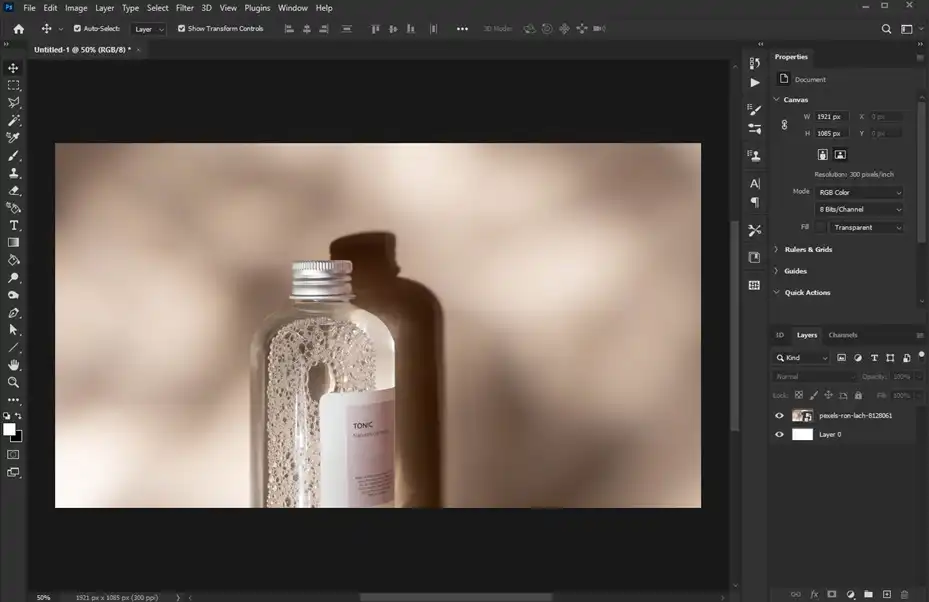
Adding natural-looking shadows to product images manually requires expert Photoshop skills. We recommend outsourcing to professional image editing services offering specialized shadow editing.
In Photoshop
Drop Shadow
Here’s a breakdown of the steps and their effects in adding a shadow to your product image in Photoshop:
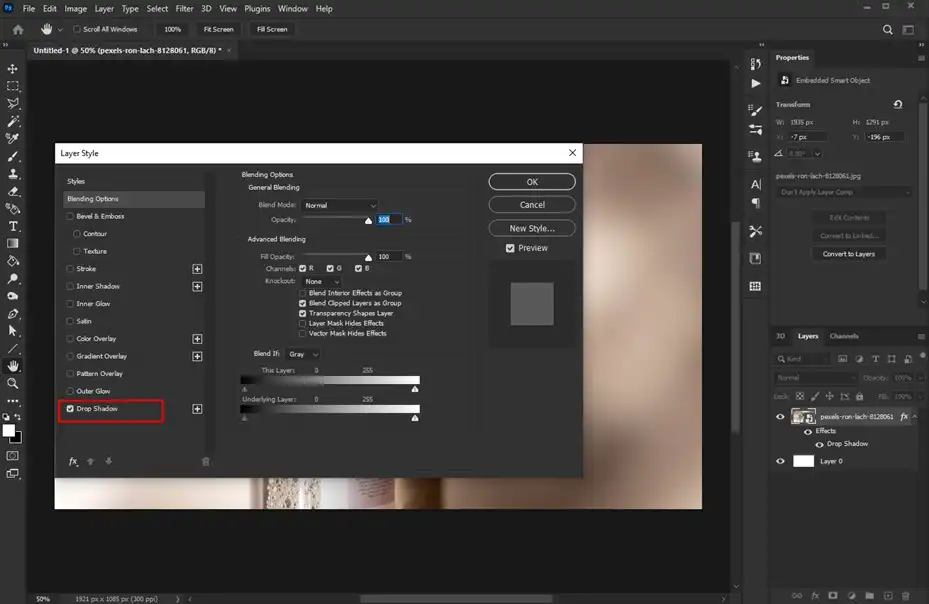
Duplicate the product layer
This creates a copy of the product, leaving the original untouched. This copy will become the shadow.
Blur it slightly
Blurring the copied layer softens its edges and reduces its detail. This is because shadows are not perfectly sharp outlines of the object. The amount of blur depends on the distance of the light source and the desired shadow intensity. A subtle blur (around 2-5 pixels) is often a good starting point.
Place it beneath the original layer with an offset
Drag the blurred layer down and slightly sideways relative to the original layer. This creates the illusion of the shadow falling behind and slightly to the side of the product, as natural shadows do.
Adjust the opacity and blend mode
Opacity: Reduce the opacity of the shadow layer (around 50-70%) to make it appear semi-transparent, like a real shadow.
Blend mode: Change the blend mode of the shadow layer to Multiply. This multiplies the color values of the shadow layer with those of the original layer, resulting in darker areas where the shadow overlaps the product, creating a natural shadow effect.
Reflection Shadow
By following the following steps, you create a realistic reflection shadow that adds depth, dimension, and a touch of luxury to your product image. It makes the product appear as if it’s resting on a reflective surface, enhancing its appeal and professionalism.
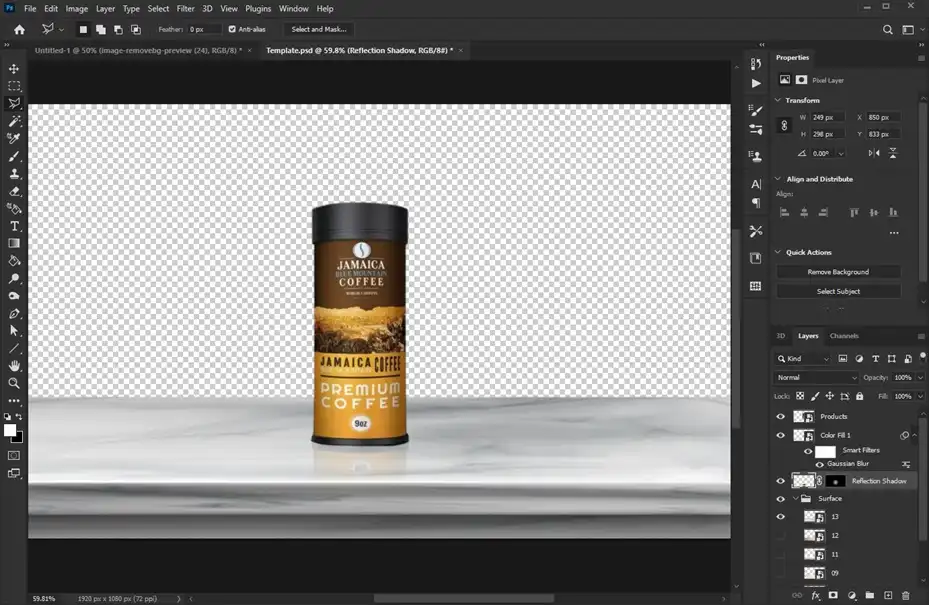
Duplicate your product layer: This creates a copy of the product to work with as the reflection.
Flip it vertically: This transforms the copy into a mirrored version of the product, essentially flipping it upside down. This will be the base of the reflection shadow.
Blur it slightly: Similar to the drop shadow, a subtle blur (around 2-5 pixels) softens the edges of the reflection, making it appear less harsh and more realistic.
Place it beneath the original layer with an offset: Drag the flipped and blurred layer down and slightly sideways relative to the original layer. This positions the reflection underneath and slightly displaced from the product, as it would be on a reflective surface.
Lowered opacity: Reduce the opacity of the reflection layer (around 30-40%) to create a semi-transparent effect. This mimics the light reflecting off the surface being slightly dimmer than the original product.
Subtle water ripple texture (optional): This step adds a touch of realism and detail to the reflection, especially if your product is placed on a watery surface. You can achieve this by adding a noise filter or using a dedicated water ripple texture brush. Apply the texture subtly and adjust its opacity to blend seamlessly with the reflection.
Cast Shadow
Tool and settings you will need to use –
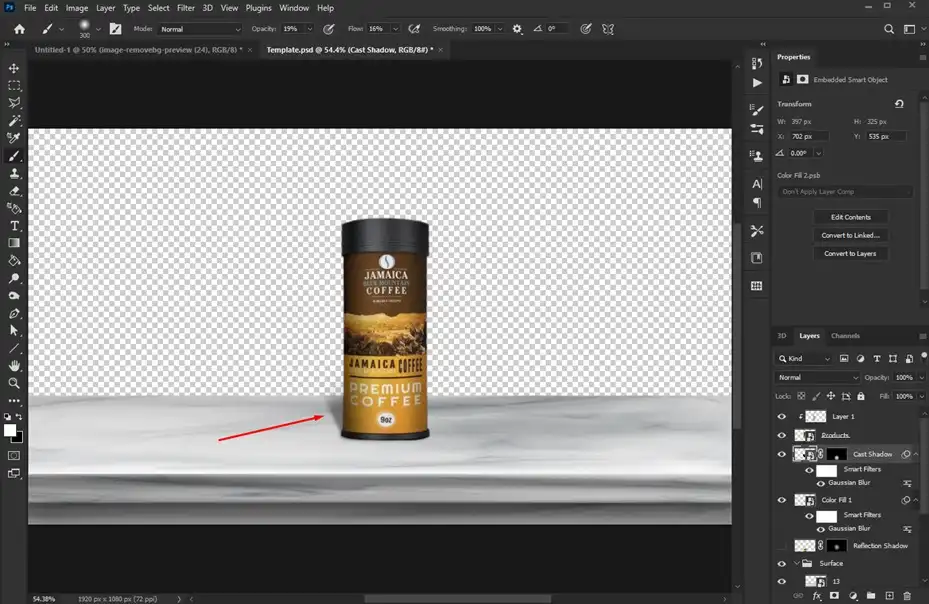
Brush tool: This versatile tool allows you to manually paint the shadow pixels by pixel.
Soft brush: Choose a soft brush preset to create a gradual and natural edge for the shadow, avoiding harsh outlines. Adjust the brush size based on the width of the shadow you need.
Low opacity: Set the brush opacity to a low percentage (around 20-30%) to build up the shadow gradually and achieve realistic translucency.
Now, let’s start painting the shadow:
Location: Analyze your image and identify where the shadow would naturally fall on the background based on the light source direction and object position.
Color sampling: Hold the Alt key and click on the background near the object to sample the background color as your brush foreground color. This ensures the shadow seamlessly blends with the existing scene.
Painting strokes: Start applying short brush strokes with low pressure where the shadow is darkest. Gradually build up the shadow intensity by increasing pressure and adding more strokes, focusing on the area closest to the object.
Fading the edges: As you move further away from the object, reduce the brush pressure and opacity to create a subtle fade, mimicking the natural shadow dispersal.
Refine and adjust: Take your time and zoom in for precision. Use the Eraser tool with a low opacity to gently remove any unwanted strokes or adjust the shadow shape.
In GIMP
Drop Shadow
Similar to Photoshop, duplicate the layer, blur, offset, and adjust opacity/blend mode.
Reflection Shadow
The process is quite the same as the photoshop.
Duplicate, flip, blur, offset, and adjust opacity. You can use the Perspective Tool for more realistic reflections on angled surfaces.
Here, you will have a bonus editing tool, Perspective Tool for angled surfaces. This tool allows you to adjust the perspective of the flipped layer to better match the angle of the surface the product is resting on. This adds a significant touch of realism, especially for products on sloped or tilted surfaces.
Cast Shadow
Here’s a breakdown of each step and its effect:
Fuzzy Select:
- This tool allows you to create a soft-edged selection based on color similarity. Use it to select the area on the background where the shadow would naturally fall from the object.
- Adjust the Tolerance setting to control the selection spread. A higher tolerance creates a larger, softer selection, while a lower tolerance makes it smaller and sharper.
- Ensure the selection accurately covers the shadow area without bleeding into unwanted parts of the background.
Paintbrush with Soft Brush and Low Opacity:
- Select the Paintbrush tool. Choose a soft brush preset to create a gradual and natural shadow edge. Adjust the brush size to match the width of the desired shadow.
- Set the brush opacity to a low percentage (around 20-30%) to build up the shadow gradually and achieve a realistic translucency.
- Sample the background color near the object as your brush foreground color. This lets the shadow seamlessly blend with the existing scene.
- Paint within the selection with short brush strokes, focusing on the area closest to the object for the darkest part of the shadow.
- Gradually reduce pressure and increase distance from the object to create a subtle fade, mimicking the shadow dispersal in the real world.
In Canva
Drop Shadow
Canva has a built-in Shadow effect that allows you to adjust blur, offset, and color.
Reflection Shadow
Unfortunately, Canva doesn’t have a dedicated reflection shadow tool. However, you can achieve a similar effect by duplicating your image, flipping it vertically, blurring it, and placing it beneath the original with lowered opacity.
Cast Shadow
While there’s no direct cast shadow tool, you can use the Shapes tool to create a custom shadow shape and adjust its opacity and blur.
Shadow Editing Service Providers for Your eCommerce Site Product Images You May Be Interested In
As mentioned, manually editing quality shadows requires expert skills. Rather than struggling with Photoshop, outsource to experienced eCommerce product image editing specialists for flawless custom shadow effects.
Some noteworthy custom shadow editing services for eCommerce include:
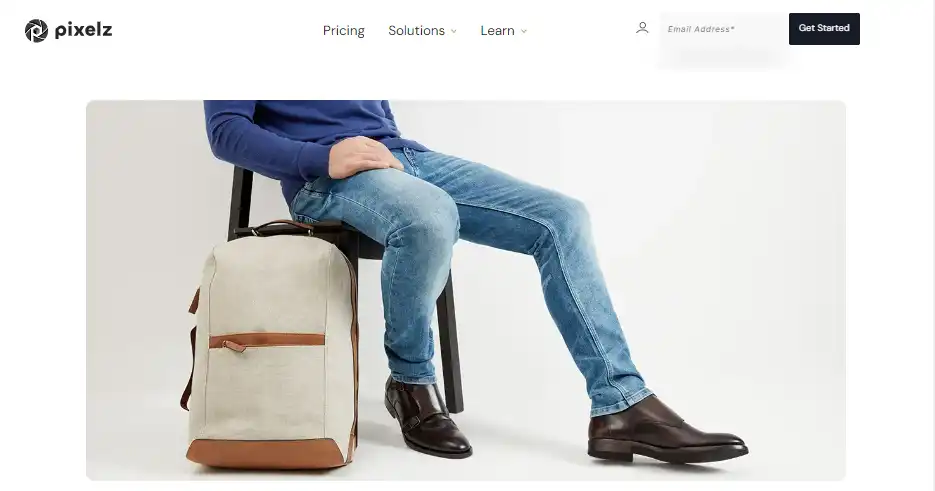
Pixelz
From subtle natural shadows to dramatic artificial effects and reflections, Pixelz provides all custom shadow editing for both apparel and non-apparel eCommerce product images. Phenomenal quality and quick turnarounds start from $0.50 per image. In total, they will cost you around $1.45 per picture.
Clipping Fly
With over 500 expert designers and image editors, Clipping Fly offers speedy custom shadow editing for eCommerce sites specializing in natural or artificial effects matching exact brand guidelines for as low as $0.29 per image.
Ukclippingpath

An experienced UK and Europe-based product image editing company providing fast custom shadow effects of all kinds starting from only $0.39 per image. Known for nimble operations and superb quality control, Ukclippingpath accommodates large volumes of product photo enhancement requests.
Clipping Path Client
A dedicated product image enhancement firm from Bangladesh providing specialized custom shadow editing optimized for a wide range of ecommerce niches. Services start from as little as $0.45 per image while retaining stringent quality control practices. Clipping Path Client has 1500+ satisfied clients to date relying on them for essential shadow effects.
Conclusion
Optimizing product photos with custom shadow effects greatly improves perceived quality, consistency, and visual impact across e-commerce stores. Natural soft shadows lend credibility and depth while bolder artificial shadows highlight products in striking ways aligned with brand aesthetics. Hiring specialized shadow editing services with artistic skills saves much hassle and gives flawless results.
Do you have any other queries regarding custom shadow effects for your online store’s product catalog? Let me know in the comments!