If you’re thinking about offering clipping path services? Awesome! It’s a great skill to have and lets you help people make their product photos look sharp. But before you jump in, there are a few tools you’ll need to get your hands on.
In this article, I’ll break down the essentials – the software that’ll help you cut out those backgrounds like a pro. No crazy tech talk, just the stuff you need to know to get started. Let’s get started!

Which Tool is Most Essential Amongst Other Photoshop Clipping Tools?
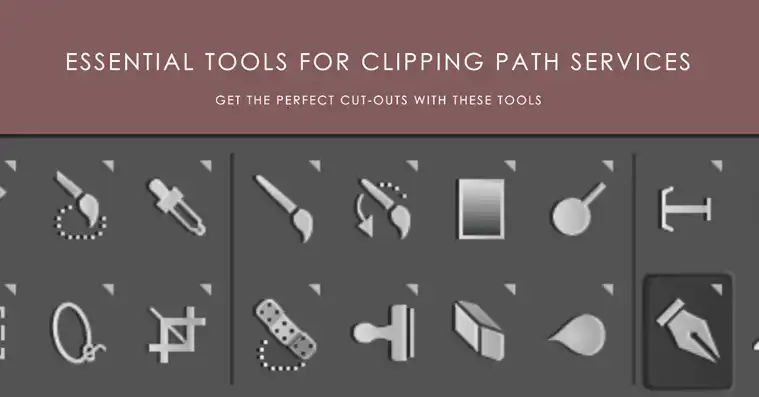
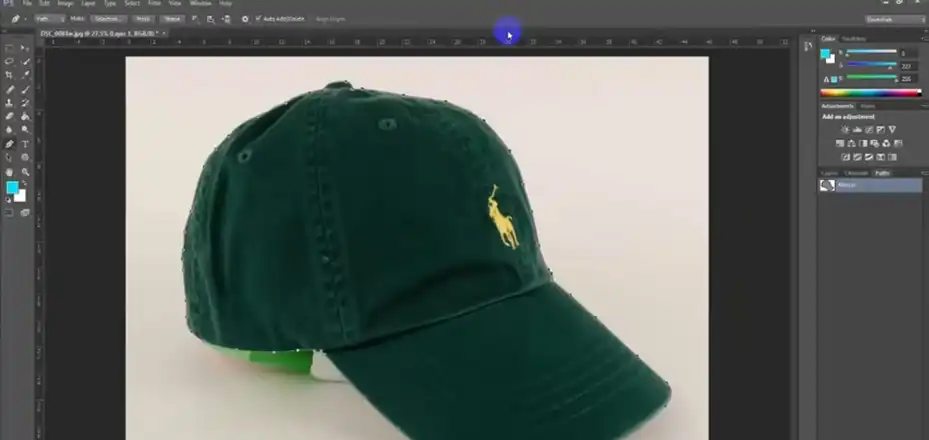
The clipping experts basically use Photoshop for clipping paths. However, some use other free platforms like GIMP, Inkscape, etc. Well, when it comes to tools, they always opt for the Pen tool. Well, there’s a reason behind it! It allows you to create smooth, vector-based outlines that perfectly hug the edges of your object, no matter how complex the shape might be.
Here’s why the Pen Tool is the undisputed champion:
Precision: Unlike other selection tools that might struggle with intricate details, the Pen Tool gives you ultimate control over every curve and line in your path.
Scalability: Vector paths created with the Pen Tool are infinitely scalable. This means you can resize your image without losing any quality, making it perfect for both print and web use.
Flexibility: The Pen Tool allows you to create complex shapes with sharp corners, soft curves, and everything in between. It’s the ultimate tool for tackling any clipping path challenge.
Becoming an expert in the Pen Tool takes practice, but trust us, the effort is well worth it. It’s like learning to ride a bike – once you get the hang of it, you’ll be creating clean, professional-looking clipping paths in no time.
Other Tools that You Can Use for Clipping Path Service
While the Pen Tool is the king of clipping paths, there are other tools in your arsenal that can come in handy depending on the complexity of your image and your level of expertise. Let’s explore some of these helpful companions:
Quick Selection Tool
The Quick Selection Tool is a great time-saver for objects with relatively simple, well-defined backgrounds. It uses color similarity to automatically select an area of your image. Simply click on your object, and the tool will attempt to grab everything with a similar color range.
Here’s the catch: the Quick Selection Tool isn’t perfect. It might miss some areas around fine details like hair or fur. So, while it can be a good starting point, you’ll likely still need to refine the selection using tools like the Pen Tool or Refine Edge for a clean cut.
Magic Wand Tool
The Magic Wand Tool is another one-click wonder but with even more limitations. It selects contiguous areas of your image based on a chosen color tolerance. This means it will grab everything that falls within a specific color range.
The Magic Wand Tool works best for objects with solid, uniform colors against a contrasting background. However, for anything more complex, it’s likely to give you a very rough selection that requires a lot of manual adjustments.
Pro Tip: Combine the Magic Wand Tool with the Pen Tool! Use the Magic Wand to grab a large chunk of your object, then refine the edges with the Pen Tool for a more precise selection.
Magnetic Lasso Tool
The Magnetic Lasso Tool is a good middle ground between the freehand selection tools and the more precise Pen Tool. It allows you to “drag” a selection line around the edges of your object, and the tool will automatically snap to contrasting edges.
This tool works well for objects with clear, defined edges against a contrasting background. However, it can struggle with objects with soft edges or intricate details.
Background Removal Tool
In Photoshop, there you won’t find any tools named background removal tools. For using such a tool, you will need to use the Eraser Tool, actually, this tool is the one which is known as a background removal tool. This tool uses AI to automatically analyze your image and separate the foreground object from the background.
While this might sound like a dream come true, the Background Removal Tool is still under development and has its limitations. It can work well for simple objects with a clear contrast between the foreground and background. However, for complex objects with intricate details or hair, it might produce inaccurate results and require further refinement with other tools.
Choosing the Right Tool for the Job
Picked out some cool tools for clipping paths? Now what? This next part helps you pick the right one for your picture. I’ll keep it simple – an easy tool for easy pictures, a fancy tool for tricky ones. Let’s find the perfect fit!
- For complex objects with intricate details: The Pen Tool is your best friend. It offers the ultimate precision and flexibility for a flawless cut.
- For objects with simple, well-defined backgrounds: The Quick Selection Tool can be a time-saver for a basic selection, but be prepared to refine it with the Pen Tool for a clean finish.
- For objects with solid, uniform colors against a contrasting background: Give the Magic Wand Tool a try, but remember, it might require additional work with the Pen Tool for precise edges.
- For objects with clear, defined edges against a contrasting background: The Magnetic Lasso Tool can be a good option, but keep an eye out for areas where it might struggle with details.
- For a quick and easy (but potentially messy) attempt: The Background Removal Tool can be a gamble. It might work for simple objects but be prepared for some manual cleanup.
Remember, the best tool often depends on the specific image you’re working with. Experiment with different tools and see what works best for you!
End Notes
And that’s a wrap on the main tools for clipping path services! The Pen Tool is definitely the MVP, but don’t sleep on those other useful options like the Quick Selection Tool and Magnetic Lasso. With some practice, you’ll be whipping through clipping paths like a boss.
Got any other questions or need more deets on something I covered? Drop a comment below – I’m always happy to clarify or provide more tips. Thanks for reading, and best of luck with all your future clipping path adventures!

