Enhancing furniture photos with a clipping path is a professional editing technique that can significantly improve the visual appeal of your images. Whether you’re in e-commerce, marketing, or interior design, high-quality furniture images are essential for capturing attention and driving sales. This guide walks you through the entire process of using clipping path techniques to enhance furniture photos, making them look more polished, professional, and ready for online or print display.
What is a Clipping Path and Why is it Important for Furniture Photography?
A clipping path is a vector-based selection tool, typically used in software like Adobe Photoshop, to cut out or isolate objects from an image. For furniture photography, using a clipping path allows you to remove the background and highlight the furniture piece itself. This technique is especially important when you need to place your furniture on a clean, consistent background for e-commerce, promotional materials, or social media. A precise clipping path ensures clean edges and a sharp focus on the product, which is essential for a professional look.
Why Should You Use Clipping Paths for Furniture Photos?
Furniture is often photographed in complex environments, such as showrooms or homes, where the background can be distracting. By using a clipping path, you can remove these distractions and ensure that the focus remains on the furniture. This also allows you to change backgrounds easily, adjust lighting, and create a consistent look across all your product images. Using a clipping path can help boost sales by presenting your furniture in a visually appealing and consistent way.
If you’re looking for high-quality, professional furniture photo editing without the hassle, let ClippingFly handle it for you. We specialize in precise clipping paths, background removal, and advanced image enhancement to make your furniture photos stand out. With fast turnaround times and affordable pricing, we’re the trusted choice for businesses of all sizes.
How Do You Enhance Furniture Photos Using a Clipping Path?
Enhancing furniture photos with a clipping path involves a series of steps, from image preparation to final adjustments. Here’s a detailed guide on how to do it.
Step 1: Prepare the Image
Before you begin the clipping path process, it’s essential to prepare the image properly. Start by choosing the right format for editing. RAW or TIFF formats are recommended because they retain more data than JPEG or PNG, allowing for more flexibility in editing.
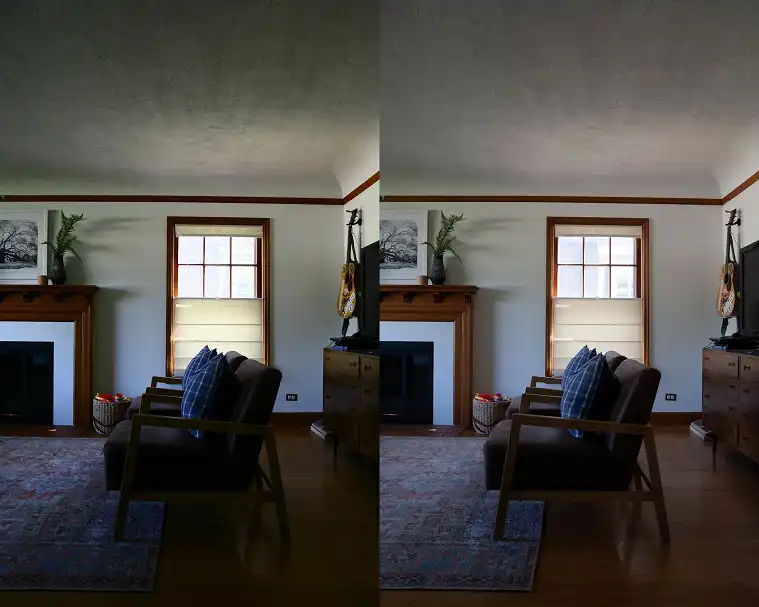
Image: RAW vs JPEG
Once you have the image, check its resolution. For professional-quality photos, the image should have a resolution of at least 300 DPI (dots per inch) for print or 72 DPI for web use. You may also need to resize or crop the image to focus on the furniture’s most important features, such as intricate woodwork, upholstery, or overall design.
Step 2: Create a Clipping Path
Creating a clipping path in Adobe Photoshop is a meticulous process. First, open the image and select the Pen Tool from the toolbar. The Pen Tool allows you to draw precise paths around the furniture. Start by clicking to place anchor points around the edges of the object. For complex curves, click and drag to create smooth lines.
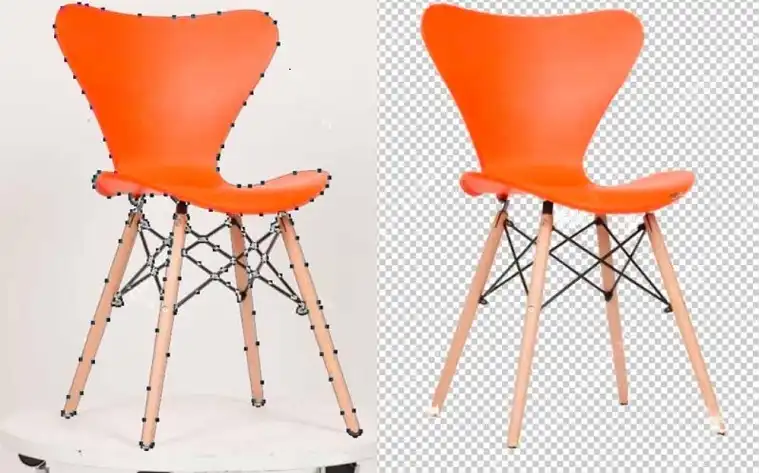
Image: Creating watermark around a chair
Be careful with path points and curves, especially around detailed parts of the furniture like legs or armrests. Zoom in on areas that need more precision, and use the Refine Edge option to ensure smooth and accurate edges. This step is critical for achieving a professional look, as uneven or jagged edges can make the furniture appear poorly edited.
Step 3: Remove the Background
Once the path is complete, you can remove the background. First, convert the path into a selection by right-clicking and choosing “Make Selection.” Then, invert the selection so that only the background is selected. Hit delete to remove the background, leaving the furniture isolated.
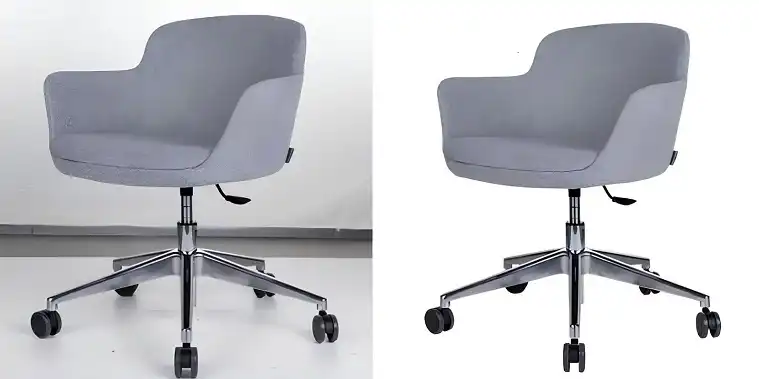
Image: A chair after removing the background
Alternatively, you can use a layer mask instead of deleting the background directly. Layer masks allow for non-destructive editing, meaning you can easily reverse changes or adjust the background later without affecting the original image.
Step 4: Choose a New Background
After removing the original background, it’s time to add a new one. The background you choose should complement the furniture without overshadowing it. Neutral backgrounds, such as white, light gray, or soft pastels, work well for e-commerce and catalog images. If you’re creating lifestyle images, consider using backgrounds that match interior design trends, such as minimalistic living rooms or modern office spaces.

Once the new background is in place, make sure to adjust the furniture’s positioning and scale so it looks natural. The furniture should appear grounded and proportionate to its surroundings.
Step 5: Make Final Adjustments
To enhance the photo further, adjust the color balance, contrast, and brightness. This step ensures that the furniture’s materials and textures are accurately represented. For instance, wood furniture may require a slight increase in warmth to bring out its natural grain, while metal or glass surfaces might need more contrast to highlight their reflective qualities.
Add shadows to give the furniture depth and make it look like it’s sitting on the surface, rather than floating. In Photoshop, you can create realistic shadows by using the Layer Styles and adjusting the Drop Shadow effect. Consider the direction and intensity of the light source to match the shadows naturally.
Finally, save the image in a high-quality format. For web use, JPEG is a good option as it balances quality and file size, while TIFF or PNG is better for print or high-resolution uses.
What Are the Common Mistakes to Avoid When Using Clipping Paths?
Even experienced editors can make mistakes when using clipping paths. One common issue is overlapping paths, where the path crosses over itself, creating a messy selection. Another frequent mistake is leaving gaps in the path, which can cause parts of the background to remain visible. Ensure that your path is smooth and closed before converting it into a selection.
Uneven edges are another problem that can occur, especially when working with low-resolution images. Always zoom in to check for rough or jagged edges, and use the Refine Edge tool to smooth them out.
FAQs
What software should I use for clipping paths?
Adobe Photoshop is the industry standard, but alternatives like GIMP are available for beginners.
Why do my clipping paths have jagged edges?
Jagged edges often result from low-resolution images or imprecise use of the Pen Tool. Zoom in and use the Refine Edge tool for smoother results.
Can I outsource clipping paths?
Yes, many services like ClippingFly offer professional clipping path services for businesses with high image volumes.
Do I always need to remove the background?
Removing the background is essential for consistent, clean product images, especially in e-commerce. However, for lifestyle images, you may only want to enhance the background rather than remove it entirely.
Wrapping Up
By following these steps and applying advanced techniques, you can significantly enhance your furniture photos using clipping path tools, making them look professional and market-ready. This comprehensive guide ensures you’re equipped with the knowledge needed to edit furniture images effectively, boosting your brand’s visual appeal.