As someone who has been using Picasa for years, resizing photos is a task I often need to do – whether for sharing on social media, sending through email, or uploading to websites. Even though Picasa has been discontinued by Google, many of us are still using this familiar software for basic photo editing needs.
The lack of a dedicated “resize” tool in Picasa can be confusing, but it actually offers multiple ways to adjust the dimensions of your pictures. In this guide, I’ll show you the different methods I use to resize photos in Picasa. So if you’re still relying on this old favorite for quick edits, pay close attention! Let’s get started.
Steps to Resize Photo in Picasa
Picasa doesn’t directly offer a resize option within the editing tools. However, you can achieve resizing through the export function. Here’s how to resize a photo in Picasa:
- Open Picasa and navigate to the folder or album containing the photos you want to resize.
- Select the photos you want to resize by clicking on them while holding the Ctrl (Windows) or Command (Mac) key. Alternatively, you can click the Select All option to choose all photos in the folder or album.
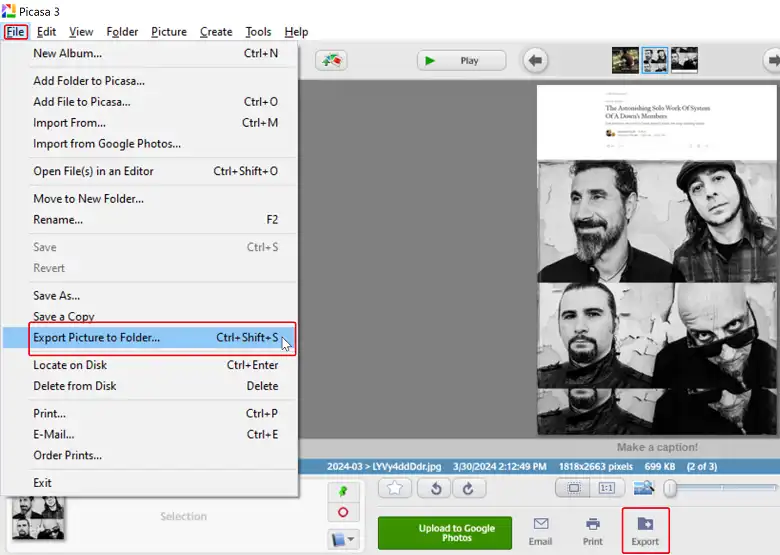
- After uploading the picture in Picasa, click on File > Export Picture to Folder. You can also find the Export option in the bottom toolbar.
- A new Export to Folder window will open. In this window, you’ll find a Resize to section with a slider.
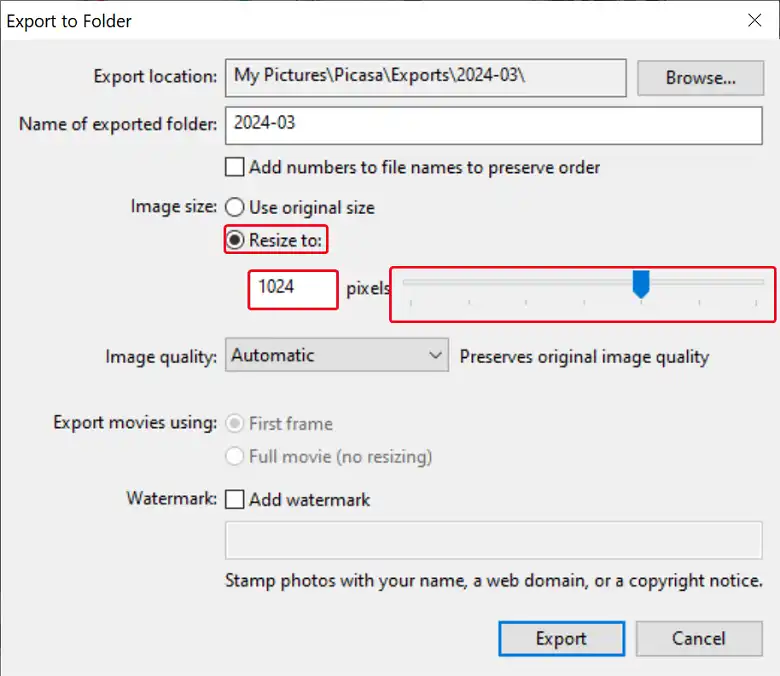
- This slider lets you determine the desired size (in pixels) for the longer dimension of your photos. For example, if you set the slider to 1000 pixels, and your original photo has a resolution of 4000 x 3000 pixels, the resized photo will be 1000 pixels wide, and the height will be automatically adjusted to 750 pixels to maintain the original aspect ratio and prevent distortion.
- Move the slider left or right to set your desired size. You can see the new dimensions displayed below the slider. Then click on Export and the picture will be saved in new size!
By following these detailed steps, you can easily resize your photos in Picasa using the export function.
Other Ways to Resize Photos in Picasa
While the export method is the primary way to resize photos in Picasa, there are a few other tricks up its sleeve.
Resize the Photo while Uploading to Google Photos
If you’re planning to upload your edited photos to Google Photos, you can resize them during the upload process. After editing your picture in Picasa, follow these steps:
- Click on the Tools menu and click on Options.

- After that, go to Web Albums.
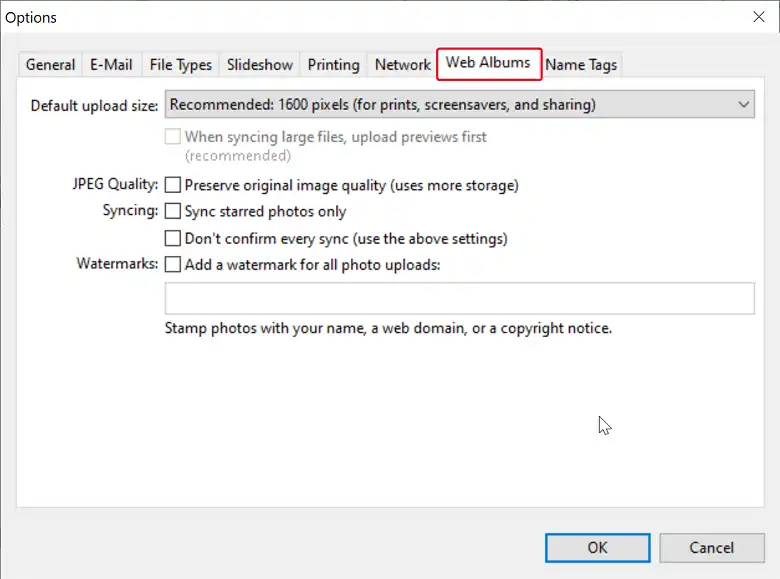
- In the Web Albums window, drop down the Default upload size option and choose the size you want for your photos.
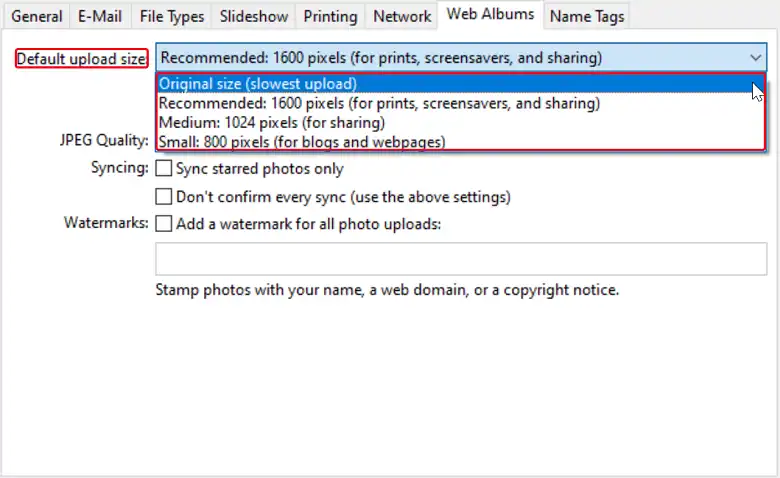
- Once you’ve selected the desired size, click OK to save the settings.
- Now, when you upload your photos to Google Photos, they will be automatically resized to the selected dimensions.
Resize the Photo while Sending through Email
Picasa also lets you resize photos before sending them via email. After editing your picture, follow these steps:
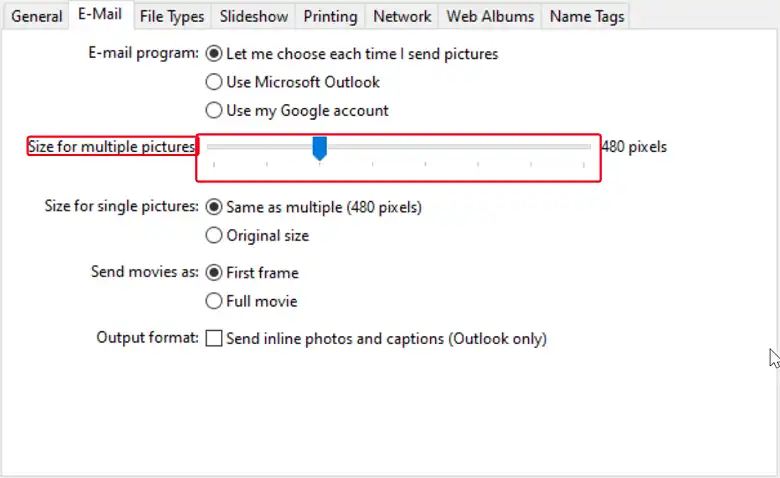
- Go to the Tools menu and select Options.
- Go to the Email tab, look for the Image Sizes section, and set the desired pixel size for your photos using the dropdown menu or by entering the dimensions manually.
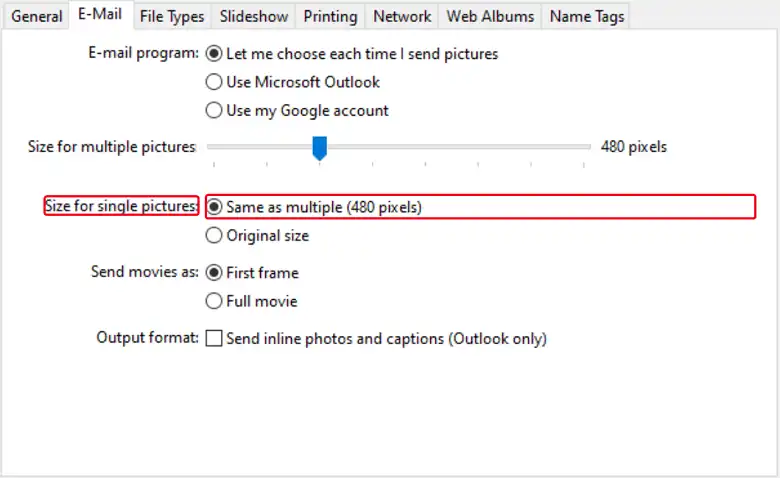
- If you’re sending a single photo, ensure that you select the same size as multiple option.
Resize the Photo while Cropping
While not technically resizing, the cropping tool in Picasa can help you achieve a similar effect by changing the aspect ratio of your image. Here’s how:
- Open the photo you want to crop and click on the Crop button in the editing toolbar.
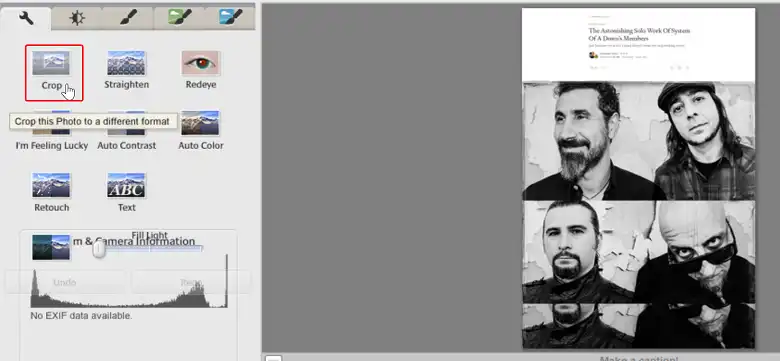
- From the dropdown menu, choose the aspect ratio you want for your cropped photo, such as 16:9 or 4:3.
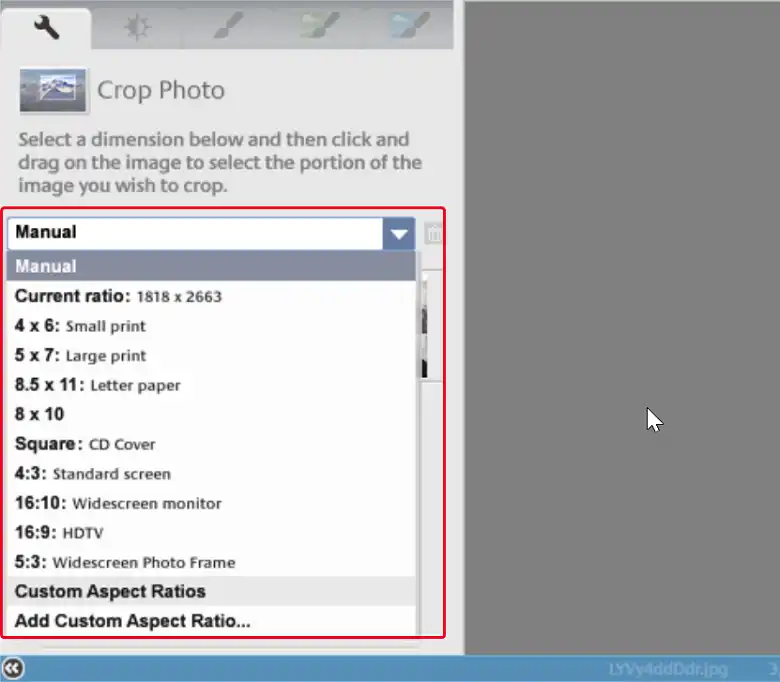
- Adjust the crop boundaries on your photo by dragging the corners or edges to the desired position.
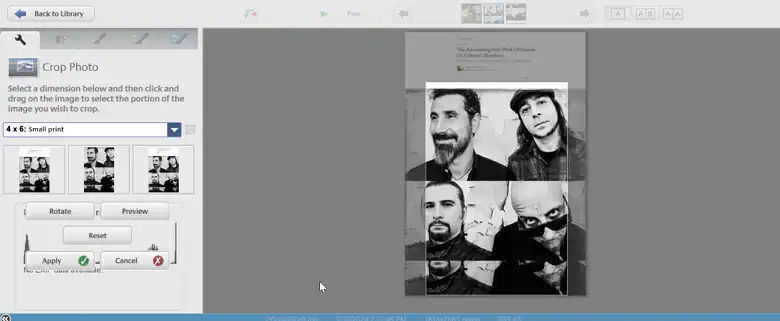
- Once you’re happy with the new dimensions and crop area, click the Apply button to confirm the changes.
- Your photo will now be cropped to the selected aspect ratio, effectively changing its dimensions.
Bottom Line
Resizing photos in Picasa is pretty straightforward once you know the different methods. The export function is the primary tool, but you can also resize while uploading to Google Photos, sending via email, or even while cropping. Remember to maintain the aspect ratio to avoid distortion. If you have any other questions, feel free to ask in the comments below. Thanks for reading, and happy editing!