Are you tired of the default outline colors in Photoshop? Customizing them is an easy way to make your designs truly stand out. In this guide, I’ll show you the simple steps to change any outline color. You can pick vibrant hues that demand attention or subtle shades that complement your art. Don’t settle for boring outlines when creating that perfect look is just a few clicks away. Whether you want to transform one element or every outline, you’ll soon have the power to choose. Let’s get in and give your Photoshop projects that extra pop of color they deserve!
Steps for Changing the Color of an Outline in Photoshop
Outlines in Photoshop can make elements stand out nicely. You may want to change the outline color to better suit your design. Here are the steps to do that easily.
Step 1 – Go to Layer and Select the Outline Layer
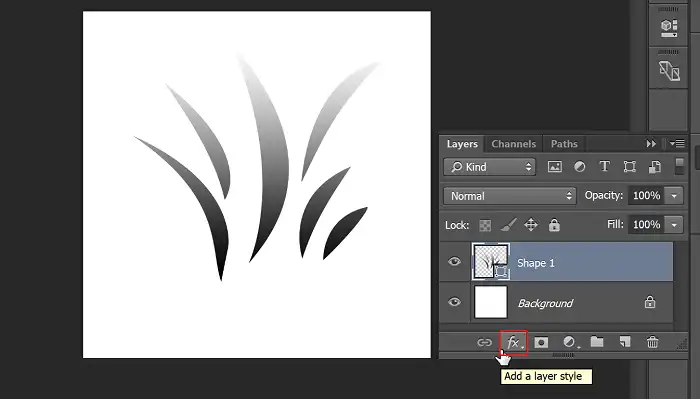
To begin changing the color of an outline in Photoshop, you’ll need to first locate the layer that contains the outline you want to modify. In the Layers panel, look for the layer that represents the outline or shape you want to edit. Click on it to select it.
Step 2 – Go to Stroke
With the outline layer selected, now click on fx at the bottom of the Layer panel.
Look for the “Stroke” option and click on it to open the Stroke settings.
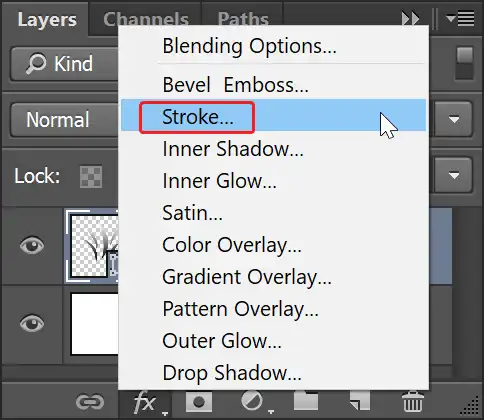
In the Stroke settings, you’ll see various options related to the outline, including its color, size, and other properties. To change the color, you can either use the color picker or enter the desired color value manually.
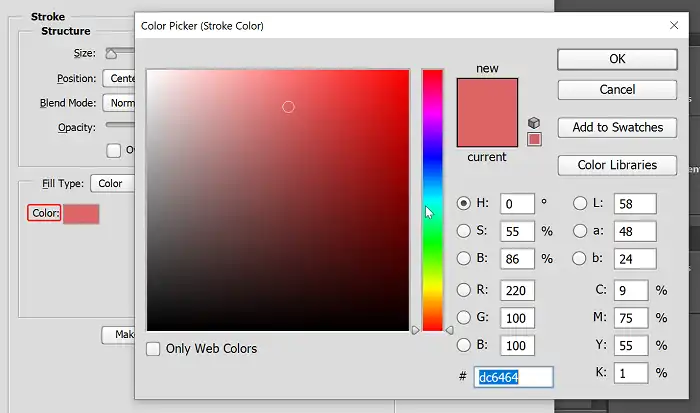
Step 3 – Choose the Outline Color
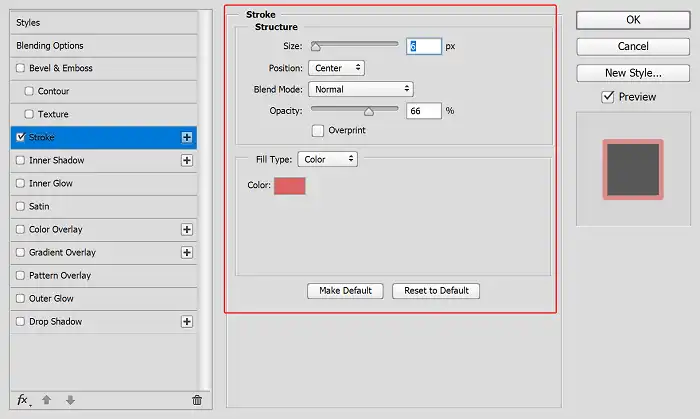
In the Stroke settings panel, you’ll find a color option where you can select a new color for your outline. Click on this swatch to open the Color Picker, and then choose your desired color from the available options.
And that’s it! Your outline should now be updated with the new color you’ve chosen. You can repeat these steps for any other outlines or shapes you want to recolor within your Photoshop document.

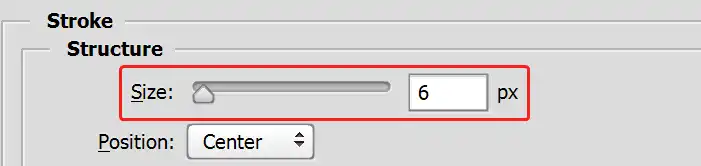
You can also change the thickness of the color of the outline. For this, you will need to change the size which can be found in the Stroke panel, under the Structure section!
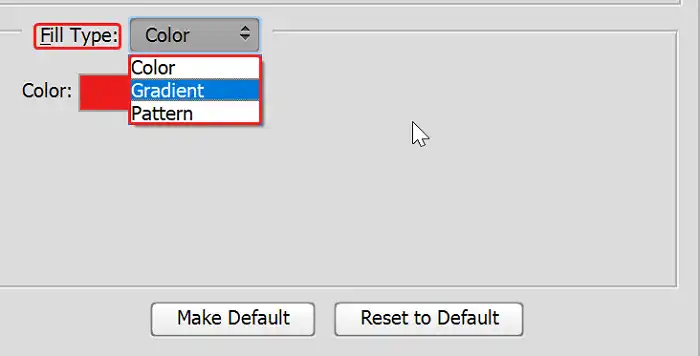
Additionally, you can also change the fill type from color to different gradients and patterns! Click on the Fill type and choose whichever type you want!
FAQs
Can I change the outline color for multiple layers at once?
Yes, you can change the outline color for multiple layers simultaneously. Simply select all the desired layers in the Layers panel, then follow the steps mentioned above to change the stroke color. The new color will be applied to all selected layers.
What if I can’t see the Stroke option for my layer?
If you don’t see the Stroke option for a particular layer, it likely means that the layer doesn’t have an outline applied to it yet. You’ll need to add a stroke effect to the layer first before you can change its color.
Can I save my custom outline color as a preset?
Absolutely! Photoshop allows you to save custom colors as swatches or presets for future use. After creating your desired outline color, you can save it as a swatch or preset by clicking the appropriate button in the Color Picker or Swatches panel.
Wrapping Up
And that’s how you change outline colors to perfectly suit your Photoshop designs! It’s such a simple process once you know where to find the stroke settings. Don’t be afraid to play around with different hues until you get that ideal look. If you have any other questions, just leave a comment below. Thanks for following along! I hope customizing outline colors helps take your art to the next level.