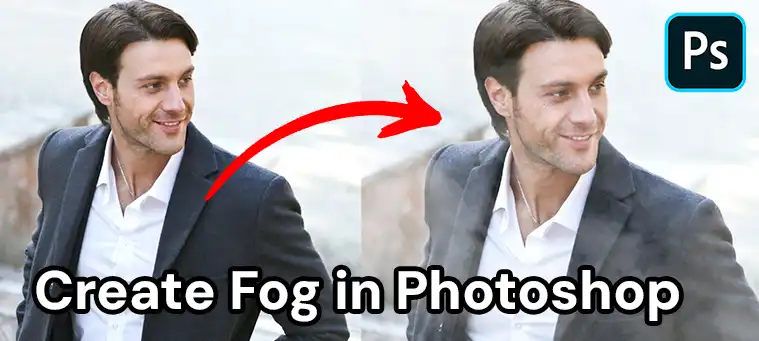
As a photo editor, I often need to make images look like they were shot in a thick, moody fog. Rather than trying to catch real fog outdoors (which is super tough!), I create realistic digital fog right in Photoshop instead. There is more than one cool technique I can do to make fog look really authentic. In this short guide, I’m going to walk you step-by-step through 4 easy methods to add perfect fog to any of your pics using filters, brushes, overlays, or presets. I’ll explain how to control the exact look, blending, depth, and positioning to get that dreamy atmospheric haze. Let’s get started!
Use Cloud Filter
One powerful method for adding realistic fog in Photoshop makes use of the procedural Cloud filter. By generating an organic cloud texture, and then selectively revealing and concealing areas with layer masks, you can achieve incredibly natural-looking and customizable fog effects.
This technique is perfect for when you need precise control over the location, density, and depth of the fog interacting with specific elements in your image. The generated cloud pattern results in soft, wispy fog shapes rather than solid-filled shapes that can look artificially perfect. Matching the light and color of the fog layer to your existing scene is straightforward as well.
Step 1: Load your base image and duplicate the background layer by pressing Cmd/Ctrl+J to protect your original image.

Step 2: Create a new transparent layer above by going to Layer > New and name it “Fog”. This will hold the fog effect.

Step 3: Set foreground and background colors to black and white by pressing D on your keyboard.

Step 4: Apply the Filter > Render > Clouds filter to fill the transparent layer with a B&W cloud pattern.

Step 5: Change the fog layer blend mode to Screen. This makes the white areas become visible fog.

Step 6: Lower the layer opacity to blend the fog naturally with the image below.

Step 7: Add a layer mask and use a soft brush tool to refine fog density and positions.

Step 8: Optionally adjust contrast with Curves or apply a slight Gaussian Blur for a depth-enhancing out-of-focus fog effect.

Step 9: Clip adjustment layers to the fog layer by holding Alt/Option while clicking between layers.

The Cloud filter makes decent starter fog, which you can then refine with additional techniques like brush painting or masking for improved realism.
Use Fog Brush
Manually painting fog onto your image with a soft brush can be extremely quick and intuitive, while still providing control over placement and shaping. When you need to match the density and direction of in-scene fog perfectly across specific regions, hand-painting it grants you that customizable precision. In this method, first, you will need to create a fog brush and then you can create fog.
Creating a Realistic Fog Brush from a Cloud Photo
The key for making a convincing fog brush is using an actual cloud image to provide the texture. Follow these steps:
1. Select a suitable cloud photo with defined white clouds against a blue sky background.

2. In the Channels panel, find the channel with the most contrast between the clouds and sky, typically the red channel.

3. Duplicate the high contrast channel into a new document.

4. Use Levels (Ctrl/Cmd+L) to increase channel contrast, pushing the dark background areas to solid black.

5. Use a Brush tool in Linear Burn blending mode to paint away any remaining gray sky areas, keeping cloud details white.

6. Ctrl/Cmd-Click the channel copy to load it as a selection once the sky is entirely black.

7. Make a new layer and fill the selection with black to isolate the white cloud details.

8. Add a white Solid Color fill layer below to serve as the brush’s base color.

9. Define a new brush preset using the black cloud silhouette against the white fill layer.

10. In Brush Settings, adjust Spacing, Scattering, and Flow Jitter to add randomness and natural variation to the fog brush.

11. Save the brush preset once it has a suitable foggy texture and variance.
Now you have a customizable photo-sourced fog brush ready to apply in any document! Let the brush stray slightly into foreground elements, then erase unwanted areas with layer masks to increase depth realism.
Applying Custom Fog Brush for Realistic Depth
1. On a separate layer above your image, activate the custom fog brush preset you created using a real cloud photo texture.

2. Lower the brush Flow setting to around 10-20% for gradual build-up. Sample a light color from existing clouds/sky to match the lighting.

3. Lightly paint foggy brush strokes around image edges and distant areas. Overlap strokes to subtly increase density.

4. Apply Gaussian Blur to the fog layer to blend and soften the brush texture into smooth, atmospheric fog spreading wider.

5. Use Select Focus Area to select foreground subjects and elements that should be clearly visible over the fog.
6. Hold Alt/Opt and drag the layer mask from the background image onto the fog layer. This will confine the fog to the background, appearing only behind the foreground elements, creating depth.
Using a brush preset created from a real cloud photo, combined with precise masking techniques, enables adding customizable, depth-enhancing fog to your images in Photoshop with full control over blending and placement.
Use Stock Image
An efficient way to add quality fog relies on using dedicated stock photography assets. Stock images and video clips containing real footage of foggy or smokey scenes captured with similar light and depth as your target image can integrate convincingly.
Here are the steps you will need to follow –
Step 1: Download suitable fog/smoke stock images from sites like Adobe Stock, iStock or Shutterstock. Aim for elements with white clouds against black backgrounds for easy blending.
Step 2: In Photoshop, duplicate your image’s background layer by pressing Ctrl + J.
Step 3: Import the fog overlay image and place it above the background layer.
Step 4: Set the Fog layer’s blend mode to Screen initially to reveal the white fog portions.
Step 5: After that, press Ctrl + L to adjust the contrast level. And then, there you go, your picture will come up with misty fog!
Step 6: Optionally, you can also modify fog color by clipping a solid Color Fill layer set to Overlay or Multiply blending.
This flexible workflow serves as a blueprint for realistically compositing almost any stock texture or element using blending modes and clipping for total control over interaction and color harmony.
Frequently Asked Questions
What other filters work well for making fog in Photoshop?
The Noise, Clouds, and Lens Flare filters can also generate suitable foggy textures. Apply them to new layers then set to blending modes like Screen or Lighten.
How do I make the fog selectively appear in front of only certain objects?
Use layer masks on your fog layers, then paint over those objects in black to hide the fog only in those areas.
Does fog work best on certain types of photos?
Yes, images with depth and distance like landscapes and cityscapes make the best use of fog effects. The fog helps exaggerate the sense of depth and distance. Portraits generally do not benefit as much from added fog.
How can I animate and loop fog overlays in Photoshop?
Import your fog clip as a video layer. Use the Timeline panel (Window > Timeline) to scrub and set start/end points for looping. Export using File > Export > Render Video to output the animated fog effect.
Can I make fog in apps besides Photoshop?
Yes, raster and compositing apps like GIMP and Affinity Photo contain similar filters and tools for manually painting fog brush strokes onto your images if needed. Their core capabilities allow realistic-looking fog creation.
Conclusion
And we’re done! As you can see, creating totally convincing digital fog doesn’t have to be hard. By using Photoshop’s blending and masks, you can dial in the exact foggy mood you want for landscape shots, portraits, or any other image type. I suggest you try each approach covered here to see what workflow works best for your specific needs. Customize your fogs, download brush packs, and use them as layers or filters – make them your own! I hope this short guide made the process super clear. Let me know how your fog creations turned out by posting photos in the comments!