When it comes to the jewelry business, high-quality photography is paramount. Stunning images not only drive online sales and conversion rates (up to an 80% increase, according to Shopify), but they also showcase intricate craftsmanship and convey the brand’s image and style.
However, capturing the sparkle, shine, and intricate details of jewelry pieces can be a challenging task. Minimizing reflections, and glare, and achieving proper lighting and focus are just a few obstacles that jewelry photographers face.
In this article, we’ll explain how to take good pictures of jewelry, from preparation to post-production. Let’s begin.
What Kind of Gears Do You Need for Jewelry Photography
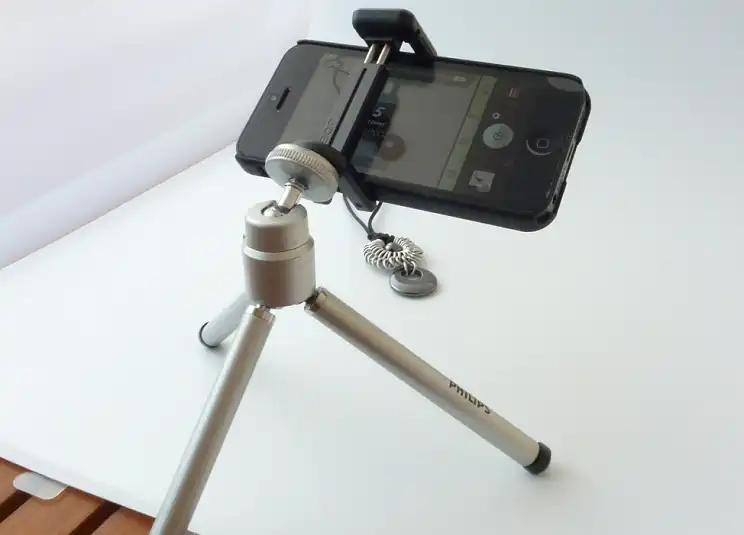
If you are starting out with jewelry photography, a smartphone camera can be a viable option. Modern smartphones come equipped with macro modes, timers, and manual controls that allow for greater creative control. Additionally, clip-on lenses and mini tripods can enhance your shooting capabilities, while apps like Camera+, Moment, and Lightroom Mobile offer advanced editing features.
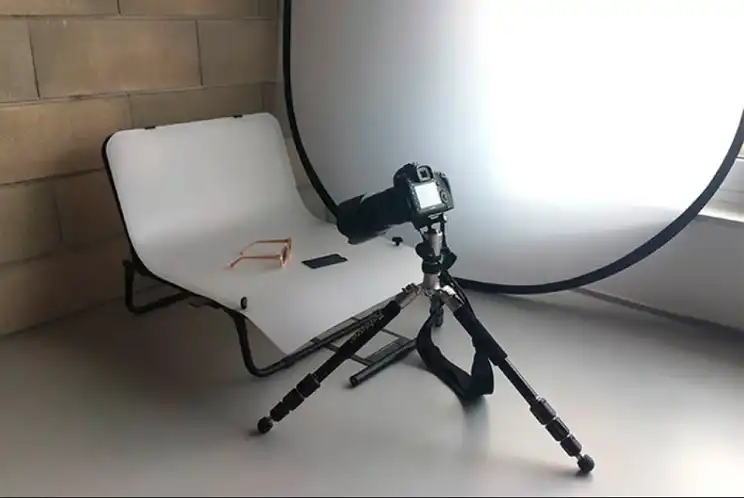
For more serious photographers, a DSLR or mirrorless camera is the way to go. Invest in a camera body along with a macro lens, prime lens, and zoom lens for versatility. A sturdy tripod and a remote shutter release will help minimize camera shake and blur. Lighting gear, such as reflectors, diffusers, and continuous or strobe lighting setups, will also be necessary for achieving professional-quality results.
How to Set Up Lighting for Taking Pictures of Jewelry
Proper lighting is the backbone of captivating jewelry photography. Natural lighting can be a great starting point, particularly when shooting near a window during the soft, diffused light of early morning or late afternoon.
Reflectors and diffusers can help fill in shadows and control contrast
For more controlled and consistent lighting, a tabletop light tent or lightbox can be a valuable investment. These enclosed setups provide soft, even illumination from multiple angles, minimizing unwanted shadows and hotspots. Clamp lights with daylight-balanced bulbs can also be an affordable and effective continuous lighting solution.
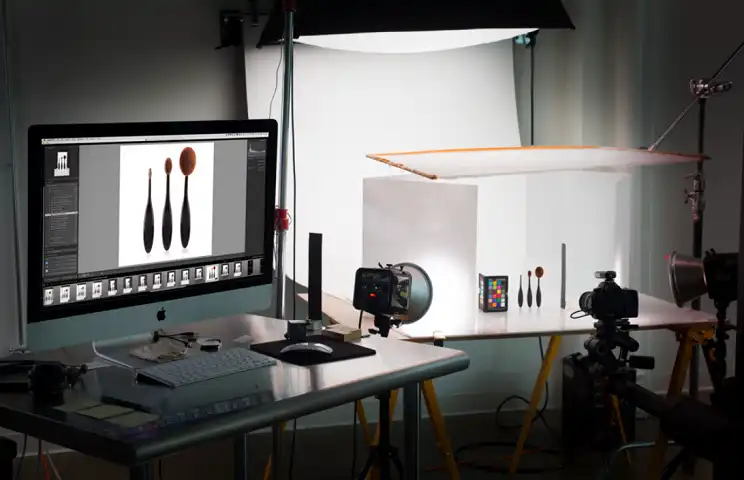
For those seeking even greater control and flexibility, strobe or flash lighting systems are the way to go. Monolights and speedlights, combined with lighting modifiers like softboxes and umbrellas, allow for precise control over the direction, intensity, and quality of light. Experiment with different lighting patterns and ratios until you achieve the desired look, whether it’s dramatic or subtle.
How to Set Up Your Camera for Jewelry Photography
Mastering camera settings and techniques is crucial for capturing sharp, well-exposed, and visually appealing jewelry shots. Aperture settings control the depth of field, allowing you to isolate the subject or keep everything in focus.
Adjust your aperture to control depth of field – use a low f-stop like f/2.8 to isolate your subject or f/11 for front-to-back sharpness. Keep ISO low (100-400) to minimize noise. Nail custom white balance for accurate colors.
Try focus stacking: take multiple shots focused at different points, then blend them in post-processing for maximum sharpness throughout. Shoot from unique angles and viewpoints to highlight interesting details.
How to Set Up Composition for Impactful Jewelry Photos
Composition plays a vital role in creating impactful jewelry photographs. Backgrounds can range from seamless paper or fabrics to textured surfaces or complementary colors that enhance the jewelry’s aesthetic.
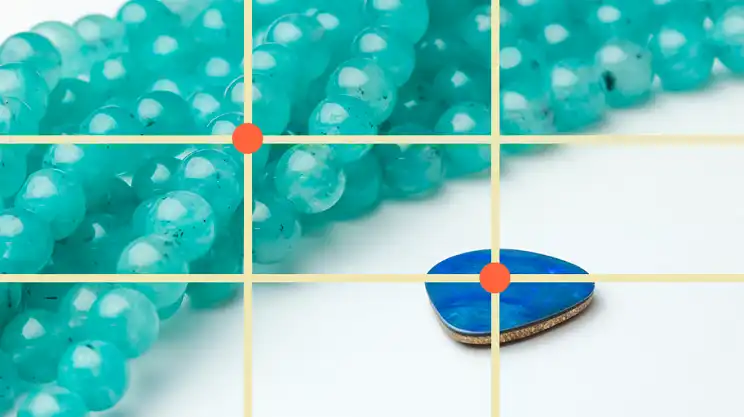
You can also use classic composition techniques like the rule of thirds that can help guide the viewer’s eye and add balance to the frame. You can also use the leading lines and geometric shapes to create dynamic compositions. Use negative space and minimalism to cleverly allow the jewelry to take center stage.
Incorporating props or human elements, such as hands or fashion elements, can add context and storytelling to the images.
How to Use Specialty Shots in Jewelry Photography
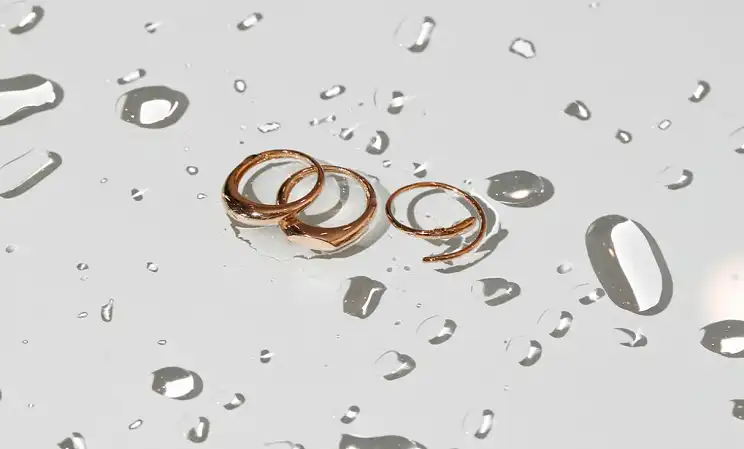
While traditional product shots are essential, exploring creative approaches can set your jewelry photography apart. Flat lays and artistic arrangements can showcase multiple pieces in a visually appealing manner. Wet shots or liquid effects can add a unique and captivating element to the imagery.
Motion and movement techniques, such as light painting or long exposures, can convey a sense of dynamism and energy. Incorporating models or fashion looks can elevate jewelry photography to an editorial or lifestyle level, showcasing how the pieces can be styled and worn.
How to Edit and Post-Process Jewelry Photos
When it comes to editing jewelry photos, shooting in RAW format is crucial for retaining all image data and maximizing flexibility during post-processing. Begin by making basic global adjustments like adjusting exposure, contrast, highlights, shadows, and white balance to get a solid base image.
For advanced edits, try frequency separation to sharpen fine details like gemstone facets without exaggerating noise or texture. Use the dodge and burn tools to make localized adjustments, brightening or darkening specific areas to draw attention to the main subject.
Color grading adds stylized looks, enhancing mood and atmosphere. Popular styles include muted and desaturated tones for an elegant feel or bold, vibrant colors for a vivid, eye-catching effect. Get creative with split-toning for unique color shifts.
What Are Some Common Mistakes That You Should Avoid While Taking Photos of Jewelry?
Even the most experienced jewelry photographers encounter challenges. Addressing reflections and glare is a common issue. Use proper lighting techniques, polarizing filters, or post-processing adjustments to fix this.
White balance issues can lead to inaccurate color rendition. You can correct this through in-camera settings or post-processing tools.
Sharpness and focus problems may arise from camera shake, improper focus techniques, or depth of field limitations. To mitigate this, always use proper tripods and use focus stacking technique.
To address uneven lighting and harsh shadow, employ multiple light sources, diffusers, and reflectors, or through careful positioning and angling of the jewelry and lighting setup.
Conclusion
By mastering the art of jewelry photography, you can create captivating images that not only drive sales but also showcase the beauty and craftsmanship of these precious pieces. With the right gear, lighting techniques, composition skills, and creative approaches, you can take your jewelry photography to new heights and stand out in a competitive market.