Let’s learn how to draw sleek horizontal curly braces that can elevate your designs in Adobe Illustrator. These versatile shapes can add flair to various projects.
As designers, we often need eye-catching visual elements to make our work stand out. Curly braces are a stylish addition that can enhance layouts, logos, or any design requiring a touch of sophistication. This guide will walk you through the process of creating horizontal curly braces from scratch in Adobe Illustrator. Get ready to master this handy technique!

Steps to Draw Horizontal Curly Brace in Adobe Illustrator
Drawing horizontal curly braces in Adobe Illustrator is a straightforward process. By following these easy steps, you’ll be able to create stylish and functional curly braces for your designs with ease. Here are the steps you will need to follow –
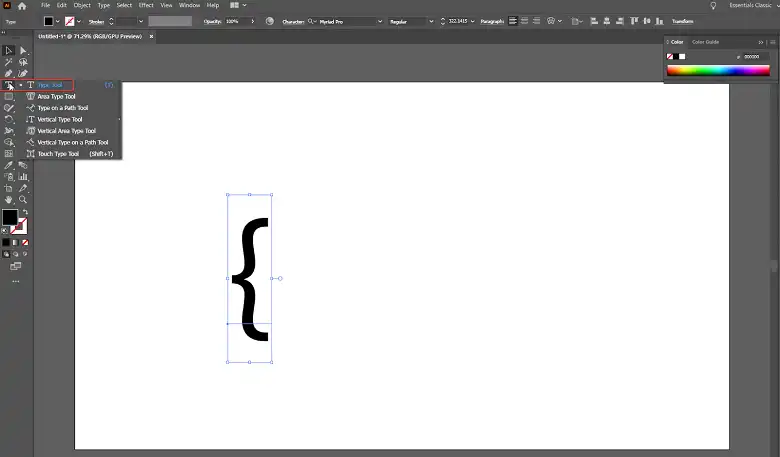
Step 1 – First, choose the text tool and type a curly bracket. Then select it and increase its size.
- Open Adobe Illustrator.
- Select the Text Tool from the toolbar. This tool is usually represented by a “T” icon.
- Click on the canvas (the working area) and type a curly bracket “{“.
- With the curly bracket text still selected, look for the Font Size option (it might be in the toolbar or a separate panel). Increase the font size to make the curly bracket larger and easier to work with.
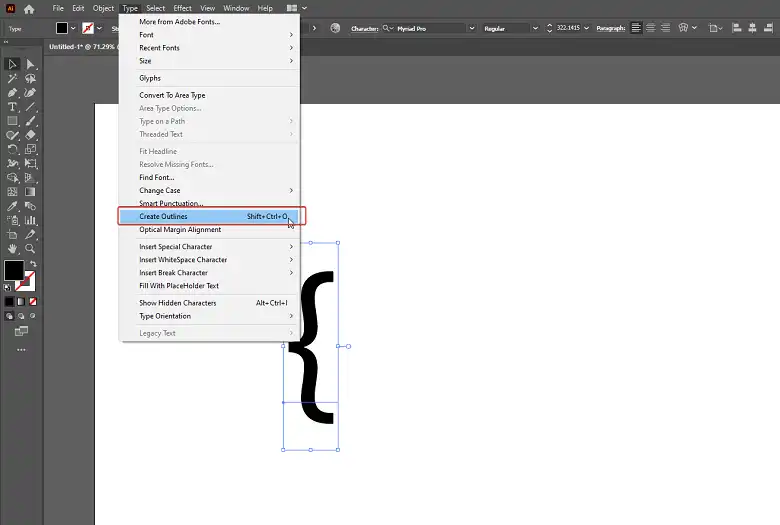
Step 2 – Next, convert the text into a path by selecting the font character with the direct selection tool and choosing Type > Create Outlines.
- Switch to the Direct Selection Tool. This tool is usually represented by an icon that looks like a white arrow pointer over a black arrow pointer.
- Click on the curly bracket text to select it.
- Go to the Type menu (or Text menu, depending on your software) and look for the Create Outlines option.
- The curly bracket is now converted from editable text to a path (a vector shape).
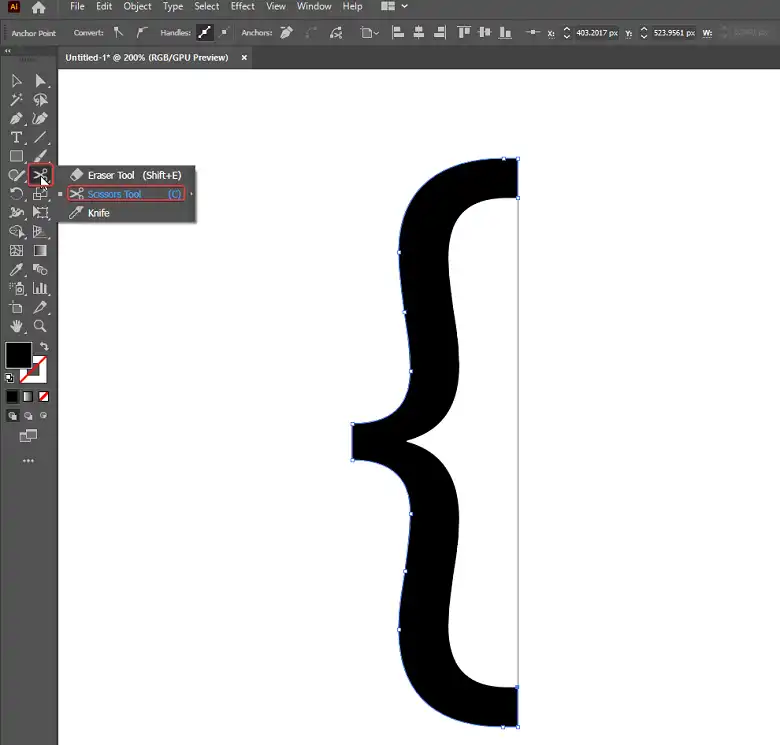
Step 3 – Use the scissors tool to cut the path at the inside anchor point. Then delete the unwanted path.
- Select the Scissors Tool from the toolbar. It’s usually represented by an icon that looks like a pair of scissors.
- Click on the inside corner or anchor point of the curly bracket path. This will cut the path into two separate pieces.
- Use the Selection Tool again to select the part of the path you don’t need (usually the smaller piece).
- Press the Delete key on your keyboard to remove the unwanted path.
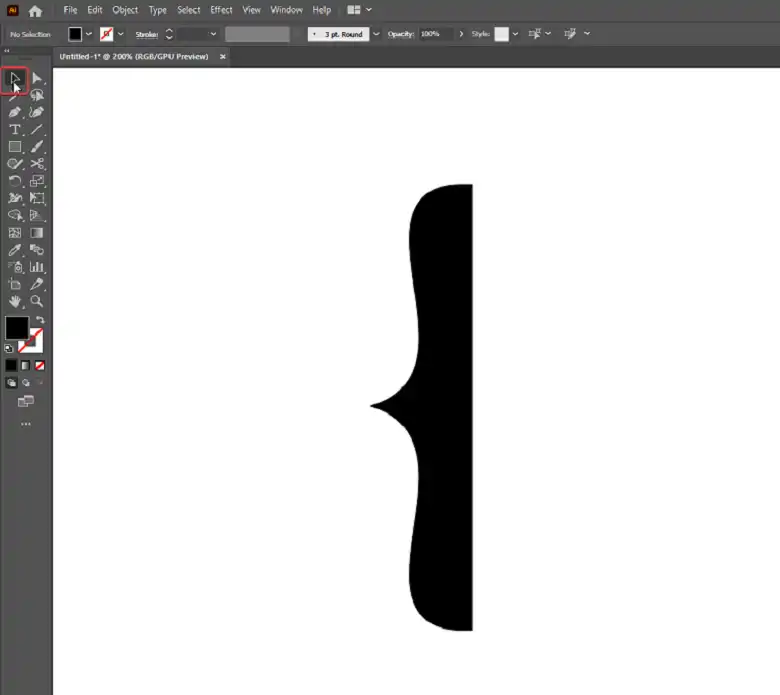
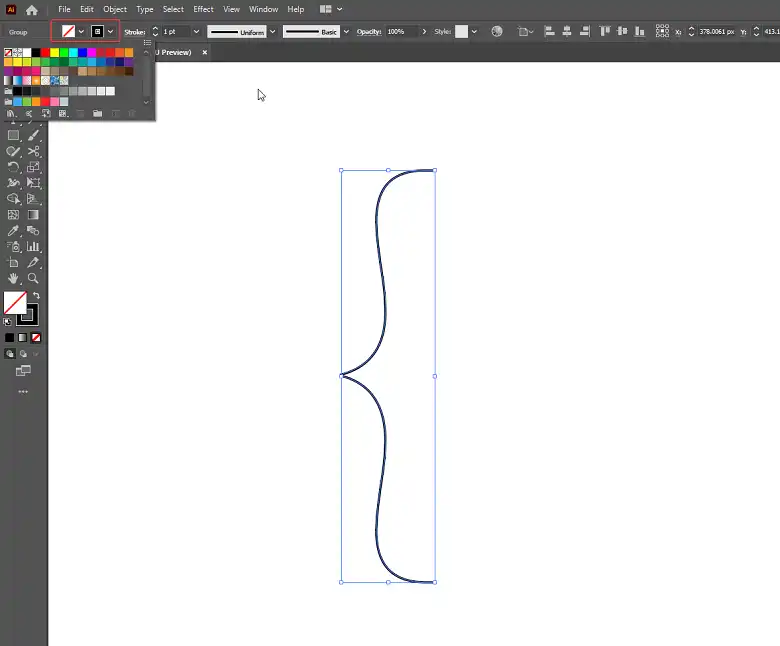
Step 4 – Now you should have a path in the desired curly bracket shape. Fill it with a stroke and remove the fill.
- With the remaining curly bracket path selected, look for the Stroke and Fill options (these might be in the toolbar, a separate panel, or in the menu).
- Click on the Stroke option and choose a color or thickness for the outline of the curly bracket shape.
- Click on the Fill option and choose None or a transparent color. This will remove the color fill inside the shape, leaving only the outline (stroke).
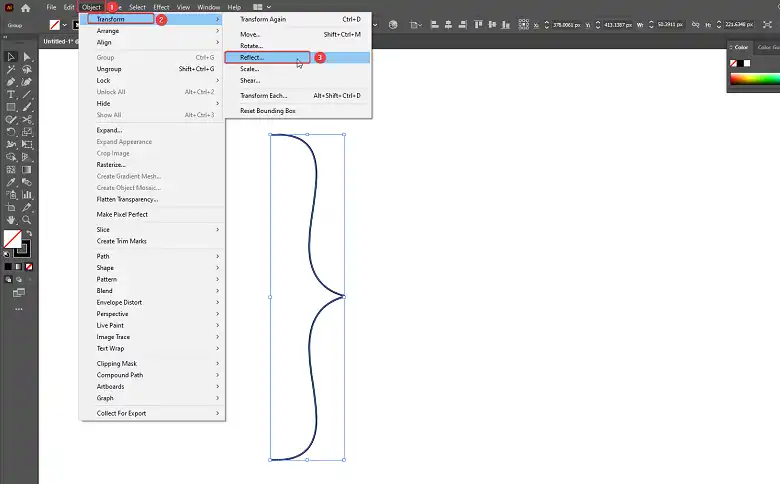
Step 5 – Reflect one of the curly bracket shapes over the vertical axis to create another version.
With the curly bracket path still selected, look for the Object Transform tools (these might be in a separate panel or menu). Click on Object > Transform > Reflect > Horizontal > OK.
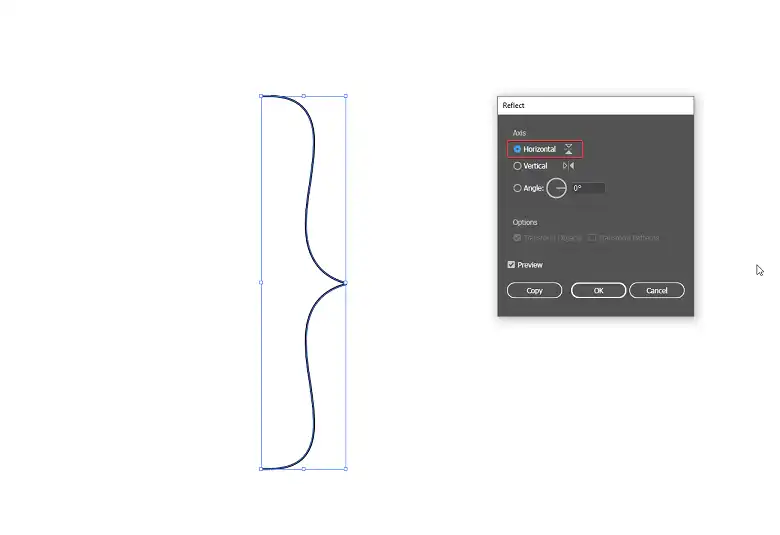
By following these steps, you should have created a curly bracket shape, reflected it vertically to create a mirrored version, and rotated another copy by 90 degrees. Remember, the specific names and locations of tools may vary depending on the design software you’re using, but the general concepts should apply across different programs.
Wrapping Up
You’ve made it to the end and now you know how to create stunning curly braces! Don’t stop here – keep exploring and pushing the boundaries of your creativity. Who knows what amazing designs you’ll come up with next? If you hit any roadblocks, don’t hesitate to ask for help. Hit comment below and I’ll gladly help you out! Happy designing mate, over and out!
