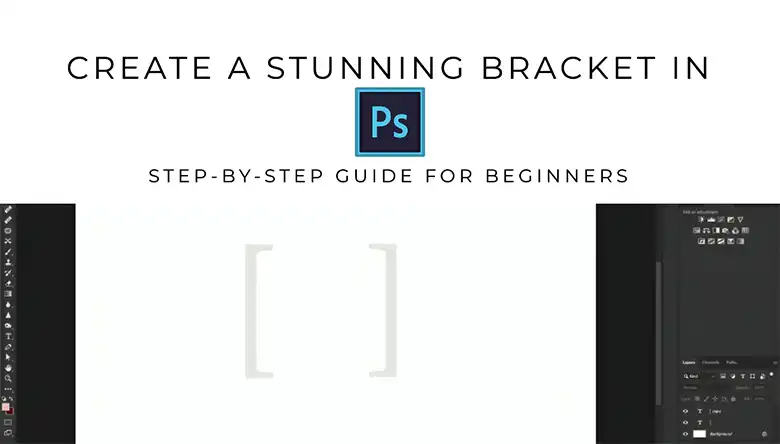
Hey there! I’m excited to share with you an easy tutorial on how to make brackets in Photoshop. As a graphic designer, I frequently need to create visuals with brackets for various projects. Whether it’s for logos, icons, or typography designs, knowing how to make perfect square and curly brackets comes in super handy.
In this guide, I’ll walk you through step-by-step instructions to create both types of brackets from scratch. The process is pretty straightforward, and you don’t need any advanced Photoshop skills. So, whether you’re a beginner or a seasoned pro, you’ll be able to follow along easily. Let’s get started!
Steps to Make a Bracket in Photoshop
Brackets are a common symbol used in many designs. They serve various purposes like highlighting text or numbers. Creating square/curly brackets in Photoshop is super easy. You just need to follow some basic steps. Here’s how you can do it:
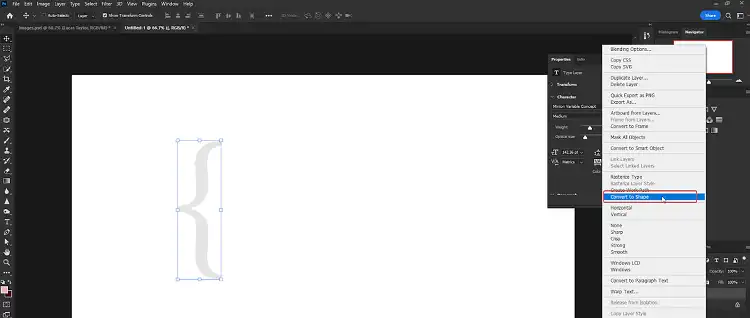
Step 1 – Type a curly bracket: Use the Text Tool (T) and type { or }, any font will work. This will be the base for your curly bracket.
Step 2 – Turn it into a shape: After that, right-click on the Layer at the right pane and then click on Convert to Shape.
Step 3 – Duplicate the Layer: Once you have made it a shape, now you can resize it according to your needs. After resizing, click on the layer and drag it to the new layer option at the bottom to create a new layer.
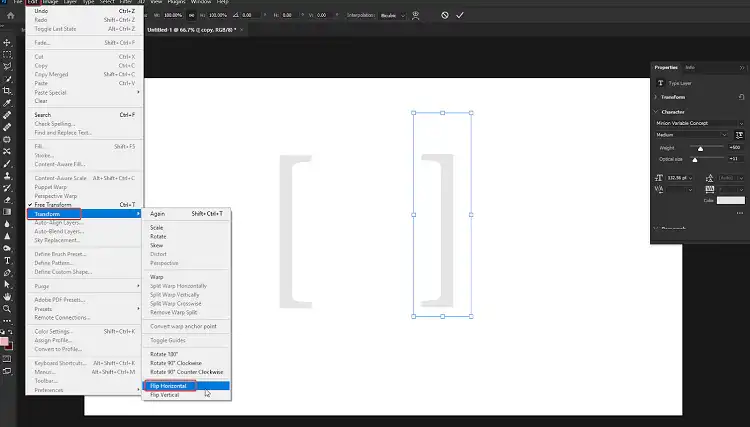
Step 4 – Duplicate the Bracket: Next, click on the Select tool and then select the bracket. After that, click on Edit > Transform > Flip Horizontal. Now, select the flipped bracket and relocate it according to your distance.
FAQ
Can I create different sizes of brackets?
Absolutely! Once you’ve created the bracket shape, you can easily resize it by selecting the layer and using the Free Transform Tool (Ctrl/Cmd + T).
How can I change the color of the brackets?
To change the color of the brackets, simply select the layer containing the bracket shape and adjust the Fill color in the Layers panel or by using the Color Picker Tool.
Can I create brackets with different styles or designs?
Yes, you can customize the appearance of the brackets by modifying the stroke weight, adding patterns or textures, or even combining multiple shapes to create unique designs.
Is it possible to create brackets with rounded corners?
Yes, you can create rounded brackets by using the Rounded Rectangle Tool or by adjusting the corner radius of the existing bracket shape using the Direct Selection Tool.
Conclusion
There you have it, folks! You’ve learned how to make brackets in Photoshop like a pro. With these simple techniques, you can now create visually appealing brackets for all your design needs. Don’t be afraid to experiment with different sizes, colors, and styles to make them truly unique.
If you have any other questions or need further assistance, feel free to leave a comment below. I’ll do my best to help you out. Thank you for reading, and happy designing!