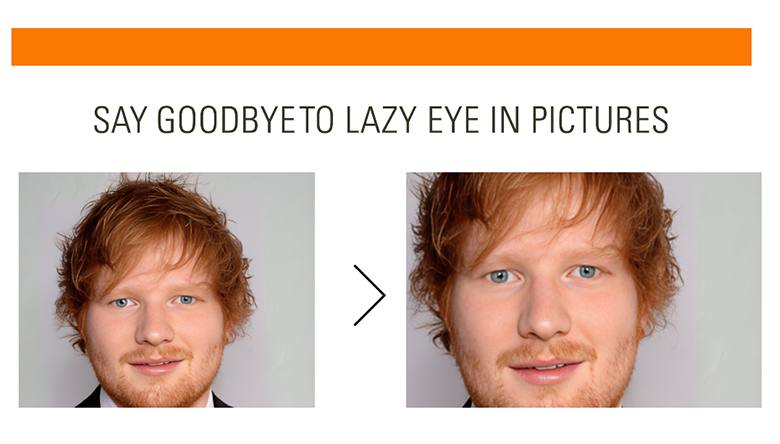
You know that friend who always looks a bit cross-eyed in photos? That’s lazy eye. when one eye wanders inward or outward. It can make people look a little funny in pics. But don’t worry, there’s an easy photo editing trick to straighten those wandering peepers! Just open up the lazy eye photo in your favorite image editor. Use the editing tools to slightly rotate and reposition the lazy eye so it lines up properly with the other eye. A tiny adjustment is all it takes to fix that lazy look. Your friend will be stoked to finally have normal-looking eyes in all their snapshots!

Steps for Fixing Lazy Eye Issue in Photoshop
I will talk about the easiest method to fix the uneven eyes in the next few steps mentioned below. Just make sure you have Photoshop installed on your PC before you start the process.
Step #1
Open Adobe Photoshop and open the image on Photoshop. Click on the Quick Selection/ Lasso Tool from the left toolbar and select the lazy eye on the picture. Make the selection an individual layer by pressing Ctrl + J.

Step #2
You can now move the selection by using the Move tool from the left toolbar. After that, hold shift and drag the selected portion to rotate it horizontally.

Step #3
Now, place the cropped eye and then click on the Eraser tool. After that, click on Brush Preset Picker, and change the size of the eraser, and the hardness according to your need.

Step #4
Here is the final output. Look how accurate it is. Doesn’t matter how lazy it looks in the picture, it can be solved by following the steps mentioned above.

Alternative to Photoshop for Fixing Lazy Eye in a Picture
AI-powered photo editing tools like Lazyeyefix offer a convenient and user-friendly solution for correcting lazy eyes in photographs. These specialized applications leverage advanced artificial intelligence algorithms to streamline the process, making it accessible even to those without extensive editing expertise.
Here’s why Lazyeyefix might be a good choice:
- Simplicity: These editors are designed specifically for this task. Unlike complex software like Photoshop, they require minimal editing skills.
- Speed: Lazyeyefix uses AI to automatically detect and adjust the eye position in seconds, saving you editing time.
- Natural Results: Ideally, a good AI editor should make the correction subtle and maintain a natural look.
Here’s a quick rundown on how Lazyeyefix works:
- Upload your photo to the Lazyeyefix website.
- The AI analyzes the image and identifies the eyes.
- It then adjusts the position of the lazy eye to match the other eye.
- In a few seconds, you have your edited photo with the lazy eye corrected.
How Do You Prevent A Lazy Eye In Pictures?
If you want to get your eyes look straight to the camera, you may need to practice for the perfect camera angle with a mirror. This will provide you with an idea of how you should look and which direction you should look at the camera during a photoshoot. For a better result, hold your head in a position that is relative to the camera.
Final Words
The truth is, you can get rid of the lazy eye issue by being a little bit cautious. If you already have taken one, you can fix the issue by using the Photoshop hack. This will let you have a better image without any effort. However, this thing will need enough proficiency, otherwise, it will be hard to get the best result. If you have a lot of them then you can reach us to get your job done!
It may take 5-10 minutes for anyone to fix a lazy eye. Following the photoshop instructions accurately will let you have a better fix that will look real.

