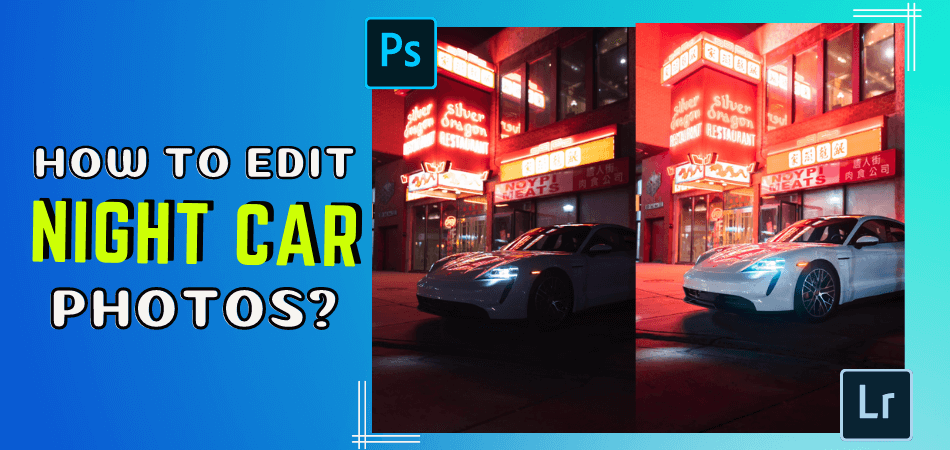
Do your night car photos look dark and blurry? Don’t worry, we can fix that! Shooting cars at night is hard because there is little light. But with some editing, your night car photos can look amazing.
This guide will teach you how to edit night car photos by using Lightroom and Snapseed. You will learn tricks to make the photos brighter and clearer. The edits will reveal details you couldn’t see before. Colors will pop, and the car will shine like new.
After following these steps, your disappointing night shots will become incredible photos. Friends and other car lovers will be stunned by how good the pictures look. Get ready to turn those dark, blurry messes into works of art!
We provide professional car image editing services that you are probably looking for.
Once you have perfected the technique for editing nighttime images, the results can help you gain popularity and build your brand. This article will go over how-to guides and software applications for editing nighttime car images.

What Should You Edit in Night Car Photos?
To edit your night car photos, you may need to change a lot of settings under any application. Due to the strong chips of iPhones, you can edit night car photos on iPhone apps without needing a PC.
The basic things to change while editing a night car photo are:
- Exposure
- Contrast
- White balance
- Shadow
- Temperature
- Color grading
- Saturation
- Luminance
Most stock photo editing applications on a smartphone or a PC won’t allow you all these options. That is why it is better to use authentic software such as Adobe Photoshop and Lightroom for computers.
These days, smartphones like the iPhone and Android models use strong chipsets to perform demanding photo editing applications.
There are also smartphone versions of Adobe Photoshop and Lightroom, which are free to use. Hence, one can edit car photos in Lightroom mobile as well.
Furthermore, you can use Google’s Snapseed application or Picsart to get more reliable options for editing.
Method 1: By Using Lightroom
Lightroom is one of the most useful tools for editing nighttime car photos. Moreover, it is available for both PCs and smartphones with similar interfaces. A similar interface is available in Photoshop if you need to edit car photos on Photoshop.
Step 1: Import the Picture in Lightroom
Firstly, you must take multiple pictures of your car using different settings of the camera. From all the RAW images, you should select the best looking with better exposure and light for editing.
Step 2: Exposure Correction
Exposure is the primary thing you should start with while editing the night car photos. Drag the exposure slider slightly upwards to better look at the details and deep shadows on the car’s body.
It is better not to overexpose the picture than the original settings. For darker and more intense results, you can decrease it. But be careful about the details while sliding the exposure.
Step 3: Highlight and Shadow Correction
It is an important step that most people miss. Lower the highlight to get more focus on the background. The details in the background are enhanced without damaging the quality of the subject.
Next, you can increase the shadows by 4-5 units to increase the focus on the car. Try not to bring up too much noise doing it.
Step 4: Whites and Blacks Correction
It is better to increase the White a bit or leave it as it was for night photos. It helps to pop the details in the background. On the contrary, the Blacks should be balanced with a slight increment so that the detail of the subject is not damaged.
Step 5: Saturation Control
The saturation correction depends upon the exposure of colors in your car photo. You should handle it very carefully because over or under-saturated balance degrades the color quality of the subject.
Step 6: Color Balance
In this step, you need to focus on the available colors in the photo. Check which colors can highlight the car without causing much damage to the background. It requires a lot of trial and error to balance the color grading.
For this, you should start with the colors of the car body, headlights, and tints of the window panels for better results.
Step 7: Sharpening the Photo
For nighttime photos, it is important to look out for the noise on the subject. Increasing the sharpness will also increase the amount of noise.
Hence, you can use the masking option under sharpening to check the areas with higher noise and eliminate them without making the picture smooth.
Method 2: By Using Snapseed
Snapseed is Google’s free yet very efficient photo editing application based on smartphones. It allows you to edit your night car photos on the go without needing heavy computer setups. The results from Snapseeds are also quite satisfactory for social media uploads.
Step 1: Selecting Photo
Start by selecting and opening the picture on the Snapseed interface. There are three major options Styles, Tools, and exports. Select the tools to open all the basic image tuning options.
Step 2: Tuning Image
In the upper left corner is the tuning option. Under which you will find the Brightness, Contrast, Saturation, Ambiance, Highlights, Shadows, and warmth sliders.
For enhancing, night car photos, you must increase the brightness, contrast, ambiance, and highlights. All these should be balanced perfectly by sliding the pointers.
On the other hand, you can decrease the saturation, shadows, and warmth by a few points to focus on the aesthetics of the nighttime car photo.
Step 3: Curve Correction
Next, select the Curves under the tools option and manipulate it to get the suitable color and highlights of the picture. Select the color grading palette to focus on the color correction of the car body. It can be avoided if the car is painted black or white.
Step 4: White Balance
It is not mandatory to use this section for night photos. But if necessary, the tints and temperature of the photo can be shifted using the White balance.
Step 5: Other Options
Apart from there, there are some advanced buttons for editing, such as the “Selective.” It allows you to select a specific area on the photo and tune it manually. You can use it to change the focus of the background or subject.
Moreover, using the Brush tool, you can manually shift the saturation, temperature, and exposure on the selected fields. It gives you moreover editing the pictures. But these should be handled carefully as the slightest missing details can ruin the photo.
Some Tips on Editing Night Car Photos?
There are some mandatory factors that you must emphasize more while editing night car photos. These tips will help you get good reviews if you run a nighttime image editing service.
Lighting
Lightening is the key factor for nighttime car photos. Makes sure the picture is taken in lower ISO and higher exposure settings for maximum light. It allows controlling the lightning easily while editing.
Underexposed pictures have very low room for manipulating the brightness or exposure afterward.
Car Painting
Take more time to focus on the paint color of the car. Since night photos have lower color intensity capture, you must manually pop the colors of the painting as naturally as possible. If the car is painted in black or white, the work becomes easier.
Background Color Selection
The background in the nighttime car photos greatly affected the viewers. Pay attention to the details of the background. If it’s nature, then the colors should not get faded or under-saturated.
Besides, if there are writings, posters, or buildings in the background, the sharpening of the background should be balanced carefully.
Conclusion
We covered a lot of editing tips for night car photos. You learned how to adjust exposure to brighten dark images. You used contrast to make the cars stand out. Dodging and burning enhanced specific areas.
Editing night shots takes time and practice, but it’s worth it. With these new skills, you can transform any nighttime car photo. Blurry, underexposed messes become vibrant, detailed masterpieces.
Keep experimenting and improving your night photo edits. Soon, your car pictures will dazzle everyone who sees them!

