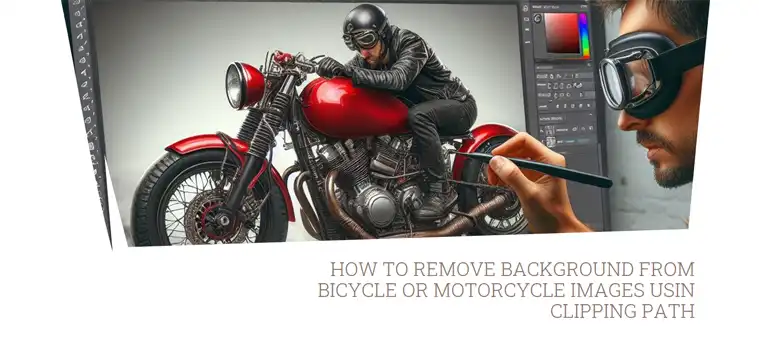
Riding a bike or motorcycle is a fun activity that many people enjoy. However, capturing the perfect photo of you on your favorite two-wheeler can be tricky with distracting backgrounds. That’s where clipping paths come in handy! Clipping paths allow you to precisely cut out the bicycle or motorcycle from the photo and replace the background with something cleaner or more dramatic.
That’s why I learned how to use clipping paths in Photoshop to cut out my bikes from photos. It takes some work to trace around the edges just right, but the results are so worth it. In this guide, I’ll teach you everything I know about removing backgrounds with clipping paths. With a little practice, you’ll be editing pro-level cycling shots in no time! Let’s do this so you can take your bike photos up a gear.
How to Remove Bicycle or Motorcycle Background with Clipping Path in Photoshop?
Clipping paths are vector paths that outline the edge of the subject you want to isolate. By creating a precise clipping path around your bicycle or motorcycle, you can cleanly cut it out from the background. Here are the step-by-step instructions for removing backgrounds with clipping paths in Photoshop:
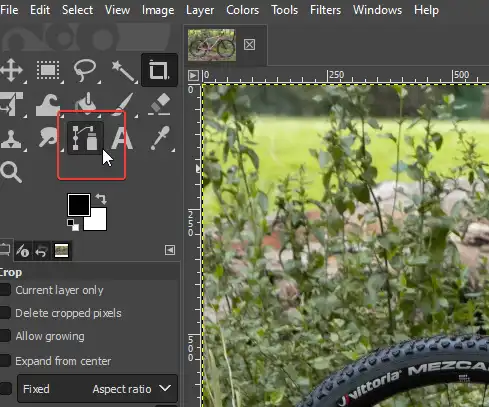
Step 1: Open Image in Photoshop
Open the image with the bicycle or motorcycle photo in Photoshop. Make sure the background layer is unlocked or flatten the image if needed.
Step 2: Zoom In
Use the Zoom tool to zoom in close on the edges of the bicycle or motorcycle. Getting a closeup view will help you create a more accurate path.
Step 3: Make Path with Pen Tool
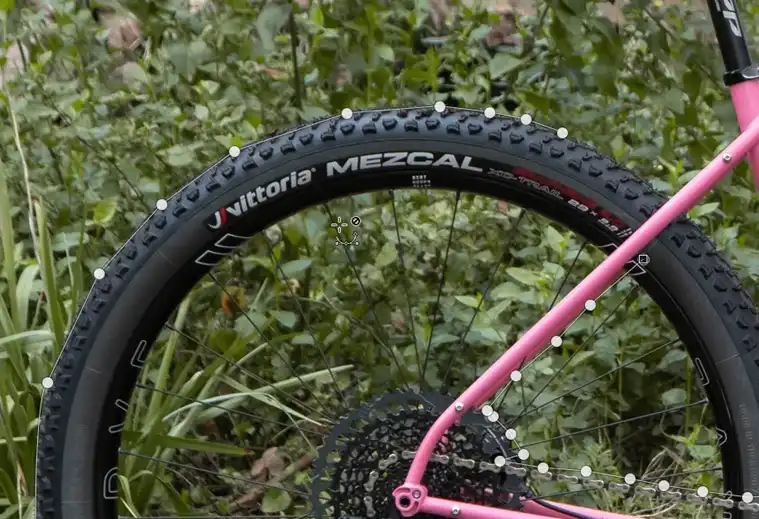
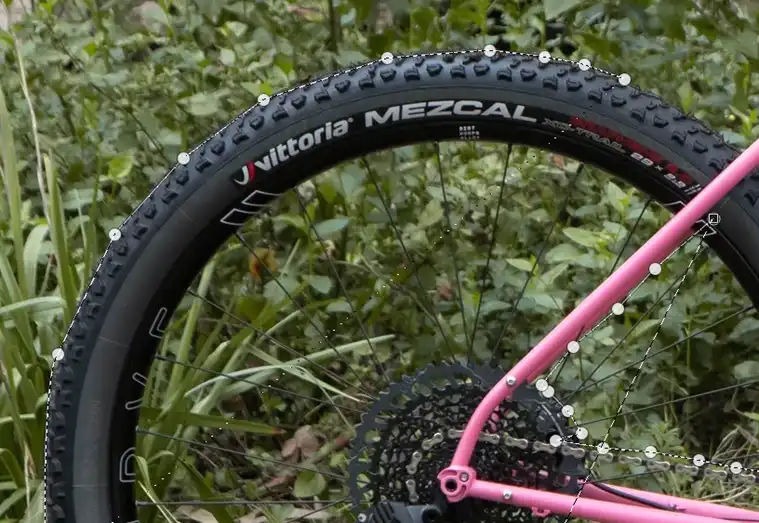
Select the Pen tool from the toolbar. Carefully trace around the edges of the bicycle or motorcycle using anchor points to outline the shape. Click to add anchor points and drag to create curves.
Aim for using fewer points with smooth curves instead of many jagged points. Zoom in on tricky areas like spokes to plot precise paths.
Step 4: Complete the Path
Once your path outlines the entire shape, click the starting anchor point to complete the path. Right-click the path in the Paths panel and select Make Selection. Or you can select selection from the top menu bar.
Step 5: Refine Selection
Use the Refine Edge dialog to fine-tune the selection. Adjust the Feather values to 0 to soften the edges. Shift the edge in or out as needed to capture flyaway hairs or other fine details.
Step 6: Create a New Layer
With the bicycle or motorcycle selected, add a new Layer to hide the background. To do so, click on Layer > Layer via cut or you can press Ctrl + shift + j to create layer via cut.
Step 7: Change to Solid Color and Remove the Background
Now, select the actual bike or motorcycle layer in the Layers panel. At the bottom of the Layers panel, click the Adjustment Layer icon and choose Solid Color. This will add a new colored background behind your subject.
Choose a color that complements your photo, like a bold blue or green for pops of color. When you’re happy with the new background, click OK to close the color picker and save your changes. The solid color adjustment layer offers an easy way to instantly change the backdrop behind your clipped-out bike or motorcycle.
There you have it, a new background for your bicycle or motorcycle!
My Takeaways for Effective Clipping Paths
Follow these tips for creating professional, high-quality clipping paths for bicycle and motorcycle photos:
Use the Pen Tool – The Pen tool allows you to create precise paths and gives you the most control. Take your time to anchor points accurately along the edges of the object you want to isolate.
Create smooth curves – Avoid sharp angles and jagged lines by using smooth bezier curves with the Pen tool. Click and drag the direction lines to create smooth curves that follow the shape of the object.
Minimize anchor points – Only use as many anchor points as needed to trace the shape. Too many points can make the path uneven.
Pay attention to tricky areas – Take extra care around intricate details like hair, lace, or transparent objects. Zoom in to place points exactly.
Use layers – Doing clipping paths on a separate layer from the image keeps things non-destructive. You can go back and edit the path easily.
Refine the path – Review your finished path at both 100% zoom and full size. Refine, add, or remove points to get a clean silhouette.
Save paths – Clipping paths take time, so save them to use again if needed. They can be reused for future projects.
Practice – As with anything, clipping paths take patience and practice. Attempt different images to improve your path skills over time.
With practice and patience, you can create professional clipping paths around bicycles, motorcycles, and any subjects with intricate outlines and details!
Alternative to Clipping Path for Removing the Background
While clipping paths are the gold standard for cleanly removing backgrounds in Photoshop, there are some alternative options worth considering:
GIMP
GIMP is a free open-source image editing program similar to Photoshop. The tools work in a very similar way for creating paths and selections. The Paths Tool lets you plot anchor points around a subject just like the Pen Tool in Photoshop. This generates a selection that can be used to mask out the background. Here are the steps for removing background using GIMP –
Click the Paths tool in the toolbar.
Outline the subject by clicking points around the edges. Curve the path by dragging endpoints. Adjust points to trace the shape.
Keep clicking around the subject until the entire outline is complete. Close the path by clicking the first point again.
Press Enter to make a selection from the path. You’ll see an outline around the subject.
Go to Select and choose Invert to switch the selection to the background.
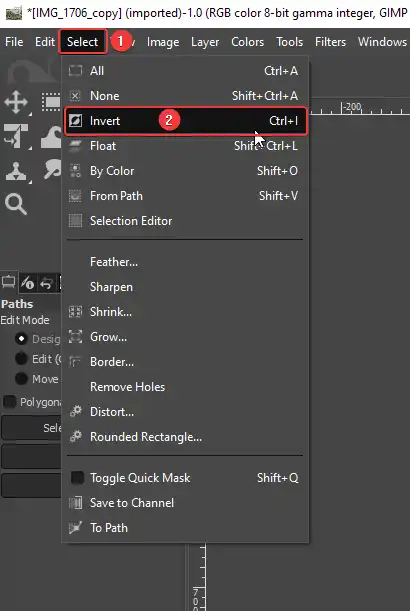
Press Delete to remove the selected background.
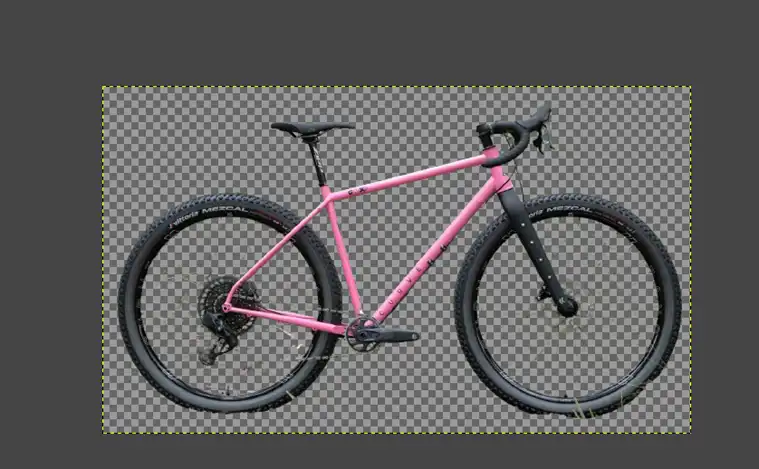
The process involves more steps in GIMP, but you can achieve the same background removal effect. For cyclists and motorcyclists looking for free software, GIMP provides a viable clipping path alternative.
Canva
Canva offers basic background removal functionality through its online graphic design platform. They have templates for social media posts, ads, and presentations.
Here are the steps –
- Upload an image or choose one from our library.
- Click Edit Image at the top.
- On the left panel, select Background Remover.
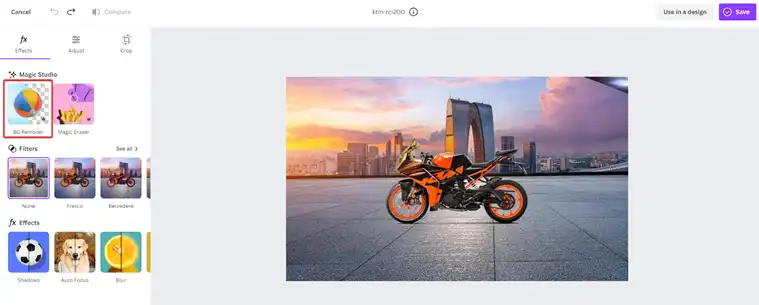
- Click on Save to save the background removal.
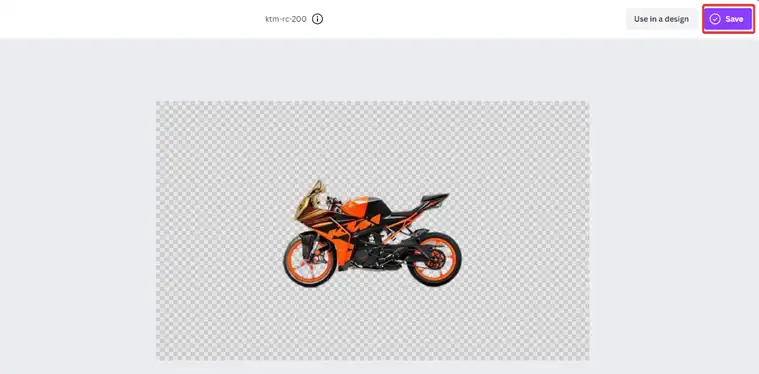
The background removal on Canva works decently for simpler product shot-type images. For photos with intricate details or flyaway pieces, the results may be messy. Overall, Canva offers a quick automated option suitable for general social media use. But serious photographers require true clipping paths.
Background Removal Sites
There are various websites like RemoveBG, Let’s Enhance, and Slazzer that allow you to remove photo backgrounds automatically. Simply upload your bicycle or motorcycle photo and their AI algorithms will detect edges and delete the background.
The technology has improved, yielding better selections than in the past. However, hands-on clipping paths still produce superior cutouts for tricky subjects. The automated tools can struggle with motion blurs, shadows, translucent objects, and fine details. Here are the steps –
Go to any Background Removal website.

Then choose a picture of your bicycle or motorcycle, and upload it.

Wait a couple of seconds and the AI will remove the background for you
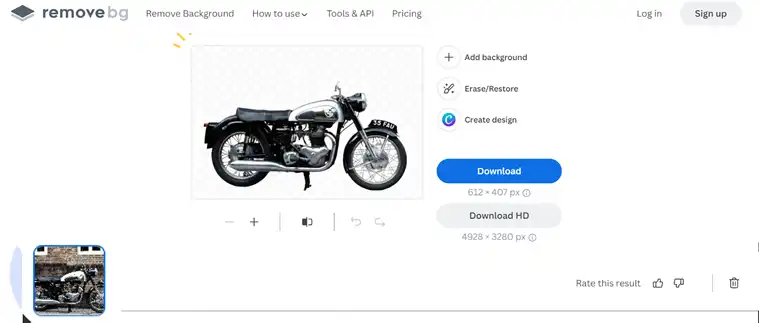
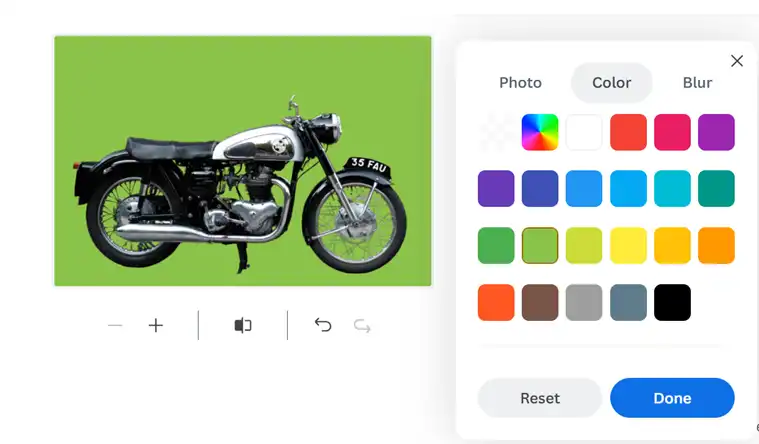
If you want to change the background color or provide something else, then you can do that by clicking on Add Background.
However, background removers work well for general product shots and static images. But bikes and motorcycles often include complex spokes, chains, and hair that require manual editing. For quality results, most photographers turn to true clipping paths over automated options.
Benefits of Clipping Path Background Removal
Why put in the extra effort to create clipping paths for removing your bicycle and motorcycle backgrounds versus using quicker alternatives? Here are some key benefits:
Precise Control
Clipping paths give you maximum control over the selection. You can plot exact points along the edges to cleanly cut out flyaway hairs and other tricky elements that are hard to isolate. Automated tools simply can’t match the precision of hand-drawn paths.
High Resolution
Paths retain the full resolution and quality of the original photo. Automated tools often degrade image resolution in the process. Clipping paths preserve detail for crisp, sharp edges.
Flexible Editing
With paths, it’s easy to go back and refine the selection as needed. Automated extractions are fixed. The intricate selections possible with Photoshop make clipping paths the choice for quality results.
Saves Time For Batch Work
While clipping paths take longer initially, you can save and reapply the same path to other photos from a shoot. That makes the work pay off when editing batches of similar images.
For professional photographers and discerning cycling enthusiasts, clipping paths are worth the effort. No automated tool can replicate the fine selections possible by hand. With practice, anyone can master the Pen Tool and achieve expert-quality background removal.
FAQs About Background Removal With Clipping Paths
What resolution do I need for clipping paths?
Aim for an image that is at least 300 PPI (pixels per inch). Higher resolution provides more detail for creating a precise path around the edges. Avoid pixelated images.
How can I avoid jagged edges?
Work slowly and use fewer anchor points with smooth curves instead of excessive points. Refine the edge with a smooth setting. Zoom in on tricky areas and cut out strands carefully.
What’s the best file format?
Save your clipped paths as PSD files to retain layers for adjustment later. PNGs also work well. Avoid lossy formats like JPG that degrade quality.
Should I remove the chain/spokes?
It’s optional. Keeping them can look more natural. But removing them simplifies the clipping path process.
How much does it cost to get clipping paths made?
Professional services charge $2-$5 per image. Complex shapes take more time. DIY in Photoshop saves money but requires practice.
Can I reuse a clipping path on other photos?
Yes, save your path then load it as a selection of similarly framed photos from the same shoot. Reapply to batch process.
With the right techniques, you can achieve professional background removal for all your biking and motorsports photos. Clipping paths give creative control no automation tool can duplicate.
Conclusion
And that wraps up everything you need to know to clip out your favorite cycles or motorcycles like a pro! Tracing careful paths and masking out the background takes some time and practice. But it’s worth it for awesome, high-quality results.
Give it a try on your next set of biking or motorcycle photos. Feel free to reach out if you have any other questions! Ride on!