Like many artists, I use both Photoshop and Clip Studio Paint in my digital art workflow. But I always struggled to figure out how to get my favorite Photoshop brushes into Clip Studio. Importing brushes seemed confusing at first.
But it doesn’t have to be! In this post, I’ll show you the two easy methods I use to import Photoshop brushes into Clip Studio Paint. Whether you drag and drop or use the import menu, you’ll learn how to get those brushes right into Clip Studio to use in your art.
I’ll also share my tips for customizing imported brushes so you can organize them just how you like. Read on to finally learn the simple steps for importing brushes between these two popular programs!

Way to Import Photoshop Brushes into Clip Studio Paint
There are two main methods for importing Photoshop brushes into Clip Studio Paint. The first method is to use the built-in brush import feature in Clip Studio. This allows you to directly import Photoshop ABR brush files into the Clip Studio brush library. The second method is to manually drag and drop the Photoshop brush. Here’s how you will need to get your job done –
Drag and Drop Method
The easiest way to import Photoshop brushes into Clip Studio Paint is through a simple drag and drop:
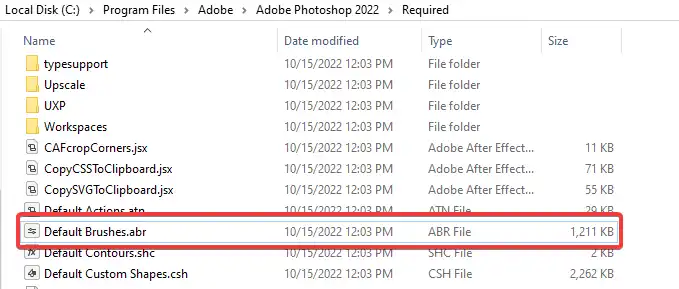
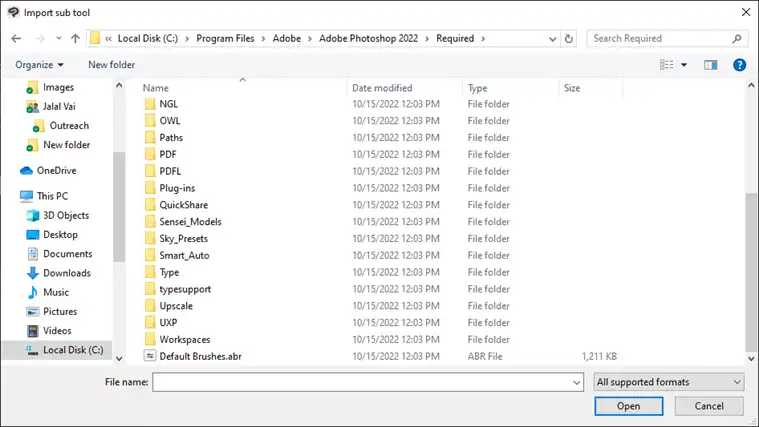
- Locate the Photoshop brush files on your computer. Photoshop brushes usually have the file extension .abr. They are often saved in a folder called Required within the Adobe Photoshop folder.
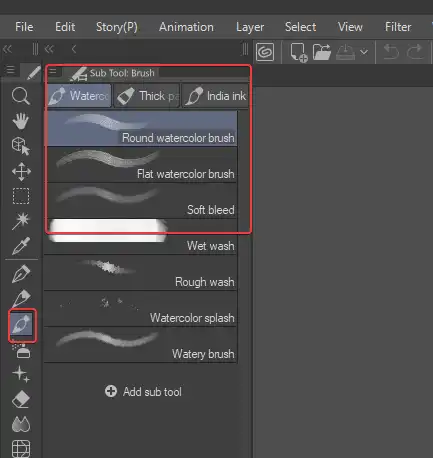
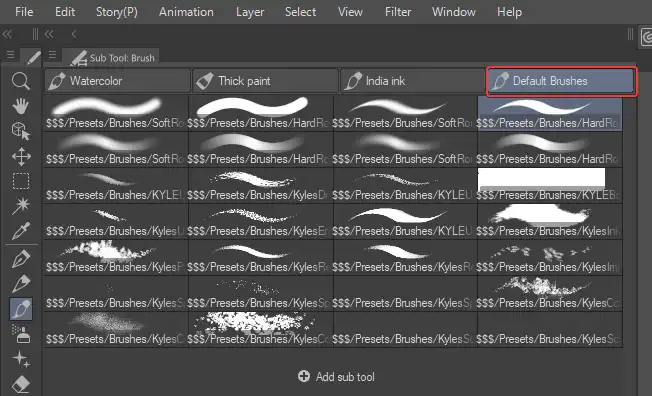
- Open Clip Studio Paint and go to the Sub Tool Detail palette. This is where you manage brushes and other tools in Clip Studio.
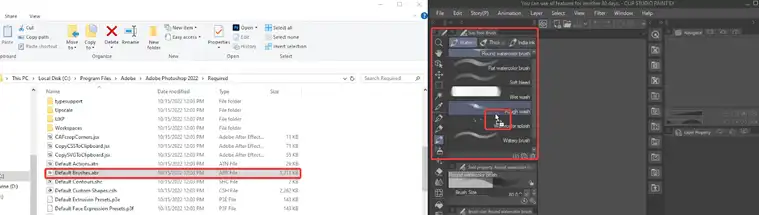
- Select the brush file you want to import and drag and drop them into the Sub Tool Detail palette window.
That’s it! The Photoshop brushes will now be imported and available for use in Clip Studio Paint. You can access them from the Sub Tool Detail palette.
The drag and drop method makes importing Photoshop brushes into Clip Studio Paint quick and easy. As long as you have access to the original .abr brush files, you can add them to your Clip Studio brushes in just a few clicks.
Import Menu Method
You can also use the import menu in Clip Studio Paint to bring in Photoshop brushes:
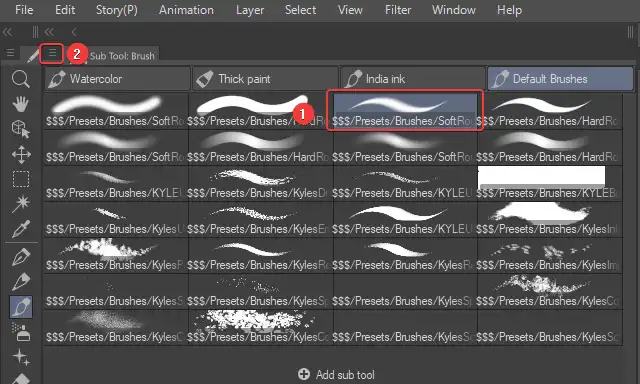
- Open Clip Studio Paint and then click on the brush icon to open the Sub Tool Detail palette.

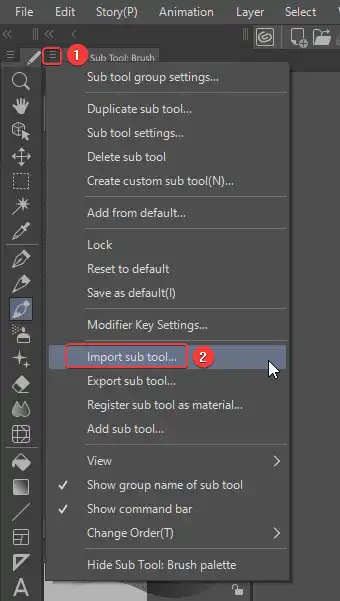
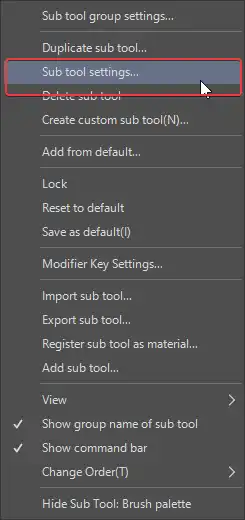
- After that, click on the hamburger icon at the top left of the Sub tool palette window and then click on the Import sub tool.
- An import window will open. Navigate to the folder containing your Photoshop brushes.
- Select the brushes you want to import. You can import multiple brushes at once by holding Ctrl/Command while clicking.
- Click Open in the bottom right corner.

- The import progress bar will display. When it’s done, the brushes will be added to your Clip Studio brushes.

- You can now access them from the Sub Tool Detail palette.
While not as fast as drag and drop, the import menu method achieves the same result. And it may be preferable if you want to import lots of Photoshop brushes at once.
No matter which method you use, the imported brushes will act just like regular Clip Studio brushes. You can organize, customize, and use them in your artwork.
Here are some tips when importing Photoshop brushes into Clip Studio Paint:
- Make sure you have the original .abr brush files from Photoshop. You can’t import brushes from a Photoshop preset library.
- Photoshop and Clip Studio use different file formats. The import converts Photoshop brushes into Clip Studio’s .sut format.
- Large, high-res brushes may load slower in Clip Studio. Try optimizing them before importing.
- Grouping brushes in folders can help keep them organized in Clip Studio.
- You may need to adjust brush settings like size and opacity after importing.
How to Rename the Imported Brush in Clip Studio Paint?
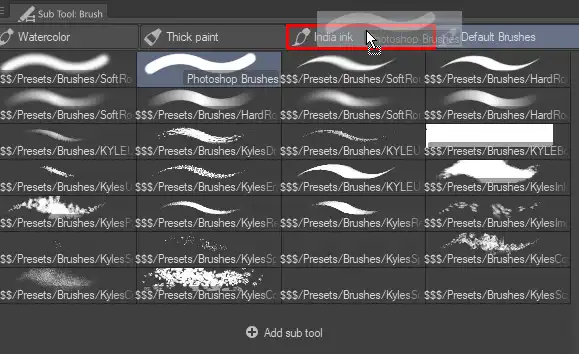
When you import Photoshop brushes into Clip Studio Paint, they are saved within a folder titled “Imported” by default. Here’s how to rename this imported brush folder:
- Open Clip Studio Paint and go to the Sub Tool Detail palette.
- Select the Imported brush and then click on the Hamburger icon.
- Click on Settings of Subtool.
- Type in a new name for the brush. For example, you could name it “Photoshop Brushes”.
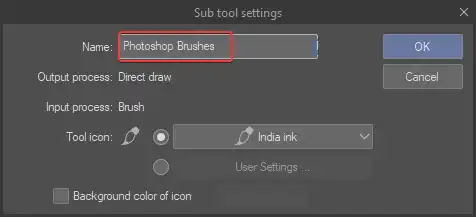
- Press Enter/Return to complete the name change.
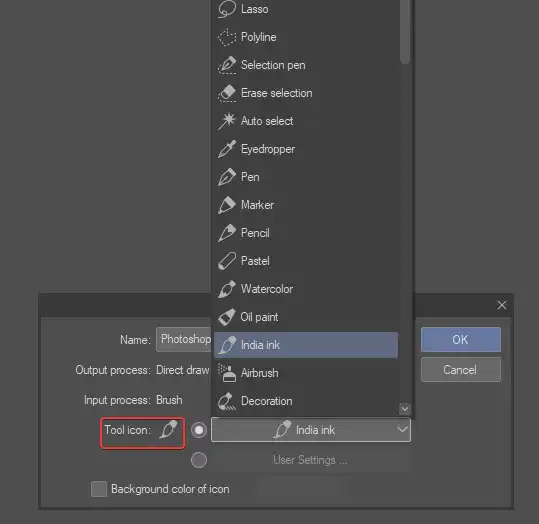
- You can also change the icon of the brush if you want.
The folder name will now be updated to your custom name. Renaming it can help you stay organized if you import lots of different brush sets.
You can also move the imported brushes into different brush libraries. Here’s how:
- Select the brushes you want to move.
- Drag the brushes into the desired library and drop it.
Moving the brushes out like this intermingles them with your other Clip Studio brushes. It’s a matter of personal preference how you organize imported brushes within the software.
Common Questions about Importing Photoshop Brushes
Will imported brushes work exactly the same in Clip Studio as they do in Photoshop?
In most cases, imported brushes will look and function very similarly between the two programs. However, there can be minor differences in how brush strokes blend or react based on each program’s unique canvas engines. Be prepared to tweak settings like opacity, flow, or shape dynamics if a brush isn’t behaving perfectly after import.
Does importing brushes allow me to edit them within Clip Studio?
Unfortunately, importing Photoshop brushes provides access to use them only. To customize or edit brushes, you need to create new ones natively within Clip Studio Paint.
Can I export my Clip Studio brushes back into Photoshop?
Yes! Clip Studio brushes use the same .abr format that Photoshop recognizes. To export a Clip Studio brush, right click on it in the Materials pane and select Export Brushes. Then import the .abr file back into Photoshop.
What happens if I import a brush that shares a name with one already in Clip Studio?
If you import a Photoshop brush that has the same name as an existing Clip Studio brush, it will simply get renamed upon import. For example, if you had a brush called “Oil” in both programs, the new imported Photoshop brush would be renamed to “Oil (1)”.
How can I tell which of my brushes are imported versus made in Clip Studio?
Imported brushes display a little purple Creative Cloud icon next to their name in the Clip Studio materials pane. Brushes created within Clip Studio will not have this icon.
Wrapping Up
I hope you now feel confident to try importing your own brushes using the simple drag-and-drop or import menu methods.
Customizing the organization of imported brushes is really helpful too. Rename folders or move brushes around until your Clip Studio library makes sense to you. Having easy access to your favorite brushes from both programs makes digital art so much more fun!
Let me know in the comments if you have any other tips for smoothly importing brushes between Photoshop and Clip Studio. I’m always looking to improve my workflow. Thanks again for reading, and happy creating!