When you’re creating a stunning graphic, a logo, a digital masterpiece, and then… you need a curved line. You grab the Pen tool, click and drag, and… disaster. A jagged monstrosity that wouldn’t look out of place in a bad 8-bit video game stares back at you. You try the Brush tool, but it ends up more like a drunken caterpillar’s path than a graceful curve. Frustration sets in, and you’re ready to throw in the digital towel.
But wait! Before you abandon your design dreams, let me assist you in drawing a curve line into your design. In this article, I’ll walk you through 4 ways with step-by-step instructions and images.
Ways to Draw a Curved Line in Photoshop
There are several intuitive tools available in Photoshop to create custom curved lines. The main four are:
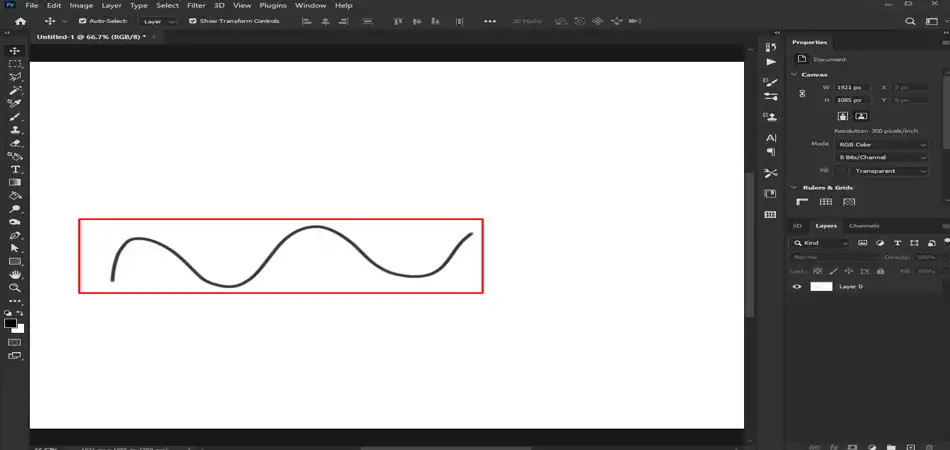
Way 1 – By Using the Brush Tool
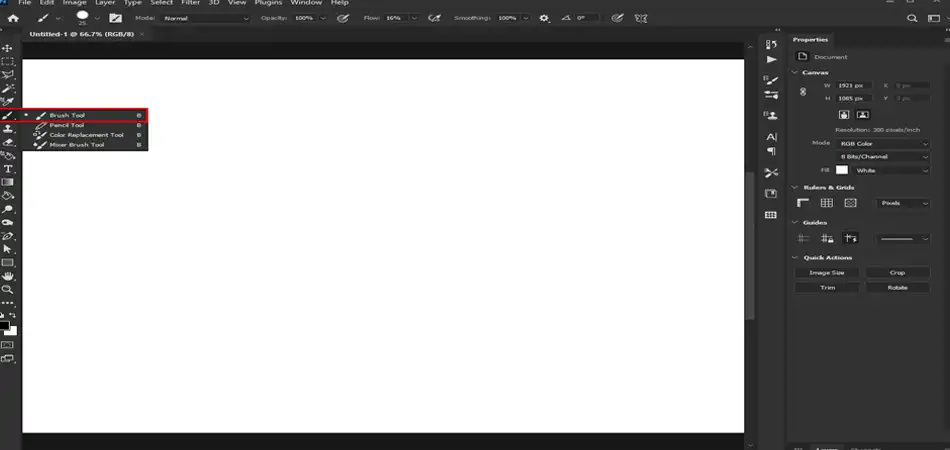
The Brush Tool in Photoshop, while often overlooked for intricate line work, can actually be a surprisingly versatile tool for drawing smooth curves. While it might not offer the same level of control as the Pen Tool, it’s a great option for beginners or for those who need a quick and dirty curve in their designs. To use it:
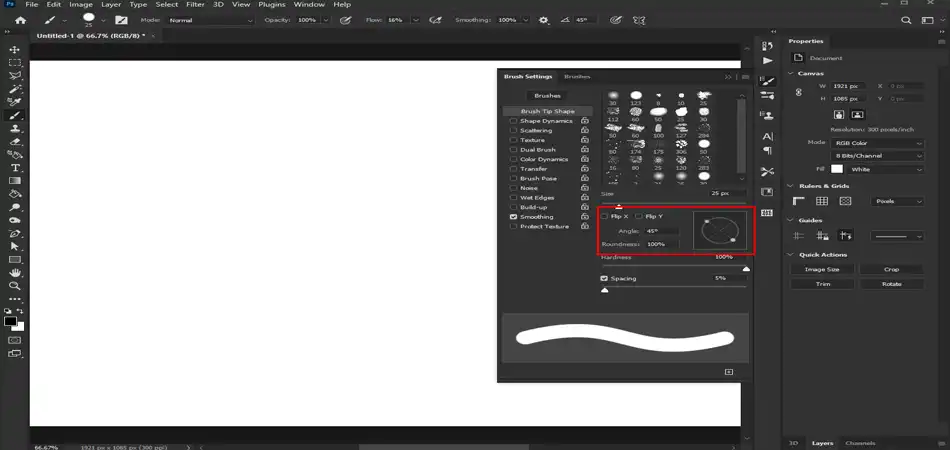
Step 1. Setting Up the Brush
Brush Selection: Choose a brush with a soft edge for smoother curves. Round brushes work well but experiment with different shapes and textures to achieve unique effects.
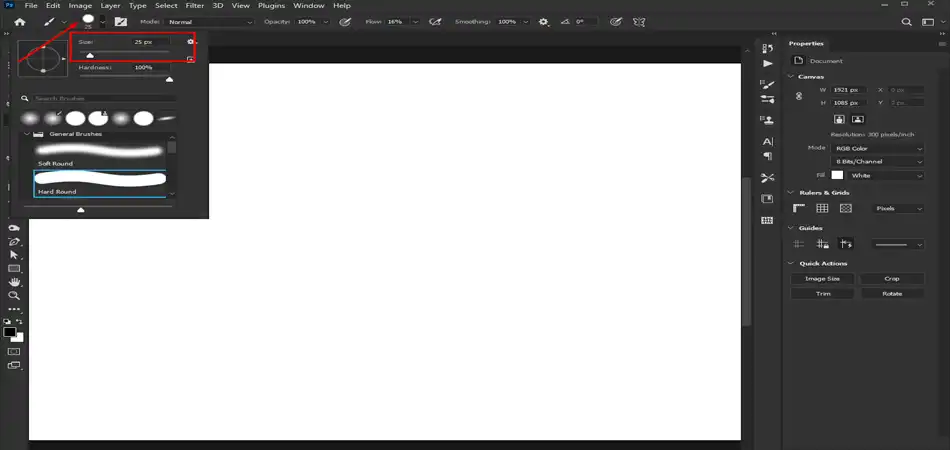
Brush Size: Adjust the brush size to suit your needs. Larger brushes are better for gentle curves, while smaller ones give you more control for tighter bends.
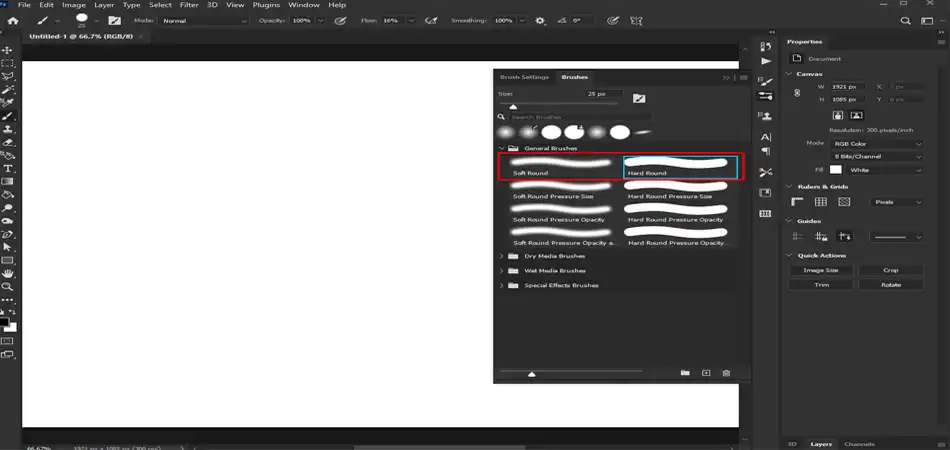
Hardness: Softer brushes will create smoother curves, while harder brushes will result in sharper bends. Find a balance that works for your desired outcome.
Step 2. Drawing the Curve
Shift Key: Hold down the Shift key while dragging to constrain the line to a 45-degree angle. This can help you create straight segments and sharp corners within your curve.
Click and Drag: Click and drag your mouse to draw the curve. Don’t worry about being too precise at this stage; you can always refine your line later.
Multiple Clicks: Instead of dragging a continuous line, you can click at different points to create a more controlled curve. This method is helpful for creating curves with specific angles or changes in direction.
Step 3. Refining the Curve (Optional)
Path Smooth Tool: Once you have your basic curve, use the Path Smooth tool to smooth out any jagged edges or imperfections. You’ll find it under the Edit menu > Smooth.
Anchor Points: If you need more control over the curve’s shape, you can convert your brush strokes to vector paths. Right-click on your curve layer and choose Convert to Path. This will allow you to adjust individual anchor points and refine the curve further using the Pen Tool techniques.
Bonus Tips
Adjust brush size and hardness: Smaller and harder brushes offer more control for tighter bends, while larger and softer brushes are better for gentle curves.
Hold Shift while dragging: This constrains the line to a 45-degree angle, useful for creating straight segments within your curve.
Click and drag instead of one long stroke: This gives you more control over the direction and smoothness of the curve.
Way 2 – By Using the Pen Tool
The Pen tool generates precise vector curves by placing anchor points and shaping segments. To use it:
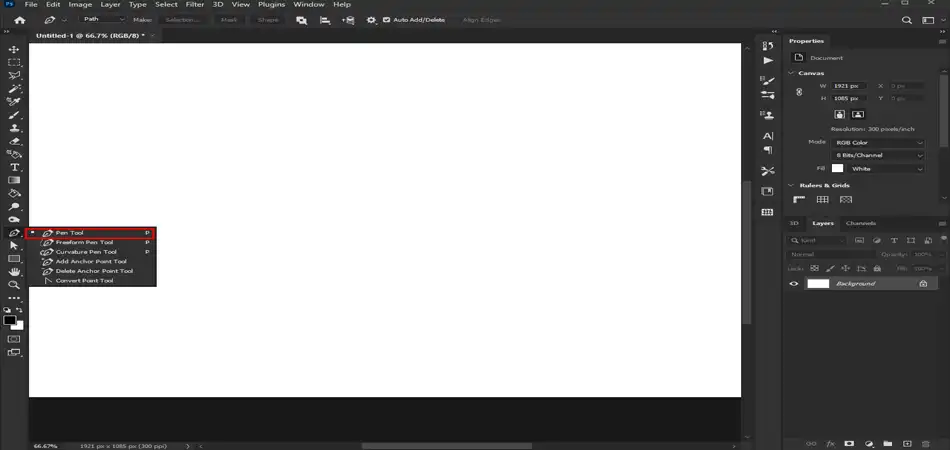
Step 1 – Pen Tool Selection
Choose the Pen Tool from the toolbar. You’ll find it nestled among the other shape tools.
Step 2 – Path Options
In the options bar above the canvas, ensure Path is selected under Mode. This ensures you’re creating a path, not a shape.
Step 3 – Stroke and Fill
You can adjust the stroke weight and color for your curve in these options, but remember, the focus here is on the path itself. You can always add fills and effects later.
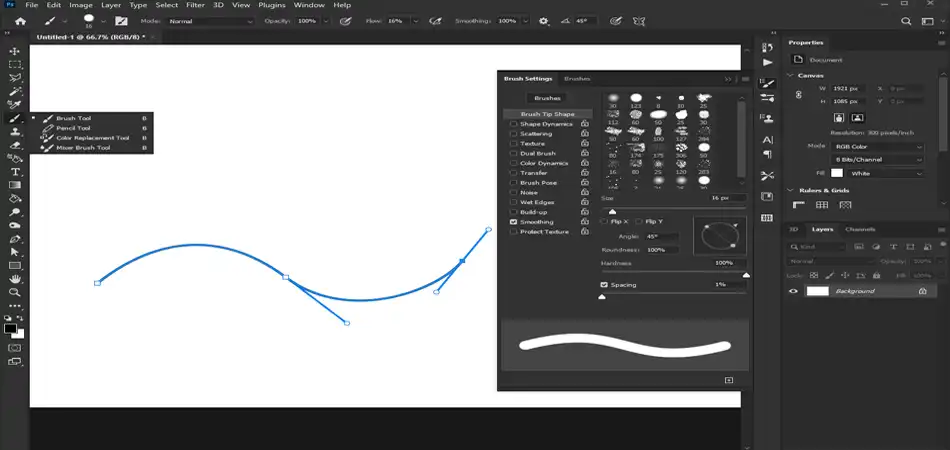
Step 4 – Anchor Points
Click your first anchor point where your curve begins. Each click creates a new anchor point, forming the skeleton of your curve.
Step 5 – Click and Drag the Magic
Click and drag the next anchor point to define the direction of your curve. The further you drag, the stronger the curve. Think of it like pulling an elastic band!
Step 6 – Direction Handles
Notice the little handles that appear on each anchor point? These are your curve-shaping superpowers! Drag them to adjust the slope and tension of the curve segment. Play around with these handles to achieve the desired smoothness and flow.
Step 7 – Corner Points vs. Smooth Points
By default, your anchor points are smooth, meaning they create a gentle curve between them. To create a sharp corner, hold Alt/Option (Mac) while clicking the next anchor point. This transforms it into a corner point, resulting in a 90-degree angle.
Step 8 – Path Smooth Tool:
The Path Smooth tool under the Edit menu is your curve-smoothing savior. It will iron out any bumps and jags, leaving you with a silky-smooth line.
Step 9 – Direct Selection Tool
Need to adjust individual anchor points after smoothing? The Direct Selection Tool (white arrow) is your friend. Select an anchor point and use the handles or simply drag it to reshape the curve.
Bonus Tips
Click and drag to define the direction and strength of the curve: The further you drag, the stronger the curve.
Use the handles on each anchor point to adjust the slope and tension of the curve segment. Play around with these handles to achieve the desired flow and smoothness.
Way 3 – By Using the Curvature Pen Tool
The Pen Tool is a powerful tool for drawing precise curves in Photoshop, but for those truly organic, flowing lines, the Curvature Pen Tool reigns supreme. Imagine shaping digital clay, effortlessly bending and twisting pixels to your will. Sounds magical, right? Well, with a little practice, it can be!
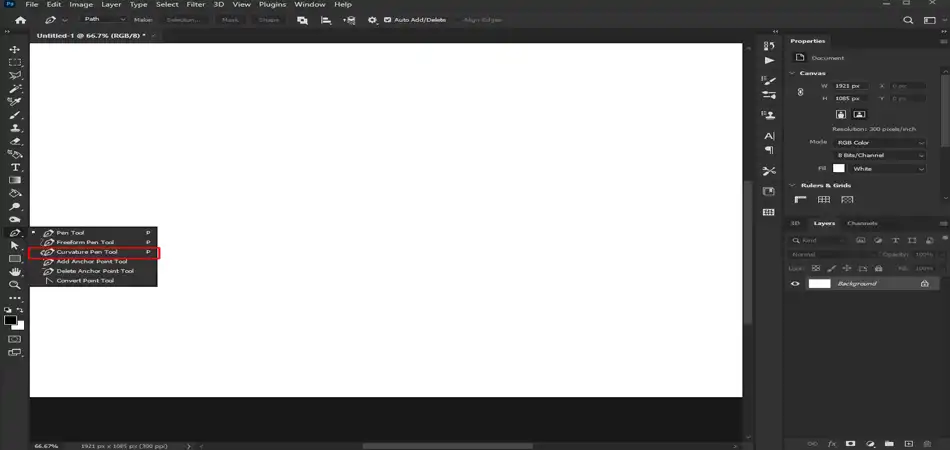
Step – 1
Locate the Curvature Pen Tool nestled amongst its Pen Tool siblings in the toolbar. Choose Path mode in the options bar to focus on creating a path, not a filled shape.
Step – 2
Click your first anchor point, then click and hold the next point, dragging your mouse to define the curve’s direction and intensity. Think of it like guiding a playful caterpillar along its path!
Step – 3
Drag upwards for gentle curves, swoop downwards for dramatic dips, and experiment with side-to-side movements to create subtle changes in direction. Remember, the further you drag, the stronger the curve.
Step – 4
Once you’ve achieved the desired curve segment, release the mouse to set the second anchor point. Continue clicking and holding to create as many points as needed, shaping your curve like a digital sculptor.
Don’t worry about pixel-perfect precision just yet. The beauty of the Curvature Pen Tool is its flexibility. You can always adjust your anchor points later. Use the Direct Selection Tool (white arrow) to select individual points and drag them to refine the curve’s shape.
Bonus Tips
Click and hold an anchor point, then drag your mouse to directly adjust the curve’s shape and direction. This allows for a more fluid and organic sculpting process.
Experiment with different dragging motions to create different curve shapes. Upward drags create gentle curves, while downward drags create dramatic dips.
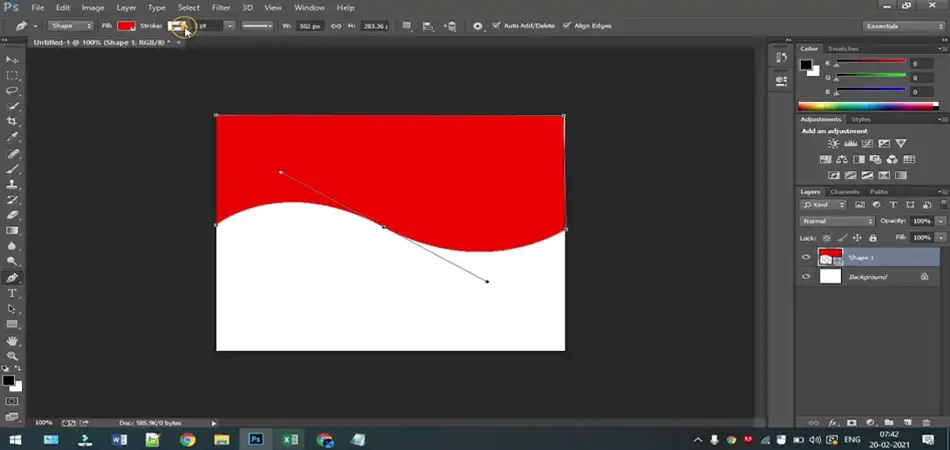
Way 4 – By Using the Shape Tool
While the Pen Tools might be the go-to heroes for intricate curves, the Shape Tool in Photoshop offers a surprisingly powerful and efficient way to draw perfect geometric curves. Think circles, ellipses, smooth arcs, and even elegant spirals – all with just a few clicks and drags!
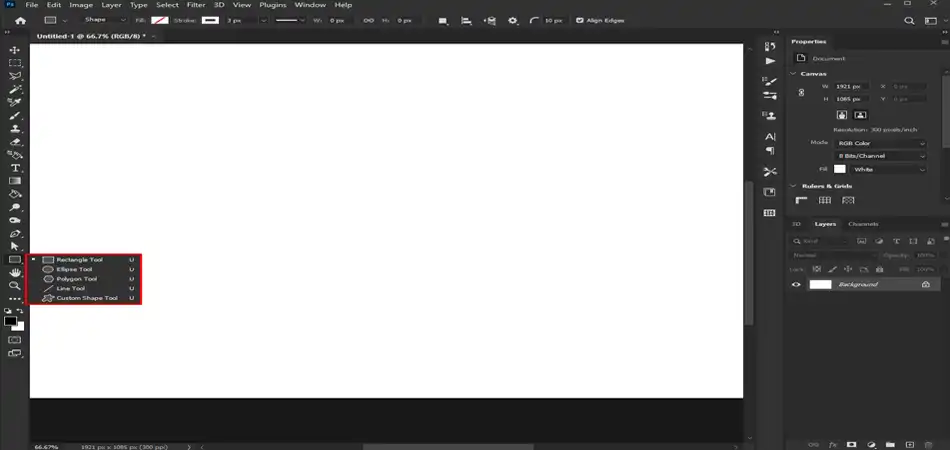
Step 1 – Shape Tool Setup
In the toolbar, select the Shape Tool icon between the rectangle and square icons. In the options bar, set Mode to Shape to directly draw filled shapes rather than path outlines.
Step 2 – Circle Drawing
Click and drag to draw circles. The further you drag, the larger the circle. Hold Shift while dragging for a perfect circle with a 1:1 ratio. Hold Alt/Option (Mac) while dragging to draw ellipses by independently adjusting the width and height.
Step 3 – Arc Creation
In the options bar under Shape, choose Arc. Click three points on the canvas. The first point sets the arc center, the second the starting point, and the third the ending point. Experiment with point placement to create different arcs.
Step 4 – Spiral Drawing
Set the Shape to Spiral for a new world of curved possibilities! In the options bar, adjust the Radius and Segments to control the spiral size and tightness. Play with the settings to make swirls, flourishes, and abstract patterns.
Bonus Tips
- Use the “Arc” option to create curved segments of circles. You can define the starting and ending points of the arc for precise control.
- Experiment with the “Spiral” option to create elegant, swirling curves. Adjust the radius and segments to customize the size and tightness of the spiral.
And That’s a Wrap!
I hope you enjoyed this little tour through some of my personal favorite curved line tools in Photoshop. Whether you prefer the smooth precision of the Pen or the organic fluidity of the Brush, unleash those creative juices and make something spectacular. Don’t be afraid to experiment either – blend techniques, try new brushes, combine effects. The only limit is your imagination! For me, few things beat that rush of building the perfect curve to bring an artistic vision to life. Thanks for joining me on this curvy journey today. Let me know what incredible designs you whip up! Maybe we’ll compare curved creations sometime. But for now – happy Photoshopping, my friend!