Photoshop software comes with several tools and programs. They will not only help you refine your picture but also enhance it along with countless individual adjustments. The layer mask is one such important tool.
So how to invert the layer mask in photoshop? The best way is to make the modifications manually instead of leaving them to the AI. This is done using the layering tool found inside Photoshop on your device.
So are you interested in knowing how to invert a layer mask in photoshop? Well then, stay with us and keep on reading. By the end of this article, you will be more than just a rookie in your Photoshop career.
Overview of Photoshop Invert Layer Mask
You might want to unlock the full potential behind a photograph and give it powerful details that make it stand up. It is in these cases that the layer mask will come in handy.
Layer masking is a technique in photo editing using a special layer mask tool. It is used to fill different layers with black, white, or gray. The invert layer mask, on the other hand, is used to flip out the colors in a photo.
This is usually used in certain photo edits to give it a more professional outlook. For every professional editor, learning about the inverted layer in Photoshop is a must.
How to Invert Layer Mask in Photoshop?
Inverting a layer mask in Photoshop is pretty easy if you know the techniques. In our step-by-step guide, we’ll use Adobe Photoshop version cc 2015 on Windows 10. The below-mentioned process is almost the same in all other versions of Photoshop.
Though mac and windows have different OS, the procedure of inverting the layer mask is the same. We’ll provide all the necessary commands both for windows and mac.
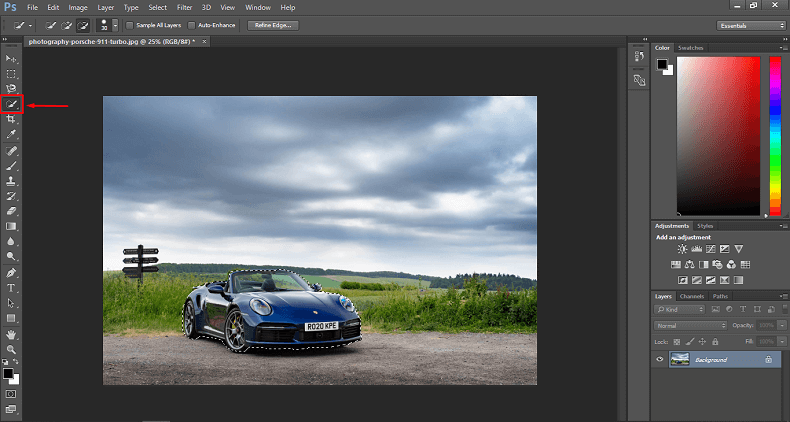
Step 1: Select the Photo Using Selection Tool
First of all you have to select the object to create a perfect layer mask. All you have to do is to use the selection tool for selecting the area. In our case, we have used the magic warden tool. It is handy to use and takes less time to select objects accurately. The keyboard shortcut for the selection tool both on Mac and windows is “w”.
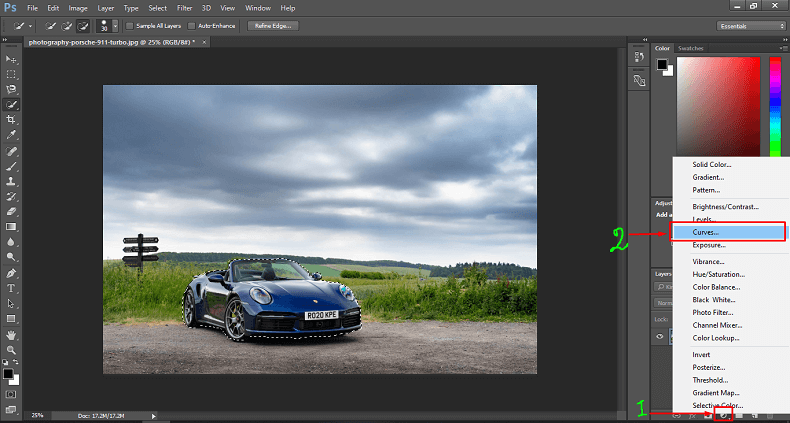
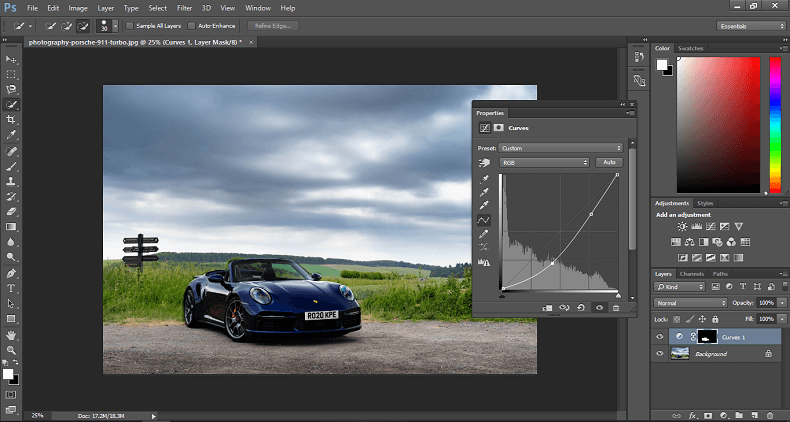
Step 2: Create Layer Adjustment Curve
Now that selection is done, we have to create an adjustment layer curve. It will give us the freedom to play with our selected area’s color and contrasts. To create the adjustment layer curve, first click on the adjustment layer button positioned in the lower left corner of your screen. Then select the curve.
You’ll find the adjustment layer curve and all other options associated with this layer option. With this curve, you can do a lot of stuff like increase or decrease the opacity, change the blend mode, and so on…
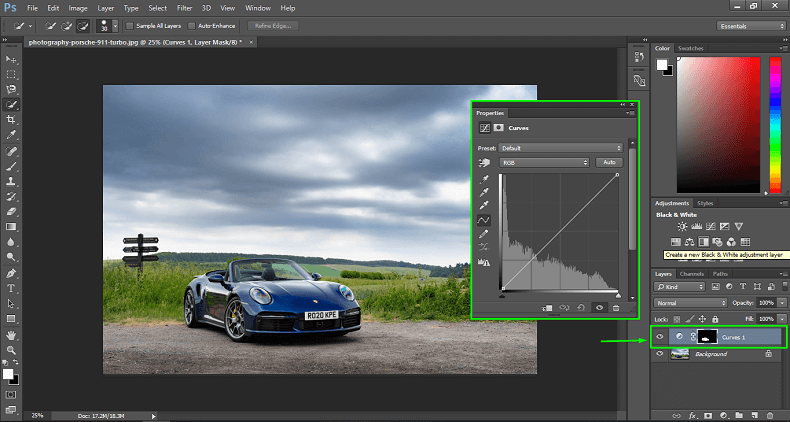
Now, to demonstrate how this curve works see the below car image. We have decreased the lighting by shifting the curve downward. Notice, that this is not affecting the entire image but only the selected area.
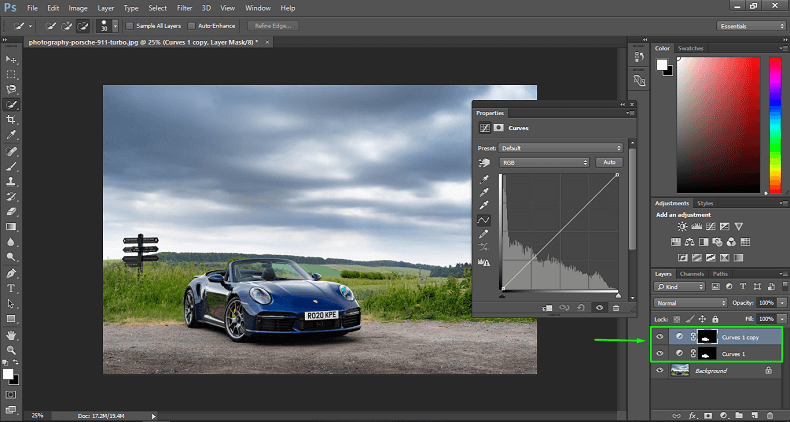
Step 3: Duplicate the Adjustment Curve
Based on whether you are using macOS or Windows, the shortcut for copying will be different. For windows this is Ctrl+J. On the other hand, this is CMD+J on macOS.
Use these shortcut codes to duplicate the image in another tab. We have marked the duplicated layers in green markings on the picture below.
You can alternatively use the quick selection tool to select the subject automatically. This will separate the layers from the subject and background and then save them up. However, this isn’t always reliable.
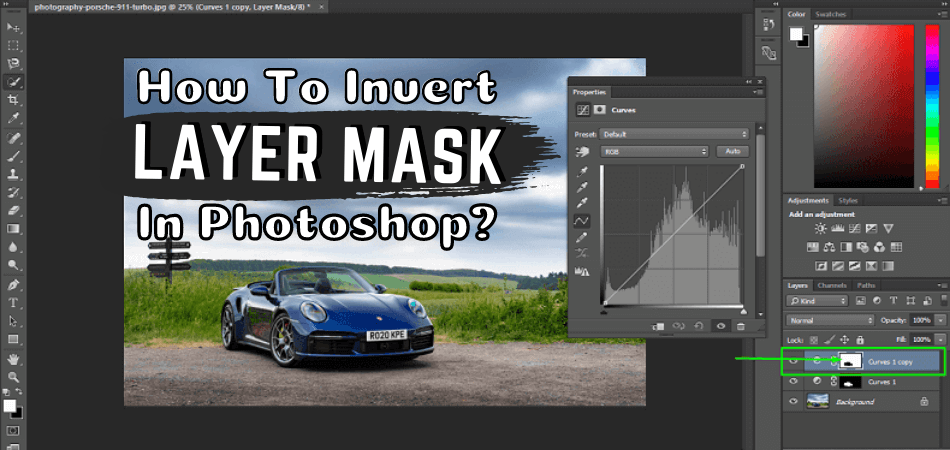
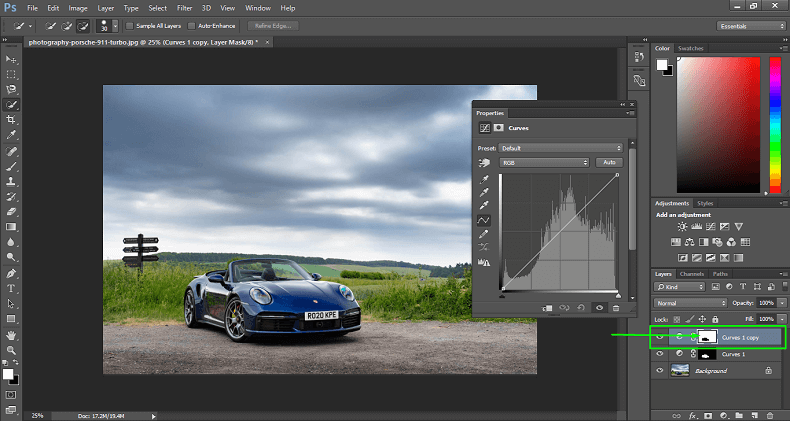
Step 3: Invert the Layer Mask
Now that you have set up all the primary masking and editing, you can invert the entire photograph. The invert mask layer function works in the same way as the duplication. All you need are certain shortcuts.
For macOS, this invert code is usually CMD+I. For Windows computers this is Ctrl+I. This inverted layer mask will change all the colors in the subject of the picture to their opposites.
For instance, everything that is black will turn white as indicated in the below picture. On the other hand, everything that is white will turn black. This function helps to move layers without moving the mask in photoshop.
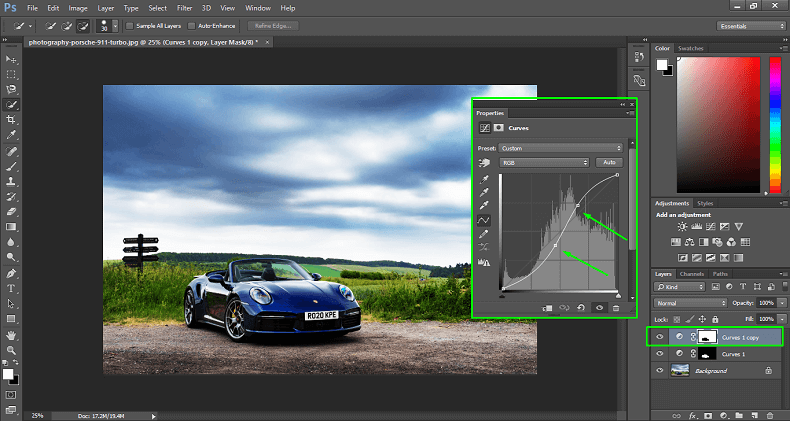
Now, just to demonstrate what this inverted mask does, follow the below image. Here, we have played with the curve and the entire image other than the selected object changes in brightness and opacity, and color blend. And this happened because we inverted the layer from the selected object to the entire background.
Adobe Photoshop Invert Layer Mask Tips and Tricks
Using photoshop can be frustrating at times, especially for amateur editors. If you are an amateur in editing and want to provide an image masking service, don’t fret so soon. Below we have some tips and tricks just for you.
- Learn how to hide a specific selected area when adding a layer mask
- Add layer masks such that unused layers can get hidden underneath
- Learn the various shortcuts needed to quicken the pace of inverting the layer masks
- Always keep the original photo save as a backup in case you need to start over from scratch
- View any changes in quick mask mode before confirming any alterations
- Disable mask filter that you do not use to prevent any accidental clicks
- Understand how to unlock layer masks by their individual layers
- Fade out any distractions using the same mask layer as the background
- Learn how to easily deselect masks in photoshop to salvage any damage to the photograph that you might have made
Conclusion
To any photo editor, learning the ABCs of layer masking is vital knowledge. Not only does it make applying filters easier, but it also saves a lot of time in the editing process.
At first, this might seem like a lot of work for an amateur. But trust us when we say this. The knowledge of invert masking and anything related will surely help you a lot.
Besides, we have also given you a lot of tips and tricks that you can use in your journey. Be patient, and with enough dedication, you will become a professional in using photoshop in no time.