Taking great photos on your phone is awesome, but what about keeping that quality when you share or print them? the quality just isn’t the same. It can be really frustrating to put in all that effort only to have your stunning shot look dull or pixelated. That’s where Lightroom Mobile comes in to save the day. This app allows you to export your edited mobile photos while keeping them looking crisp, vibrant, and just as awesome as when you first captured them.
In this guide, I’ll walk you through the exact steps to export photos from Lightroom Mobile without any quality loss. We’ll cover everything from choosing the right file type to adjusting the settings for maximum detail. By the end, you’ll be able to confidently share and print your very best shots looking picture-perfect every single time.
Steps for Exporting Photos from Lightroom Mobile without Losing Quality
As a photographer, you want to ensure that your photos maintain their highest quality, even after editing and exporting from your mobile device. With Lightroom Mobile, you can easily edit and export your photos without compromising their quality.
Step 1 – Open and Edit the Picture According to Your Need
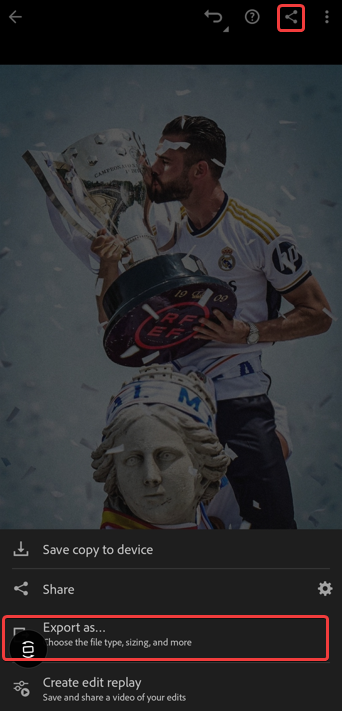
The first step in the process is to open your desired photo in Lightroom Mobile. Take your time and explore the various editing tools and sliders available. Enhance the colors, adjust the exposure, tweak the contrast, and make any other adjustments necessary to bring your artistic vision to life. After that, tap on the Share icon and then tap on Export as…
Step 2 – Choose the File Type
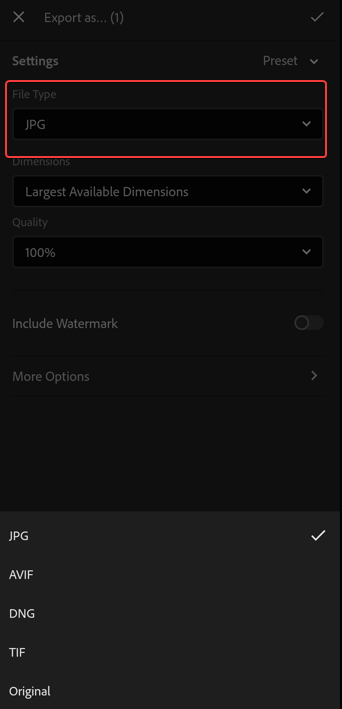
Once you’ve perfected your edits, it’s time to choose the appropriate file type for exporting. Lightroom Mobile offers several options, each with its own strengths and considerations. Here’s a quick rundown:
JPEG: The go-to choice for web and social media sharing, JPEG files strike a balance between quality and file size. However, due to compression, there may be some quality loss compared to other formats.
DNG: Short for Digital Negative, this format retains the maximum amount of image data, making it ideal for professional editing and archiving. If you prioritize quality above all else, DNG is your best bet.
TIF: Similar to DNG in terms of quality, TIF (or TIFF) files also maintain exceptional image data. However, they tend to have larger file sizes, which can be a consideration if storage space is limited.
AVIF/JXL: These relatively new formats offer good quality for web sharing, but their compatibility may vary across different platforms and devices.
If you opt for the TIF format, I highly recommend setting the Bit Depth value to 16 bits.
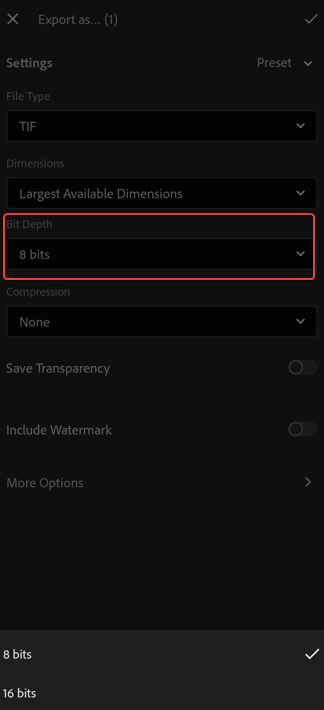
This setting allows the image to display a staggering 281 trillion colours, compared to just 16.7 million colours in an 8-bit image. 16-bit images, also known as “high-color” images, are ideal for high-quality prints and detailed editing, ensuring your photos look their absolute best.
Step 3 – Maximize Image Quality
To further maximize the quality of your exported photos, make sure to adjust a few additional settings:
For JPEG/JPG or AVIF formats, set the Quality slider to 100%. This ensures that the maximum possible quality is retained within the compression limits of these formats.

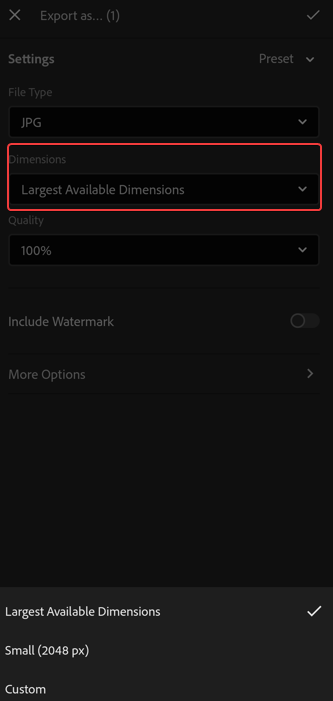
For all formats, in the Dimensions settings, choose Largest Available Dimensions. This step guarantees that your exported photo retains its maximum resolution and detail, preserving the sharpness and clarity of your original image.
With these settings in place, save your preferences and export your masterpiece! By following these simple steps, you can confidently share or print your photos, knowing that their quality remains uncompromised, reflecting the time and effort you put into capturing and editing them.
Wrapping Up
Exporting top-quality photos from Lightroom Mobile is all about choosing the right settings. DNG and TIF formats preserve the most detail and color. But if file size matters more, JPEG at 100% quality works well too. Don’t be afraid to try different options and see what works best. Have any other questions? Drop them in the comments – I’m happy to help further. Thanks for reading, and happy shooting!