Most professionals might use an actual camera to take photographs and computers for editing. However, using your phone camera for both taking the picture and editing is also a viable option.
So how to edit car photos on the phone? The most convenient method is to get a paid subscription to Adobe Lightroom. This will work for both android and iPhone users the same. Other apps could include Snapseed, Photoshop Express, etc.
We provide professional car image editing services that you are probably looking for.
If you want to get into photo editing on your phone, these apps should work wonders. However, it is important that you know how they work. And that is exactly what we will be covering here today.
How to Edit Car Photos on Phone?
Depending on whether you are an android or iPhone user, there will be several different editing options available for you. You can look at some of these options to edit car photos in photoshop apps.
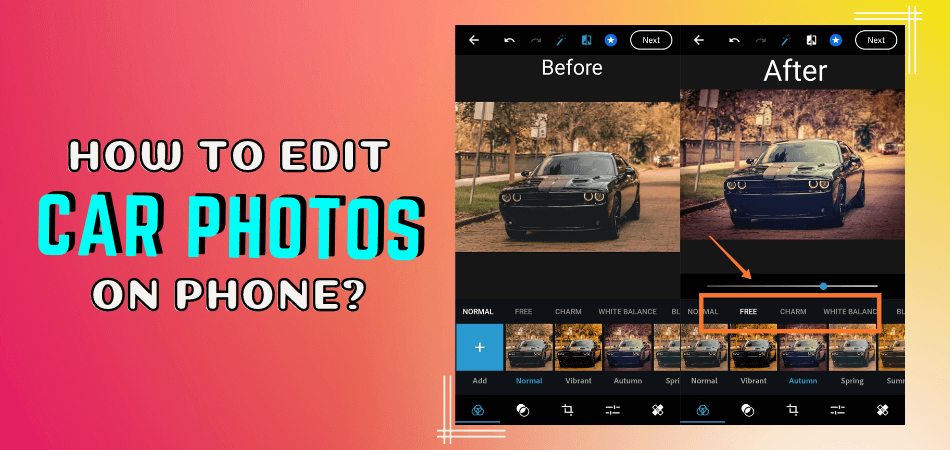
Use Adobe Lightroom
Adobe Lightroom is indeed an excellent choice that is available on both iPhone and Android. Use the following procedure to get through the basic editing needed to be done with this app.
Step 1: Edit the Basics
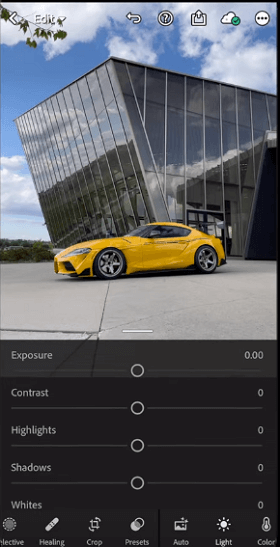
For the first step in the procedure, you are meant to take care of the basics. This involves the white balance, tone, and pressure.
Raw car photos as they are taken originally look absolutely unprofessional. The basic editing done in the first step will fix the photo and make it fit to be professional.
As for how you will adjust the options, they will depend on you. You might customize based on your preferences. However, the golden rule in these cases is to change the adjustments in moderation.
Too much or too less will make the photograph appear even worse than before.
Step 2: Adjust the Colors
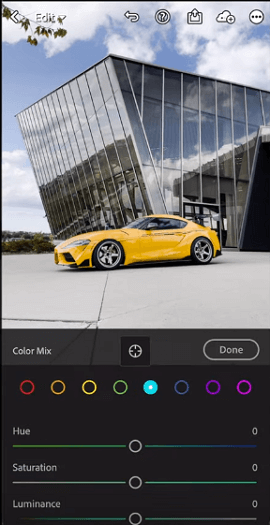
Click on the HSL/Color option to check out the drop-down menu. The options you will select for the different colors will be based on your perception and thought process.
Increasing the saturation of the color variants will allow the picture to be more color accurate. Luminescence allows a certain color in the picture to be brighter than the other.
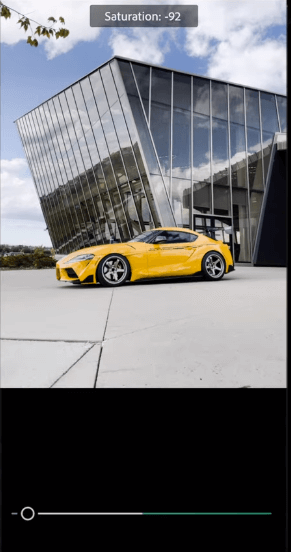
Finally, there is the hue. The hue is responsible for the background and is used to provide a sharp contrast to the actual vehicle. Setting the hue to the max will offset the saturation of the color in question.
You can also choose to use color grading selection to set up the quality of a certain color. The color grading system is based on color theory which will be determined by what your eyes perceive to be the best in the picture.
Step 3: Optimize the Photo with Linear Gradients
If you have an older app that has yet to be updated, the linear gradient term might not exist. Instead, you will get an option for graduated filters in the car photo edit settings. This should work in the same way.
Remember, you must alleviate the standards of your car photography so that it can stand apart from other car photos. This is where optimizing with linear gradients can help you out.
Access the masking panel by pressing on the icon we have drawn a circle over in the picture below. You can find this icon in the toolbar of the app. This could also be stated to be a mask overlay in an iPhone.
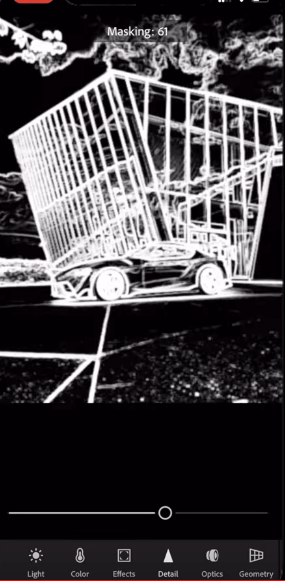
Use the tools in the masking panel to optimize the linear gradients of the pictures as much as you want. Make sure to save the picture before the optimization.
This is because if you mess up the gradients, you can easily start over from the save file instead of having to start from scratch.
Edit Car Photos on Android
The best Car image editing service on android can be provided by adobe photoshop express. Almost every photo editor using android will use this app. The basic guide to using this application has been stated below.
Step 1: Open the Image
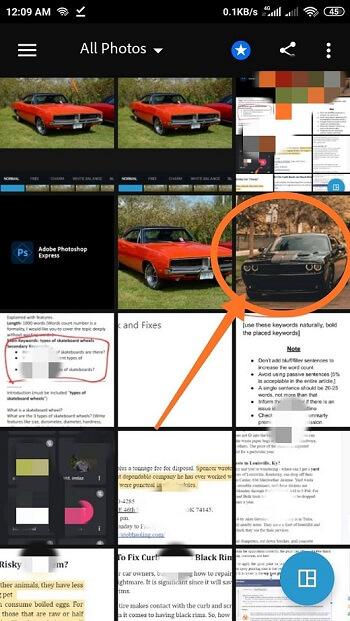
Before you can work on editing the photo of the car, you will need to open it up first. Select the car photo from the Photoshop express app. Two options will come – photo editor and photo collage. Choose the edit option.
Step 2: Enhance the Image
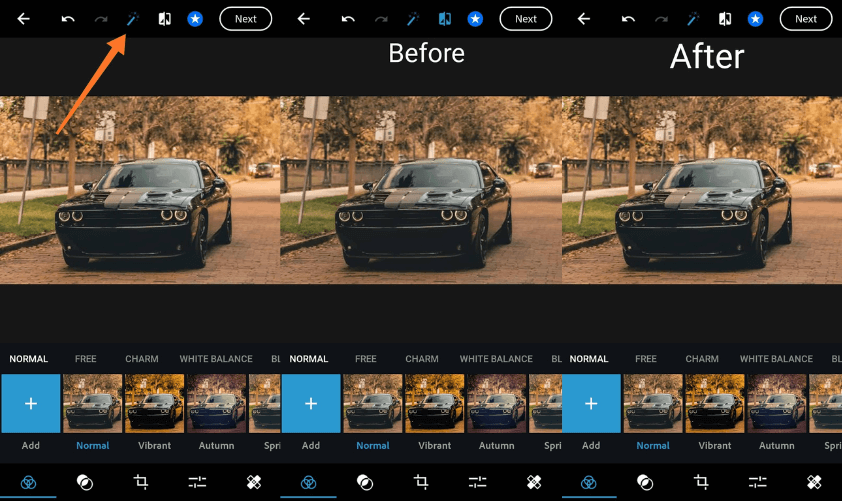
As circled in the picture above, click on the icon. This icon is called the wand tool and is used for auto-enhancements. This tool is responsible for adding the white balance, exposure, contrast, and brightness.
Besides going for the automated option, you can also choose to set the various aspects of the photographs manually. While doing this, you will be required to use your own preferences.
The different aspects will have different effects on the photograph. However, the wise way of setting it up is to go for the moderate option in all aspects. Too much or too less will ruin the photo.
Step 3: Applying Filters
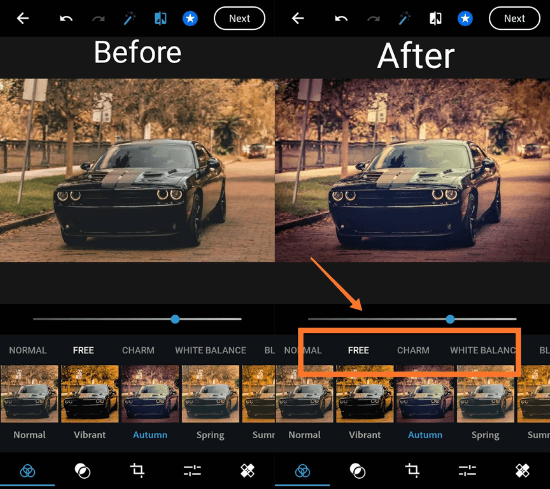
The next step in the process is to apply appropriate filters. It is the right filter that sets the difference between an unprofessional and professional photograph.
The PS Express app has a multitude of filter options that you can choose from. This includes retro, black & white, high contrast, modern, etc. Make your choice between the filters depending on the situation.
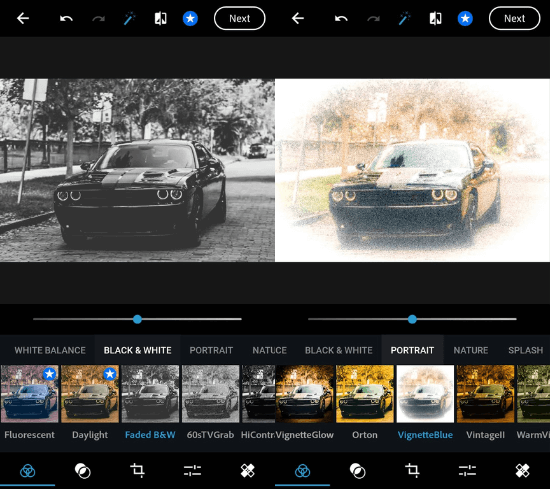
Step 5: Add Final Touches
The final touches of editing include cropping and straightening. This will not consume much time, and you should be done with it without much hassle.
To crop the photo, use the rotate option. As for straightening it, you will need to use the transform option. You usually use these options to edit night car photos.
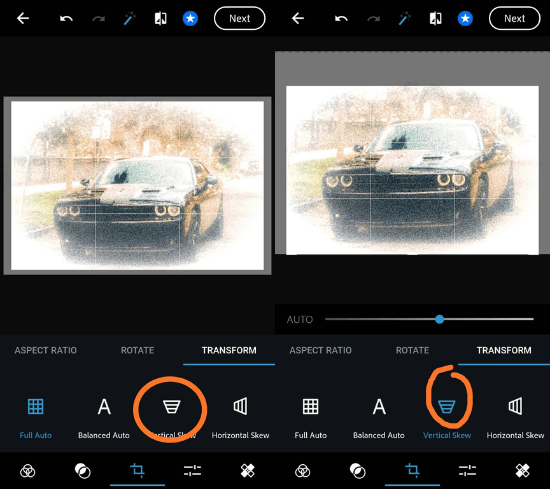
Edit Car Photos on iPhone
The best way that professionals edit car photos on iPhone can edit car photographs is to use the SnapSeed app. If you are looking for a basic tutorial on the application, we have got you covered below.
Step 1: Open the Photo
Click on the open icon and select the right photograph to open the photo you want to edit.
Once selected, you will get two different options – looks and tools. You will be navigating between the two to get the best experience.
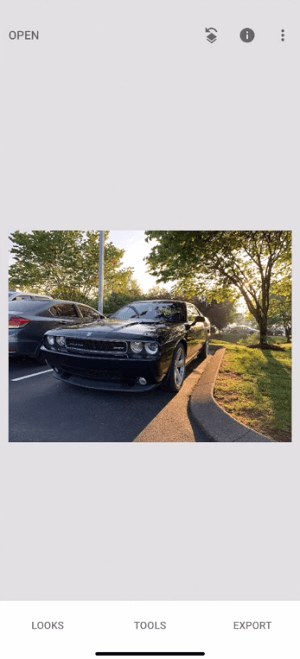
Step 2: Enhance the Image
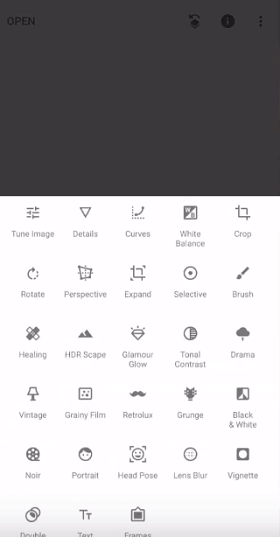
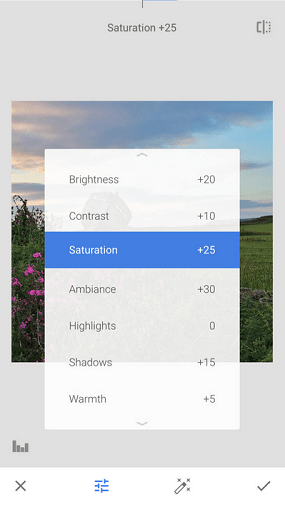
Go to the tools side of the image. From this option, you will be enhancing the image to make it look better than it previously was. Start with the tune image option to change its contrast and brightness.
You can also alter the other options included here like saturation, warmth, highlight, hue, etc.
Step 3: Change the Composition
The 3rd step will depend on how you perceive the image to be and can even be optional in many cases. Crop or rotate the image as per the need.
If you are having issues with the rotation, it will be fine. The AI in snapseed will detect the extreme points and fix them up once you have chosen to rotate the image in the right manner. There is no need for manual rotations.
Advantages and Disadvantages of Editing Car Photos on Phone
There are various advantages and disadvantages that are associated with editing car photos on your phone.
While computers are still the best, phone apps have car photo edit settings. As such, they can still be an option.
Conclusion
Professional car photo editing is a lot of work. Most people might indeed not choose to do it on the phone due to the limited options available on it.
However, with the improvement of technology, the apps have been developed to their utmost capabilities. As such, they will be able to provide very decent performance in the editing department.
If you’re looking for a professional car image editing service, then check out this car image editing service or contact us.
Besides, your phone is incredibly mobile, so you can take it anywhere and edit your car photos without any hassle.
