I love creating triptychs – they’re such an awesome way to breathe new life into ordinary photos. You know how sometimes a single image just doesn’t quite capture the full story or vibe you’re going for? Well, by splitting it into three panels or combining different shots, you can add crazy amounts of depth and artistic flair. It’s like giving your work an instant upgrade from “meh” to “woah, that’s cool!” The best part? You can totally do it yourself in Photoshop without being a pro editor. Today, I’ll show you two super simple methods to make kickass triptychs, whether you’re using multiple pics or just one. Get ready to level up your photo game!

Methods to Make a Triptych in Photoshop
Creating triptychs in Photoshop can add an artistic touch to your images. A triptych is an artwork consisting of three panels or sections, typically hinged together. In Photoshop, you can create triptychs using either three separate images or by dividing a single image into three parts.
Method 1 – Using 3 Separate Images
Creating a triptych using three separate images allows you to combine distinct visuals into a cohesive and striking artwork. This method gives you flexibility in choosing complementary or contrasting images. With careful composition, you can create a visually captivating triptych that tells a story or evokes a specific mood.
Step 1 – Create a Canvas in Photoshop
Open Photoshop and create a new document by going to File > New. Set the dimensions according to your desired size for the triptych. For example, you can create a canvas with a width of 3000 pixels and a height of 1500 pixels.

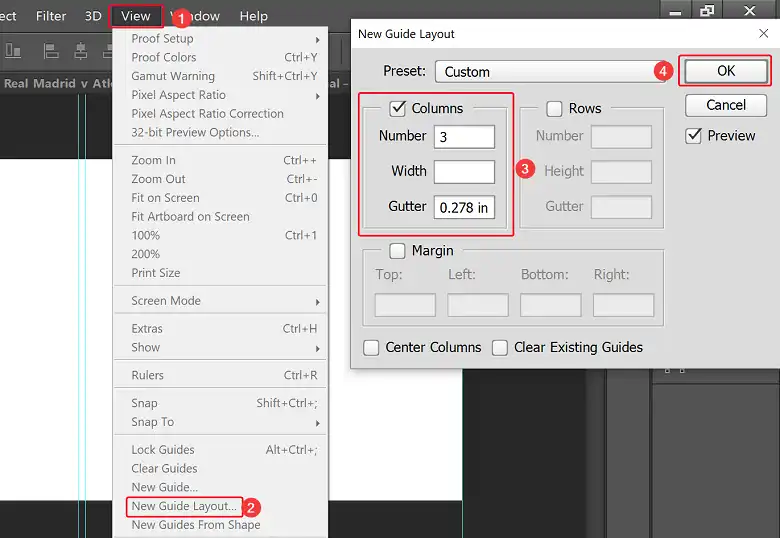
Step 2 – Create a New Guide Layout
Click on the View menu and select New Guide Layout. In the dialog box, choose the Column option and set the number of guides to 3. In the Gutter size box, input 10 mm (0.278 inches).
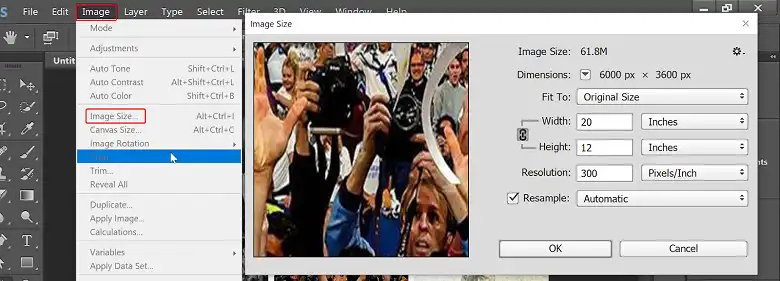
Step 3 – Resize Your Images if You want
If necessary, resize your images to fit the sections of the triptych. You can do this by going to Image > Image Size and adjusting the dimensions.
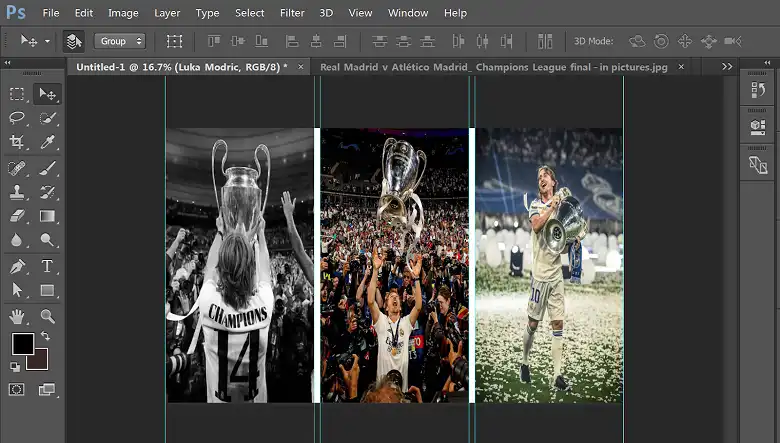
Step 4 – Start making a Triptych
Drag and drop each of your three images into the respective sections of the canvas, using the guides as a reference. Adjust the placement and sizing of the images as needed.
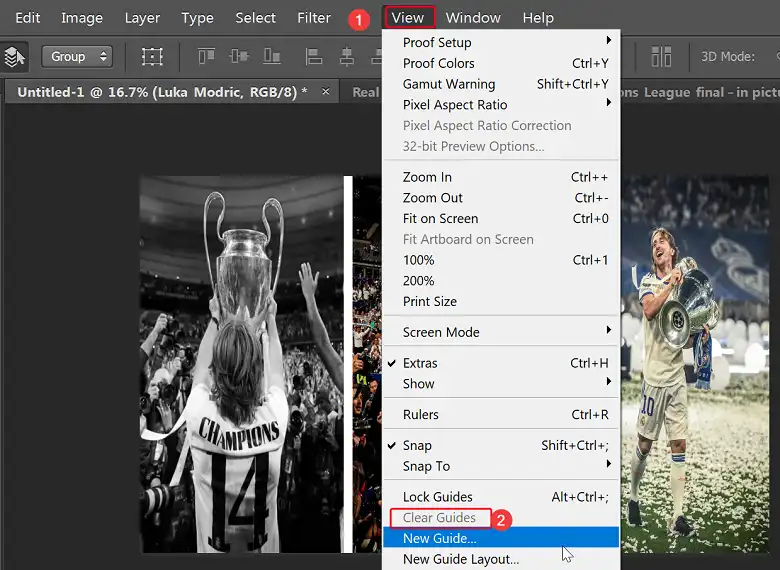
After this, click on View > Clear Guides. Then save the new triptych project.
Method 2 – Using a Single Image
Dividing a single image into a triptych can add depth, dimension, and artistic flair to your photography. This method allows you to highlight different elements or sections of the original image. By strategically cropping and arranging the panels, you can create a visually intriguing artwork that draws the viewer’s eye in a unique way.
Step 1 – Open Your Image in Photoshop
Open the image you want to use for the triptych in Photoshop.
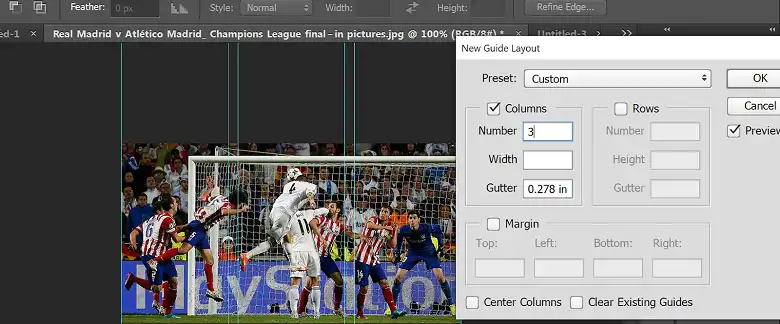
Step 2 – Create a new Guide Layout
Click on the View menu and select New Guide Layout. In the dialog box, choose the Column option and set the number of guides to 3. This will divide your image into three equal vertical sections.
Step 3 – Create a New Canvas
Create a new document by going to File > New. Set the dimensions according to your desired size for the triptych. For example, you can create a canvas with a width of 3000 pixels and a height of 1500 pixels.
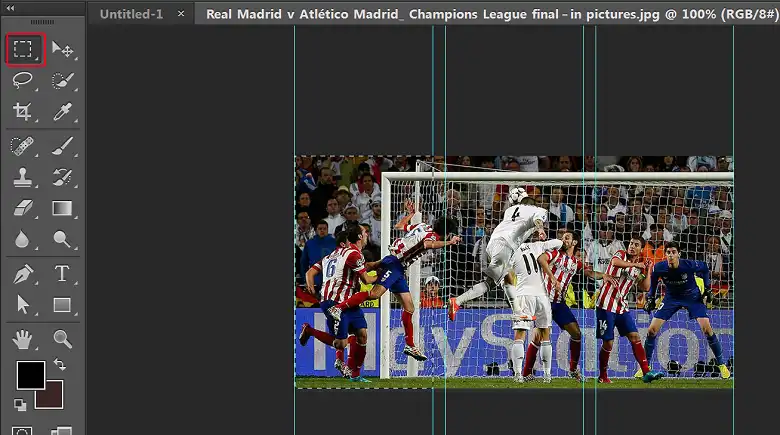
Step 4 – Crop the Image by Using the Rectangular Marquee Tool
Select the Rectangular Marquee Tool from the toolbar. Using the guides as a reference, select the first section of your image by dragging the marquee across it.
Step 5 – Paste the 3 Parts to Create a Triptych
Copy the cropped section by pressing ctrl + c. Paste it into the new canvas by pressing Ctrl + V. Repeat this process for the remaining two sections of the original image, pasting each section into the respective section of the new canvas.
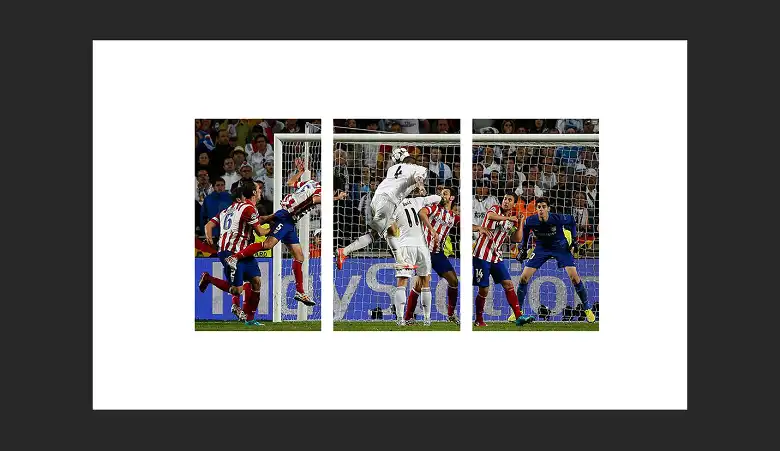
Remember to adjust the placement and sizing of each section as needed to create a cohesive and visually appealing triptych.
Conclusion
Triptychs are a beautiful way to showcase your creativity and artistic vision in photography. By following the methods outlined in this article, you can easily create stunning triptychs in Photoshop using either three separate images or a single image.
Remember, the key to a successful triptych is finding the right balance between the individual images and creating a cohesive, visually appealing artwork. Don’t be afraid to experiment with different compositions, crop ratios, and color schemes to achieve the desired effect.
If you have any additional questions or need further assistance, feel free to leave a comment below. I’ll be happy to help you achieve your creative vision.
FAQs
What is a triptych?
A triptych is an artwork consisting of three panels or sections, typically hinged together. It creates a visually striking and artistic display.
What are the benefits of creating a triptych in Photoshop?
Creating a triptych in Photoshop allows you to transform a single image or combine multiple images into a unique and visually appealing artwork. It adds depth, dimension, and artistic flair to your images.
Can I use more than three images to create a triptych?
While the traditional triptych consists of three panels or sections, you can experiment with different variations and create a multi-panel artwork using more than three images in Photoshop.
What file formats can I use for creating a triptych in Photoshop?
Photoshop supports a wide range of file formats, including JPEG, PNG, TIFF, and RAW files. You can use any of these formats to create a triptych in Photoshop.
Can I add text or other elements to my triptych in Photoshop?
Yes, you can add text, shapes, or other design elements to your triptych in Photoshop. This can further enhance the visual appeal and meaning of your artwork.