What’s up, guys! I know a lot of people wonder if you can actually make tables in Photoshop since it doesn’t have your standard table-building tools. Short answer – yes, you totally can! The trick is you have to build it externally first.
In this quick tutorial, I’m going to show you the easy way I put tables into my Photoshop documents. A table can be inserted in two simple ways, you can do it within Photoshop or you can do it from an external source. No complicated tools or plugins are needed! By the end, you’ll see firsthand just how simple throwing tables into Photoshop can be. Sound good? Then let’s get to it!
How to Insert a Table in Photoshop
While Photoshop lacks a dedicated table creation tool like Word or Excel, you can still create them using creative workarounds. Here are two methods to explore:
Method 1 – Creating a Basic Table in Photoshop
While Photoshop doesn’t have a dedicated table creation tool like Word or Excel, you can easily draw one yourself using shapes and lines. Here’s a step-by-step guide:
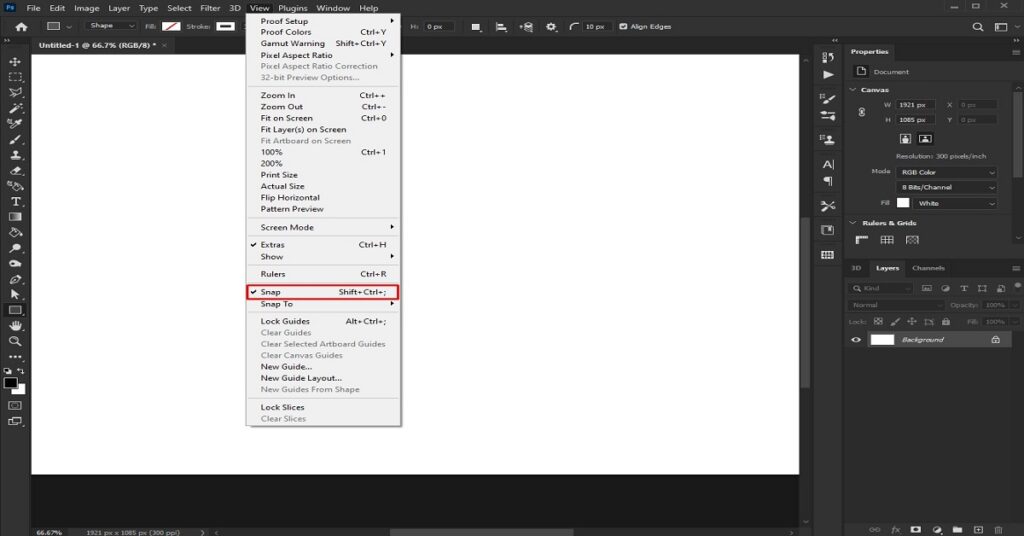
Step 1: Enable Gridlines and Snap
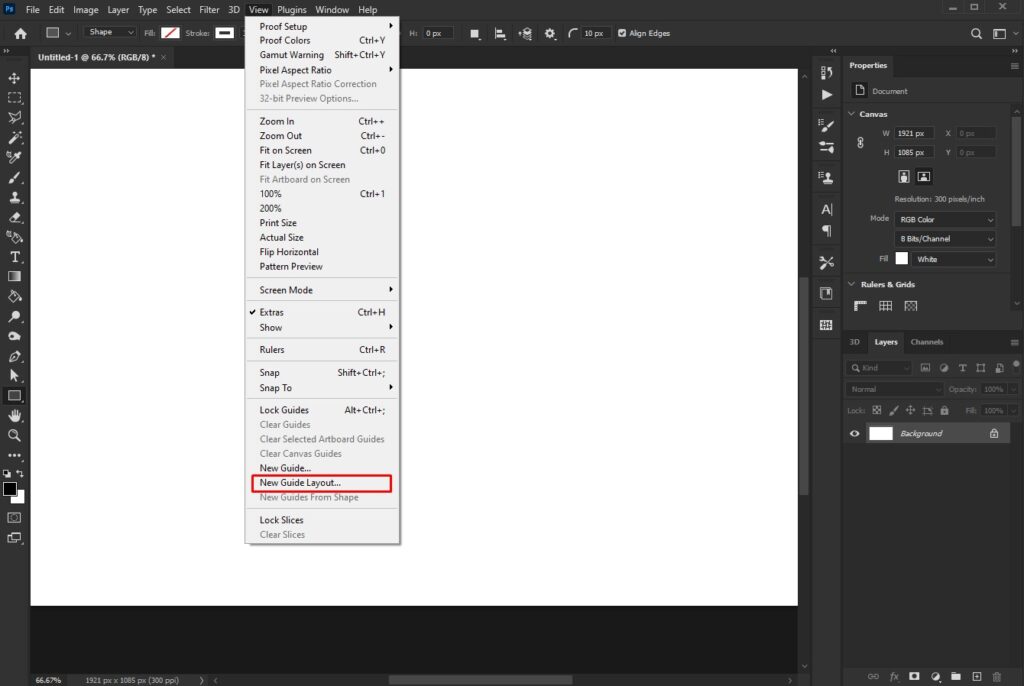
Navigate to View > New Guide Layout. This opens a dialog box where you can define the number of columns and rows for your table layout. Make sure you know how many cells you need and their approximate size before proceeding.
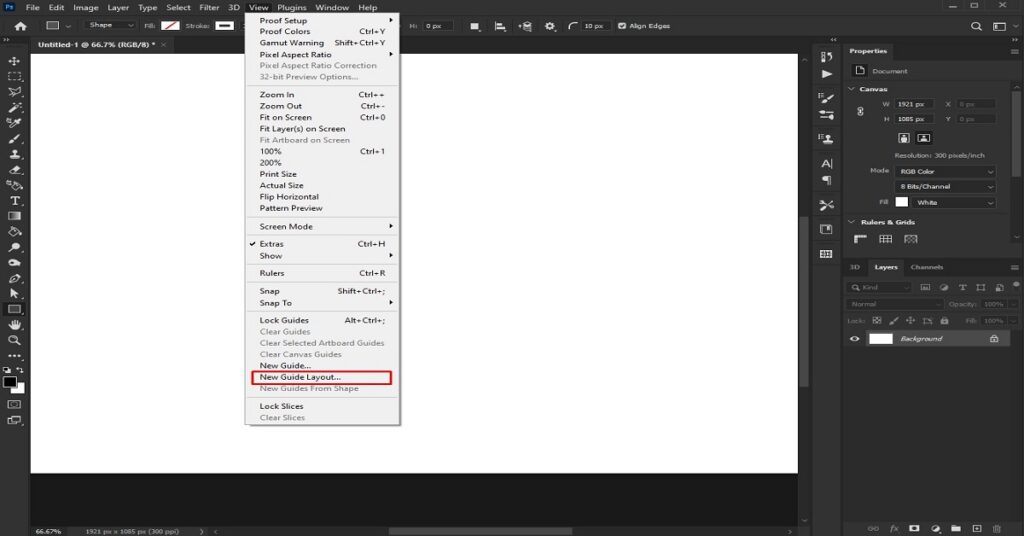
Ensure the Snap feature is enabled (checkmark next to it) in the same menu. This ensures lines snap to the grid for precise alignment.
Step 2: Draw a Rectangle for the First Row
Select the Rectangle Tool from the left toolbar.
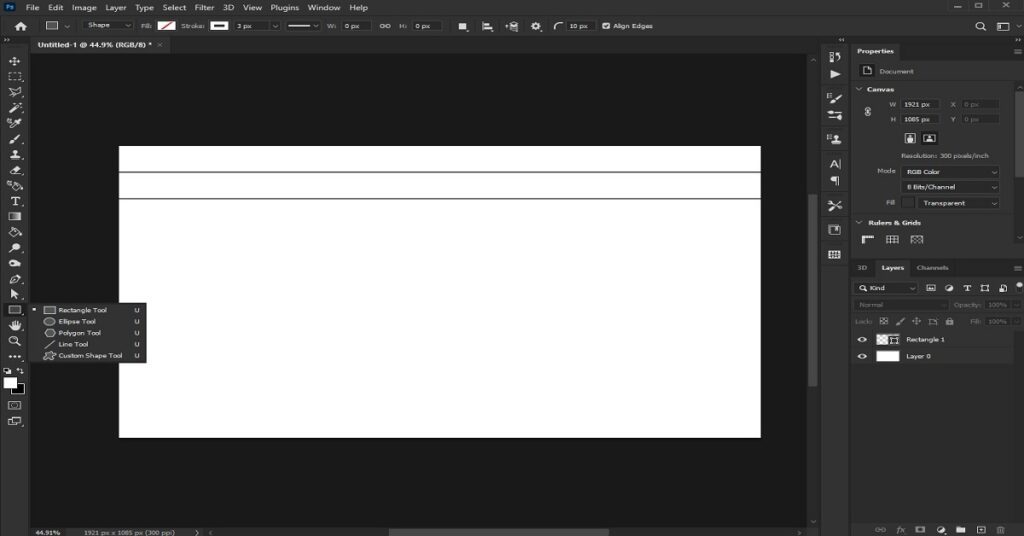
Click and drag to draw a rectangle for the first row of your table. Snap will automatically snap the edges to the gridlines.
Adjust the stroke size and color in the Options bar above the document window. You can also change the background color of the cell.
Step 3: Copy and Duplicate the Rectangle
To quickly fill in the remaining rows, press Ctrl + J (Windows) or Command + J (Mac) to duplicate the rectangle.
Press Ctrl + T or Command + T to activate the Transform Tool.
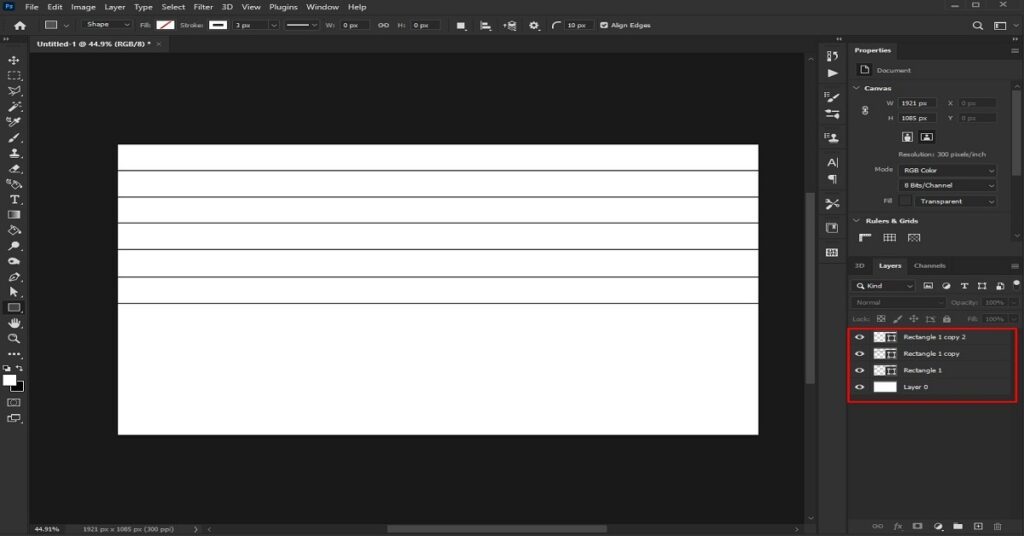
Click and drag the copied rectangle down to the next row, then press the checkmark in the Options bar to confirm the placement.
Repeat this process until you’ve filled all the rows of your table.
Step 4: Add Vertical Lines for Columns
Right-click the Rectangle Tool icon and choose the Line Tool from the submenu.
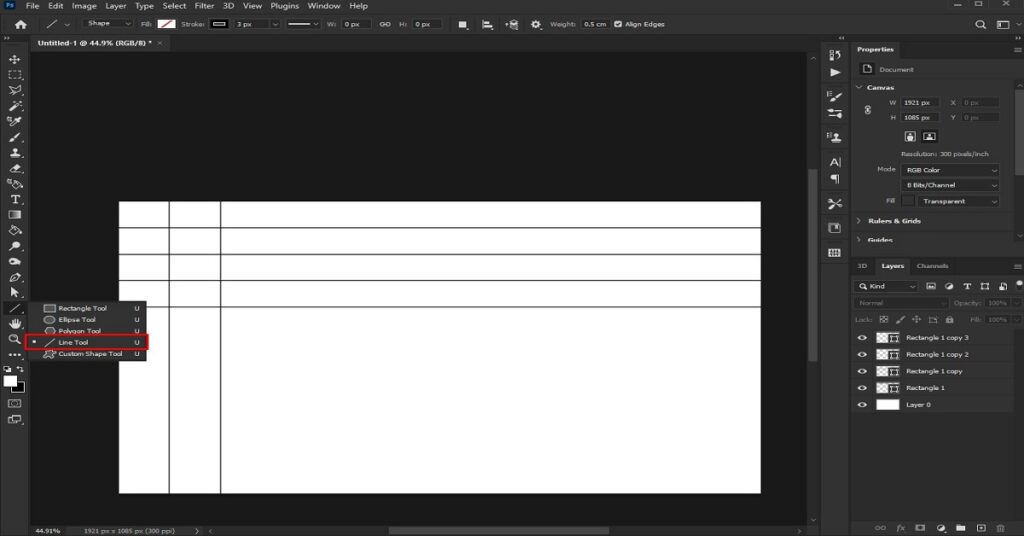
Using the guides as a reference, click at the top and drag down to create a vertical line for the first column. Adjust the stroke size and color in the Properties panel or Options bar.
Press Ctrl + J or Command + J to copy the line.
Press Ctrl + T or Command + T, then click and drag the copied line to the next guide. Confirm the placement with the checkmark.
Repeat steps 3 and 4 until you’ve filled all the columns of your table.
Method 2 – By Inserting from a Different Source
This method is faster but offers less control over the table’s appearance.
First, open a new Word or Excel document to build the initial table. Insert a table with the desired number of rows and columns. You can customize the color scheme here if you want.
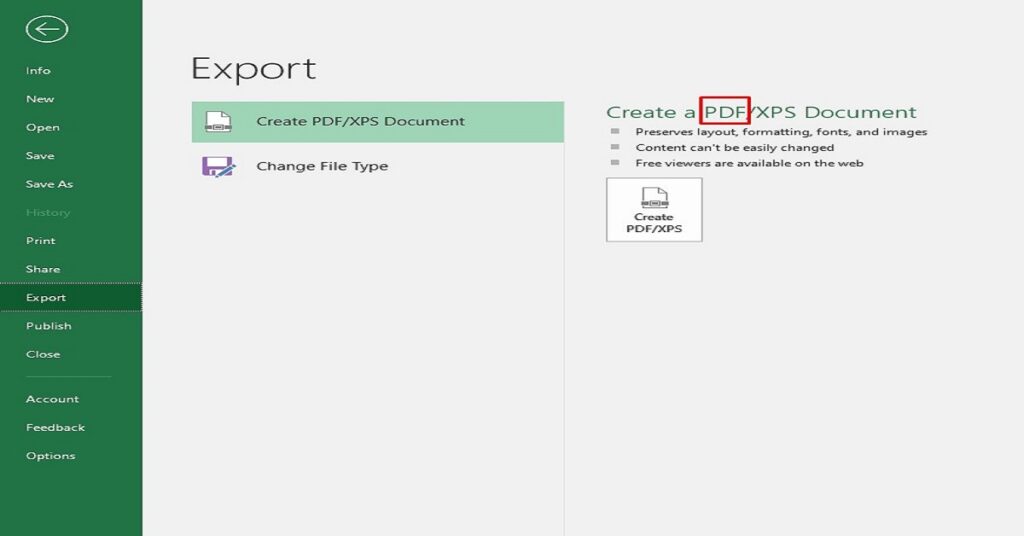
Once you have the table structure ready, save it as a PDF file so we can bring it into Photoshop. Save this one as a Table on my desktop.
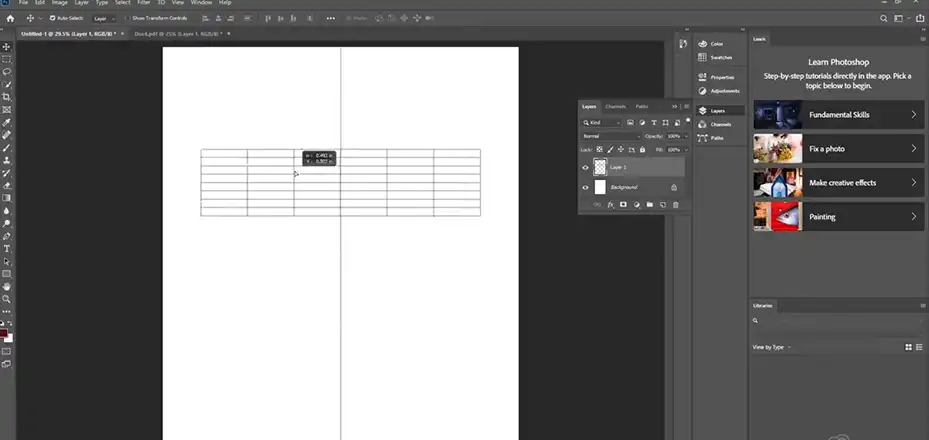
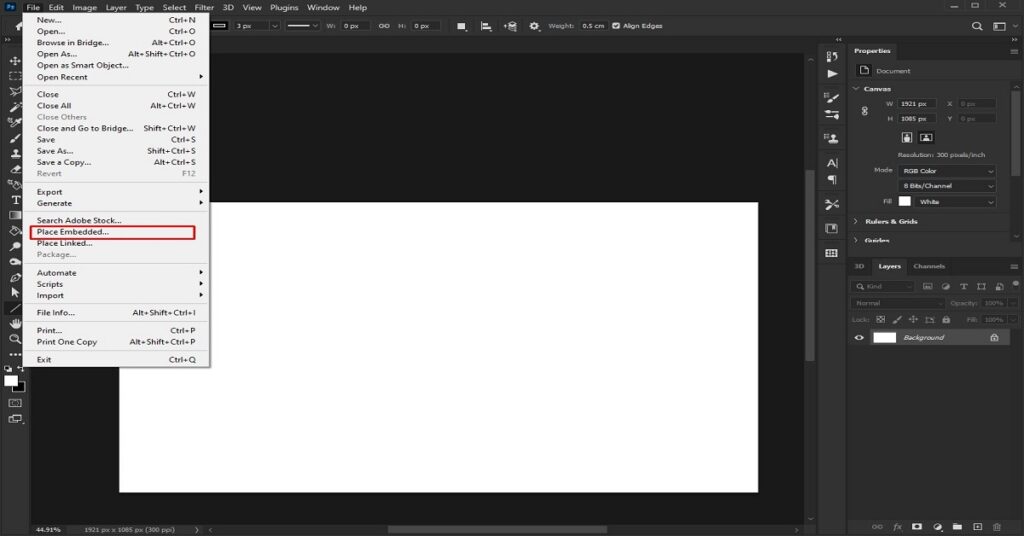
Next, open up Photoshop. Go to File > Place Embedded and select the table PDF you just saved. This will insert the table onto your Photoshop canvas.
To resize the entire table proportionally, use Command/Ctrl + T to bring up Photoshop’s Free Transform handles. Drag a corner to enlarge or shrink the whole table.
To resize rows and columns separately, use the Rectangular Marquee Tool to select the specific cells you want to resize. Then go to Edit > Free Transform, or press Command/Ctrl + T. Drag the handles to customize those areas independently.
And that’s it! With just a couple of steps, you can now build tables in external apps and bring them into Photoshop for graphic design work. Don’t forget to like and subscribe for more Photoshop tutorials!
End Notes
While not as intuitive as dedicated programs, flexible tables can absolutely be created natively in Photoshop. With a bit of effort using line tools combined with external copying and pasting, Photoshop tables unlock all kinds of new avenues for graphic layouts and data display designs.
Importing gives a head start on complex structures. But manual creation enables the most customization of table elements within the creative environment Photoshop offers best.
So don’t shy away from table needs in your PSDs. Lean into smart shape and layer usage, keep the alignment in check, and let your inner Excel analyst shine bright to craft beautiful, functional tables in Photoshop that make the data stand out.
