Are you tired of being stuck with the same old logo color? Well, you’re in luck because there are plenty of easy-to-use alternatives to Photoshop that can help you change the color of your logo in no time. In this article, I’ll walk you through some of the top online tools and show you step-by-step how to breathe new life into your branding.
From the user-friendly Canva to the powerful GIMP, I’ve got you covered. Just follow the detailed guides I’ve laid out, and you’ll be on your way to creating the perfect color combo for your logo.
Available Options for Changing Logo Color without Photoshop
When it comes to changing the color of your logo without Photoshop, you’ve got a few handy tools at your disposal. Let’s take a look at some of the top options:
Online Photo Editors
Online photo editors like Canva, PicMonkey, and Pixlr X/E offer easy-to-use interfaces that allow you to upload your logo and play around with the color settings. These tools give you the power to adjust the hue, saturation, and luminance of your logo, helping you achieve the perfect color scheme.
GIMP
GIMP is a free and open-source image editing software that’s a great alternative to Photoshop. With GIMP, you can easily open your logo image, head to the “Colors” menu, and use the “Colorize” tool to experiment with different color options.
Vectr
Vectr is a free, web-based vector graphics editor that’s perfect for working with scalable logo files. With Vectr, you can upload your logo, select the specific elements you want to recolor, and then use the color picker to apply the hue of your choice.
So, whether you’re a fan of online tools or prefer a desktop-based solution, you’ve got plenty of options to explore when it comes to changing the color of your logo without Photoshop.
How to Change the Color of a Logo in Canva
Canva is a user-friendly online design platform that makes it easy to adjust the color of your logo. Here’s a detailed step-by-step guide:
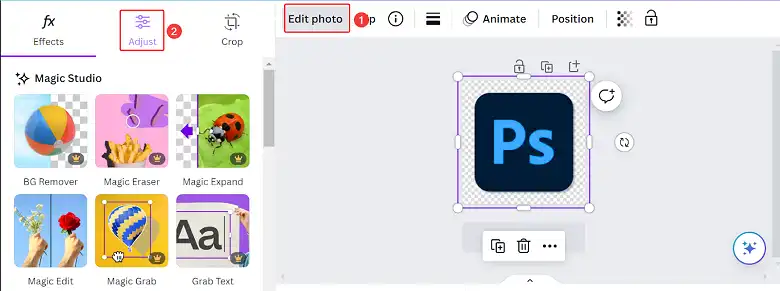
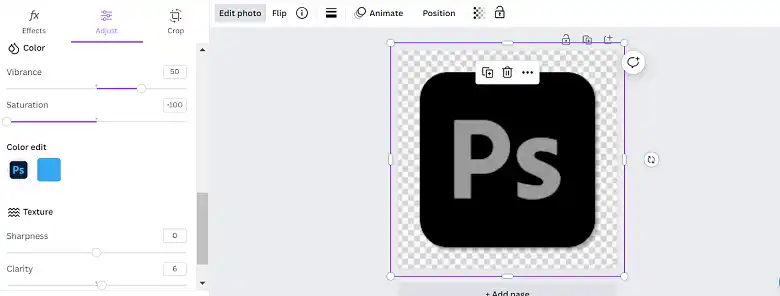
Step 1: Upload Your Logo to Canva
Open the Canva website and create a new design or upload your existing logo image (in JPG or PNG format) by clicking the Upload button.
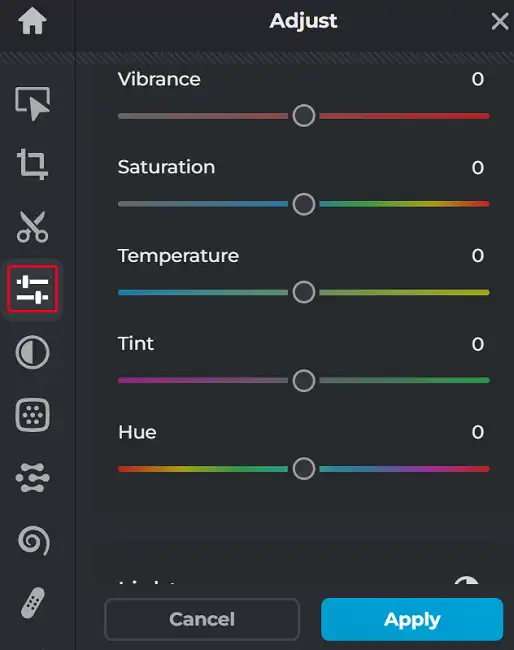
Step 2: Access the Color Adjustment Tools
Once your logo is on the canvas, click on your log, and then click on the Edit photo option. There, look for the Adjust section in the left-hand toolbar. This is where you’ll find the color adjustment tools.
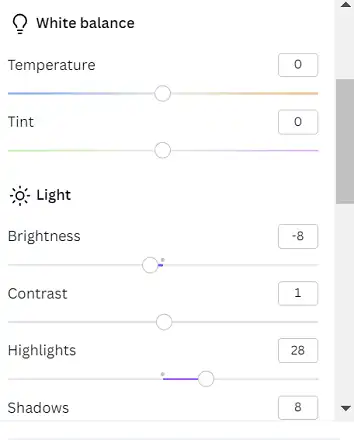
Step 3: Use the Hue, Saturation, and Luminance Sliders
Within the Adjust section, you’ll see sliders for different color adjustment options. These are the key tools you’ll use to change the color of your logo.
- Hue: Drag the Hue slider left or right to change the base color of your logo. This will shift the entire color palette.
- Saturation: Adjust the Saturation slider to control the intensity of the color. Decreasing saturation will make the color more muted while increasing it will make the color more vibrant.
- Luminance: The Luminance slider allows you to adjust the brightness or darkness of the color. Moving it to the left will darken the color while moving it to the right will lighten it.
Step 4: Experiment with the Adjustments
Play around with the different sliders to find the perfect color combination for your logo. Canva also offers pre-made color filters that you can try out if you’re feeling creative.
Step 5: Download Your Updated Logo
Once you’re satisfied with the new color of your logo, click the “Download” button to save the updated image to your device.
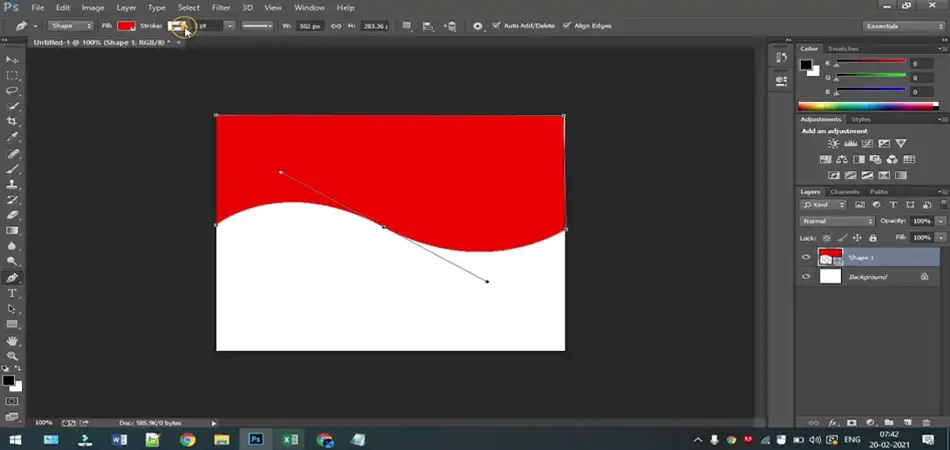
How to Change the Color of a Logo in GIMP
GIMP is a powerful open-source image editor that can be used to easily change the color of your logo. Here’s how:
Step 1: Open Your Logo Image in GIMP
Launch the GIMP software and go to File > Open to select your logo image, preferably in PNG format with a transparent background.
Step 2: Access the Colorize Tool
In the top menu bar, click on Colors and then select Colorize from the dropdown menu.

Step 3: Adjust the Color in the Colorize Window
The Colorize window will appear, allowing you to modify the color of your logo. You’ll see a color wheel or palette, as well as sliders for Hue, Saturation, and Lightness.
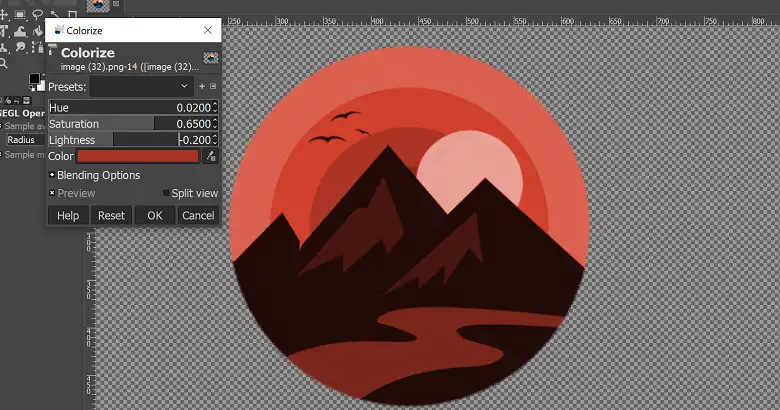
Step 4: Experiment with the Color Adjustments
Use the color wheel or palette to select a new base color for your logo. Then, use the sliders to fine-tune the hue, saturation, and lightness to get the perfect shade.
Step 5: Save Your Updated Logo
Once you’re satisfied with the new color of your logo, go to File > Save As to save the updated image to your computer.
How to Change the Color of a Logo in Pixlr X
Pixlr X is a simplified version of the Pixlr online image editor, and it offers a straightforward way to change the color of your logo:
Step 1: Upload Your Logo to Pixlr X
Go to the Pixlr X website and click on Open image from device to upload your logo file.
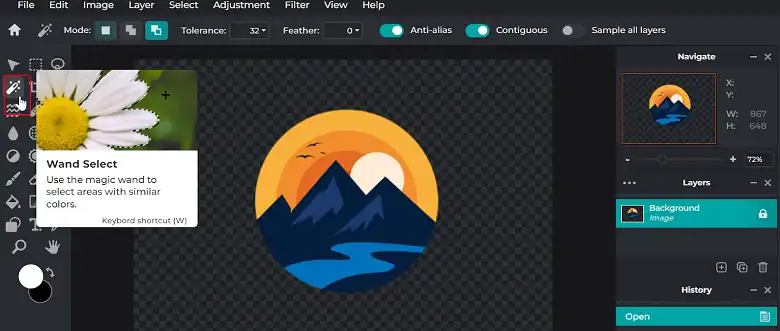
Step 2: Select the Area to Change
Use the Wand Select (W) tool to select the specific area of the logo you want to recolor.
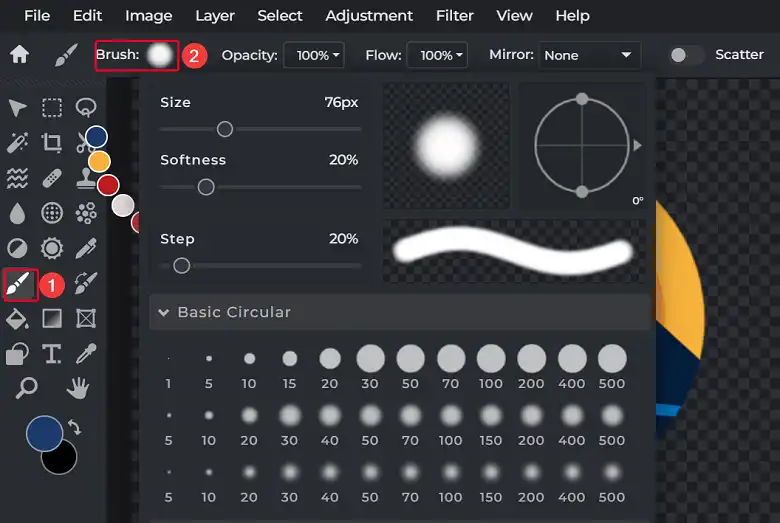
Step 3: Choose a New Color
After picking up the color, click on the Brush tool. After that, select the layer, adjust the brush settings, and start changing the color of your logo.

Step 4: Save Your Updated Logo
When you’re happy with the new color, go to File > Save (Ctrl/Cmd + S) to save the updated logo image.
How to Change the Color of a Logo in Pixlr X
Pixlr X is the more advanced version of the Pixlr online image editor, and it’s particularly well-suited for working with SVG logos. Here’s how you can use it:
Step 1: Upload Your Logo to Pixlr X
Go to the Pixlr E website and click on Open image from device to upload your logo file.
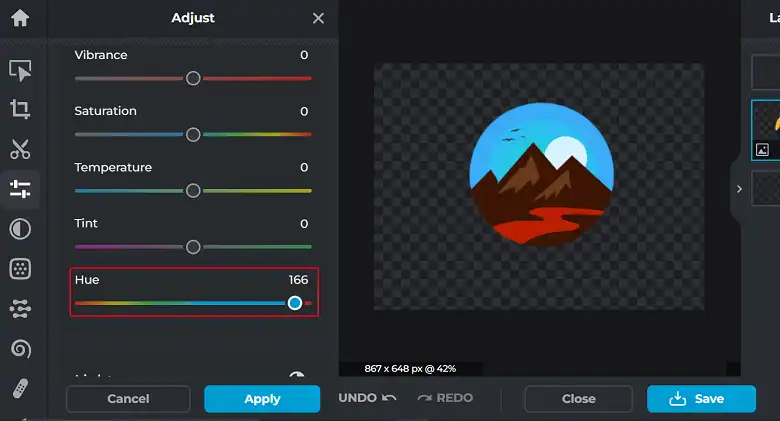
Step 2: Access the Hue Adjustment Tool
In the left-hand toolbar, navigate to Adjust. There you will find different adjustment options.
Step 3: Adjust the Hue Value
Use the slider or input field to adjust the Hue value until you achieve the desired color for your logo.
Step 4: Save Your Updated Logo
Once you’re satisfied with the new color, click the Save button to download your updated logo image.
Follow these steps and change the color of the logo by using Pixlr with ease!
Wrapping Up
Changing the color of your logo doesn’t have to be a headache. With the right tools and a little bit of experimentation, you can breathe new life into your branding. I hope the detailed guides I’ve provided have given you the confidence to tackle this task. Remember, the key is to find the tool that works best for your needs and skill level. If you have any other questions, feel free to leave a comment below. I’m always happy to help! Wishing you the best of luck with your logo color transformation.