Changing the background of an image is a piece of cake, only if you know how to use Photoshop. Photoshop allows users to customize the background to enhance the beauty or darker it for better focus on the subject. You can even blur or remove the background as well.
So, how to darken background in photoshop? Let’s have a look at the easiest method to darken the background in photoshop. For any modification, you will need to select the object you want to modify. If you are planning to darken the background, you should first select it. There are a couple of ways available to select the background. You can select it by using the magic wand tool easily.
Do you want a professional photo background removal service? Clippingfly would be your best choice. Just check out our background removal service for more information.
How To Darken Background In Photoshop
In the latest updates, Adobe Photoshop has made editing easier for users. For an easy understanding, here is a step by step guideline on how To darken Background In Photoshop –
[Note: It’s recommended to use the latest version of Photoshop while following this instruction.]
Step #1
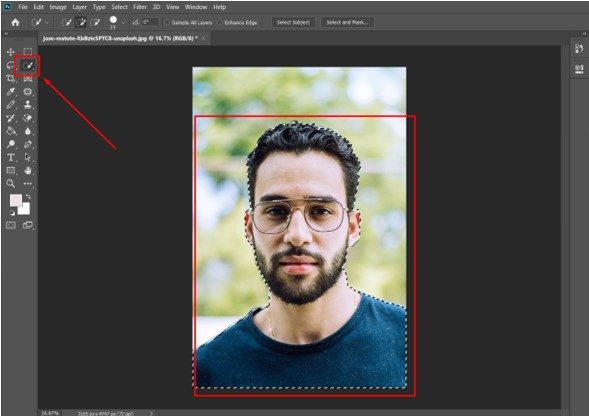
Launch Photoshop and search for the Quick Selection Tool from the left toolbar. You can also avail this option by pressing W on the keyboard. This will easily select an object perfectly. Click the mouse and hover over the main object to select it.

Step #2
If the background is made of a solid color you can select the background instead. But if you have already selected the main object, press Ctrl + Shift + I on the keyboard. This will reverse the selection. So, the background will be selected now.
Step #3
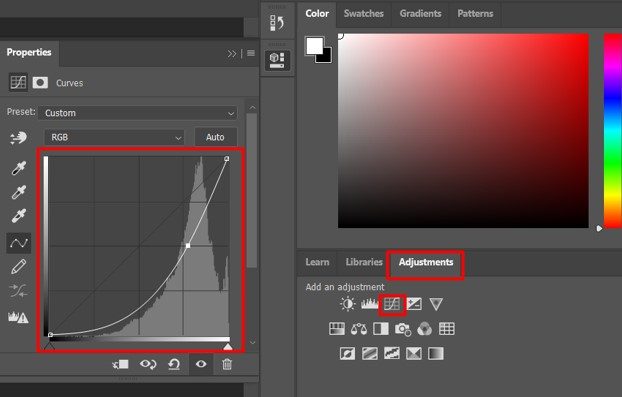
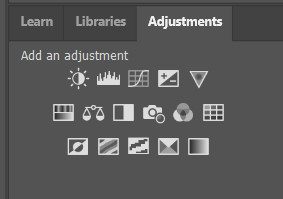
Once the background is selected, click on Adjustments from the right toolbar.
Step #4
Select the Curves option as shown in the picture. Adjust the curve and check how the background changes.
This is the easiest method to darken or brighten the background. Don’t adjust the curve too much as it will make the background different from the main object.
Step #5
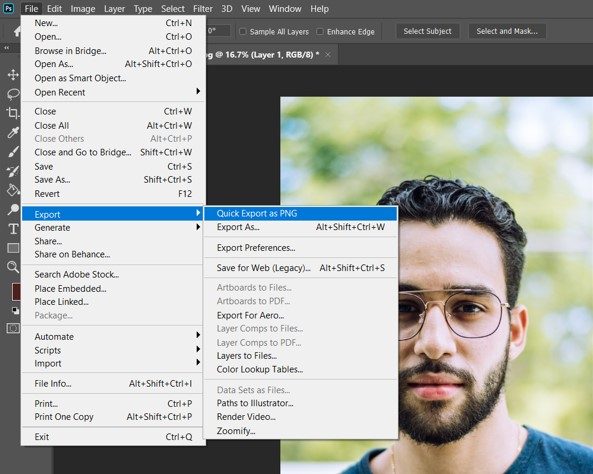
Next, save the edited image as a PNG or JPG file from the Export > Quick Export as PNG option. You can also get a high-resolution PNG from the Export As menu. This is by far the easiest way to darken background in photoshop.
For further modification, you can try the other adjustment options. You will have a real-time preview of the picture. There are multiple ways available to adjust the background but this one is undoubtedly one of the easiest ones. This is how you will be able to get the best darkening effect on an image in Photoshop.
How Do You Change the Background Color in PicsArt?
If you are not on your PC, let’s see how to change the background color by using a mobile phone.
First of all, download PicsArt from the PlayStore or AppStore. PicsArt is a photo editing tool with so many features. Open the app once installed and follow the instructions mentioned below –
- Import the image and select the eraser from available on the top of the screen.
- Change the erase method to the background to enable the background eraser.
- Now, tap on the background to select a new color. There will be a color library available below to pick one as per your requirement.
- Select a darker color.
This is how you darken the background easily on mobile. You can even change the background in any color by using PicsArt.
Final Thoughts
This is the easiest way to darken the background in photoshop. You don’t need any professional skills in photoshop to complete this task.
If you follow the methods described in this article, you will get the desired result for sure. Make sure to select the object accurately as this will deliver you a better result. Don’t adjust the curves too much as it will damage the balance of the image.