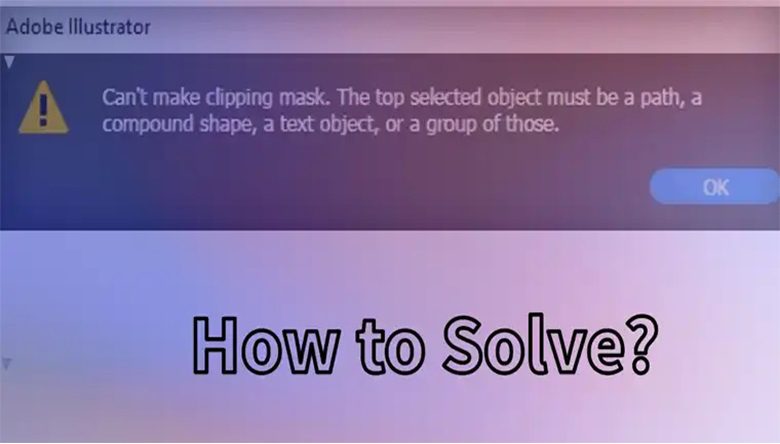
I know how freaking annoying that error is – “Can’t make clipping mask the top selected object must be a path.” Like, come on, you’re just trying to create something dope and bam! That stupid message pops up and kills your creative vibe. But chill, I got you covered in this article. We’ll figure out why it’s happening and how to make it stop for good.
The short story is, it’s happening due to the object order in the illustrator. I’ll break it all down in plain English. And by the end, you’ll be slaying clipping masks like a boss!
Why You’re Having Such Error?
Imagine trying to cut out a heart-shaped cookie with a blob of Play-Doh. It wouldn’t work, right? The Play-Doh wouldn’t hold its form, and your cookies would look more like amoeba experiments. Similarly, clipping masks need well-defined shapes, technically known as vectors or paths, to function.
Here’s the lowdown on why you might be encountering the “Top Selected Object Must Be a Path” error:
How to Troubleshoot the Clipping Mask Error?
Alright, enough with the why, let’s get to the how! Here are some troubleshooting steps to banish the clipping mask error and get your design flowing smoothly:
Solution 1 – Check Object Order
One of the simplest yet most overlooked reasons for the “Can’t make clipping mask the top selected object must be a path” error is the order of your objects. It might seem like a no-brainer, but trust me, it’s a common culprit that trips up even the most experienced designers.
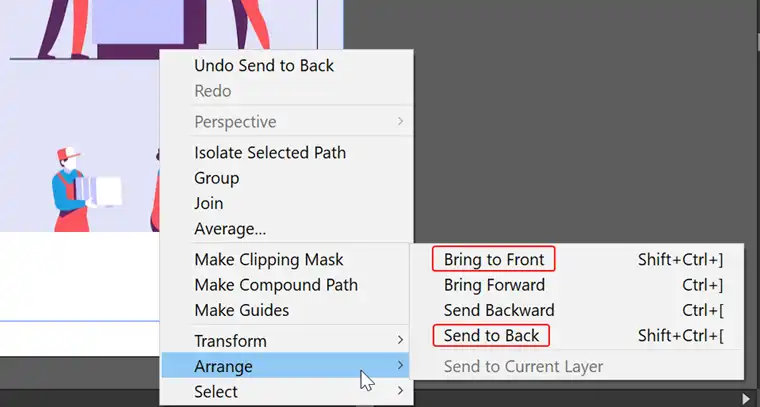
Once you’ve verified that the clipping mask shape is on top, give it another try. If the error persists, don’t worry – I’ve got another troubleshooting method up our sleeve.
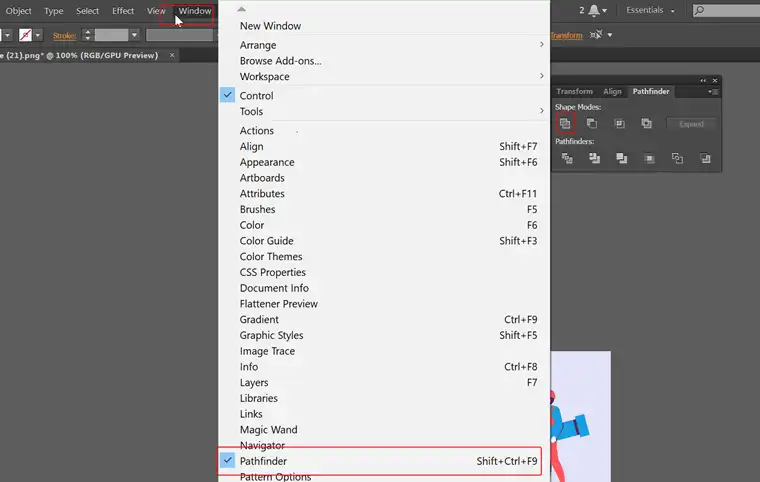
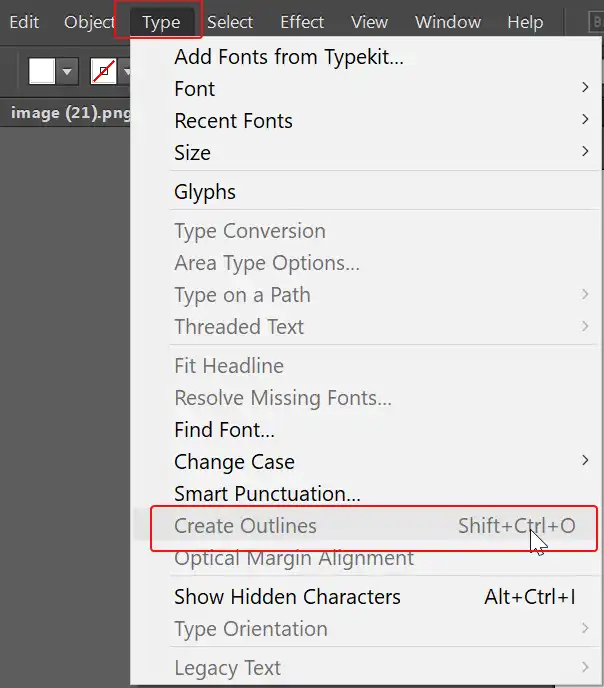
Solution 2 – Verify Path Type
Sometimes, even if you have a shape selected, it might not be a single, closed path that the clipping mask needs. This can happen when you are creating the shapes with the pen tool or without using the shape tools. In this case, you will need to check out the path of the shape. Here’s how to double-check:
Remember, if you’re still having trouble, don’t hesitate to consult the documentation or support resources for your specific design software. They may have additional tips or troubleshooting steps specific to their application.
End Notes
By following these simple troubleshooting steps, you should be able to conquer the “Top Selected Object Must Be a Path” error and create awe-inspiring clipping masks in Adobe Illustrator. Remember, the key is to ensure you have a well-defined, closed path as your clipping mask. It’s like having the perfect cookie cutter for your design dough – the cleaner the path, the sharper and more precise your results will be.